


Confirming added memory capacity
After you've installed a new memory module, make sure the operating system's memory corresponds with the memory
upgrade.
To check your system's memory
1.
Turn on the computer.
2.
Click
Start
on the Windows
®
taskbar, point to
All Programs
, and then point to
Sony Notebook Setup
.
3.
Select
Sony Notebook Setup
from the submenu. The
Sony Notebook Setup
dialog box appears.
4.
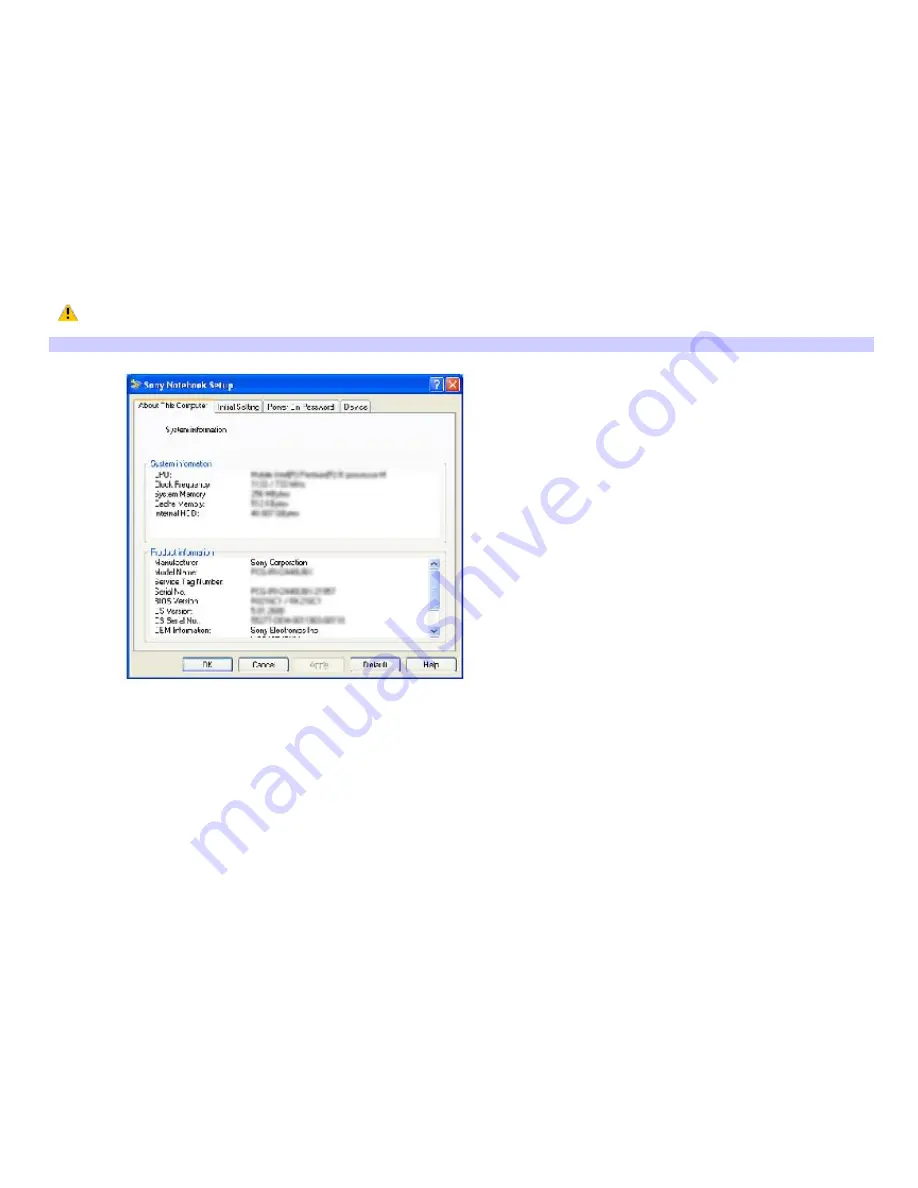
On the
About This Computer
tab, make sure the
System Memory
displayed in the
System Information
box
matches the amount of memory installed.
The displayed memory may be less than the installed memory due to the amount used by the display adapter.
Sony Notebook Setup Dialog Box
Page 146
Summary of Contents for PCG-R505DC VAIO
Page 44: ...4 Lift the disc from the drive 5 Push the drive tray gently to close it Page 44 ...
Page 52: ...Printer Connections Printing With Your Computer Page 52 ...
Page 84: ...Connecting Mice and Keyboards Using External Mice and Keyboards Page 84 ...
Page 89: ...Floppy Disk Drives and PC Cards Using Floppy Disk Drives Using PC Cards Page 89 ...
Page 97: ...Docking Stations Connecting the Docking Station Page 97 ...
Page 100: ...2 Optical drive 5 Right lever 3 UNDOCK switch Page 100 ...
Page 140: ...Memory Upgrades Upgrading Your Computer s Memory Page 140 ...
Page 147: ...Using the Recovery CDs Application and System Recovery CDs Using Your Recovery CDs Page 147 ...


