11
Getting started Preparativos
EJECT
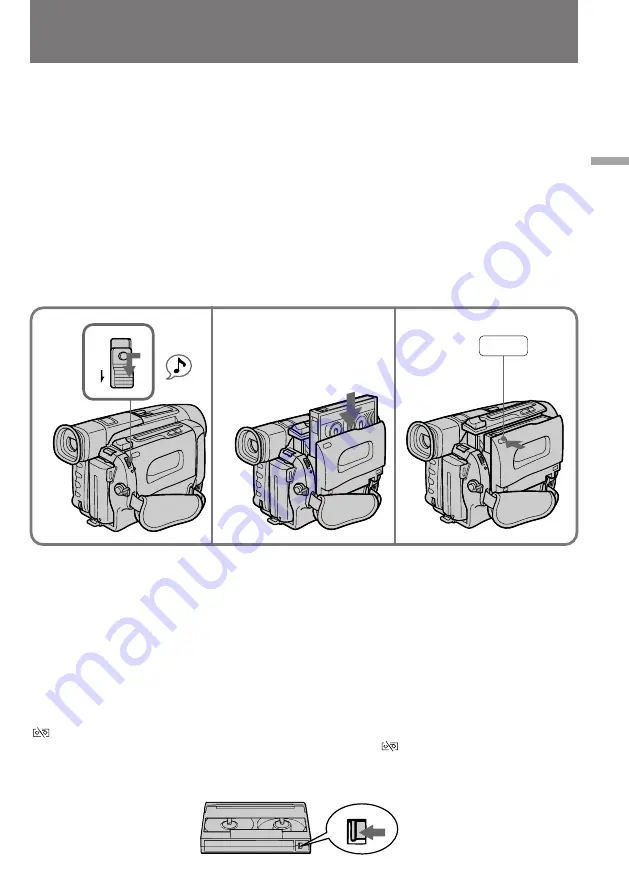
Inserting a cassette
Make sure that the power source is installed.
When you want to record in the Hi8 system, use
Hi8 video cassette
H
.
(
1
)
While pressing the small blue button on the
EJECT switch, slide it in the direction of the
arrow. The cassette compartment
automatically lifts up and opens.
(
2
)
Insert a cassette with the window facing out.
(
3
)
Close the cassette compartment by pressing
the “PUSH” mark on the cassette
compartment. The cassette compartment
automatically goes down.
1
2
3
To eject the cassette
While pressing the small blue button on the
EJECT switch, slide it in the direction of the
arrow.
To prevent accidental erasure
Slide the tab on the cassette to expose the red
mark. If you insert the cassette with the red
mark exposed and close the cassette
compartment, the beeps sound for a while. If
you try to record with the red mark exposed, the
and
6
indicators flash, and you cannot
record.
To re-record on this tape, slide the tab back out
covering the red mark.
PUSH
Inserción de un
videocassette
Asegúrese de que haya una fuente de
alimentación conectada a la videocámara. Para
grabar en el sistema Hi8, utilice un videocassette
H
.
(
1
)
Manteniendo presionado el pequeño botón
azul del mando EJECT, deslícelo en el sentido
de la flecha. El compartimiento del
videocassette se elevará y abrirá
automáticamente.
(
2
)
Inserte un videocassette con la ventanilla
hacia afuera.
(
3
)
Cierre el compartimiento del videocassette
presionando la marca “PUSH” del mismo. El
compartimiento del videocassette descenderá
automáticamente.
Para expulsar el videocassette
Manteniendo presionado el pequeño botón azul
del mando EJECT, deslícelo en el sentido de la
flecha.
Para prevenir el borrado accidental
Delice la lengüeta del videocassette de forma que
la marca roja quede al descubierto. Si inserta un
videocassette con la marca roja al descubierto y
cierra el compartimiento, sonará un pitido
durante cierto tiempo. Si intenta grabar con la
marca roja al descubierto, parpadearán los
indicadores
y
6
, y no podrá grabar.
Para volver a grabar en esta cinta, deslice la
lengüeta para cubrir la marca roja.
Summary of Contents for HANDYCAM VISION CCD-TRV94
Page 128: ...Sony Corporation Printed in Japan ...


