


59
Editing
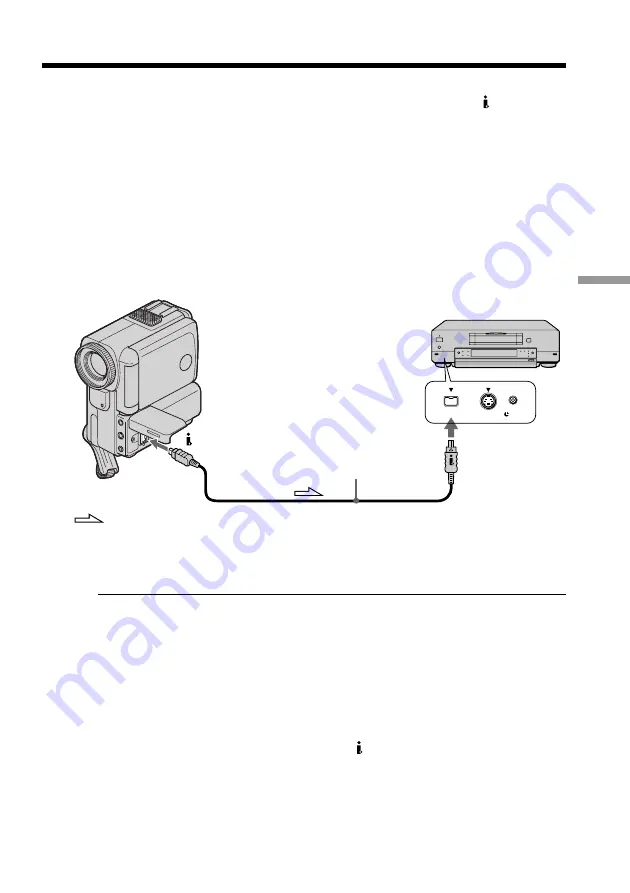
Dubbing a tape
Using the i.LINK cable (DV connecting cable)
Simply connect the i.LINK cable (DV connecting cable) (not supplied) to DV IN/OUT
and to DV IN/OUT of the DV products. With digital-to-digital connection, video and
audio signals are transmitted in digital form for high-quality editing. You cannot dub
the titles, display indicators or the contents of cassette memory.
(
1
)
Insert a blank tape (or a tape you want to record over) into the VCR, and insert
the recorded tape into your camcorder.
(
2
)
Prepare the VCR for recording.
Set the input selector to LINE. Refer to the operating instructions of the VCR.
(
3
)
Set the POWER switch to VCR.
(
4
)
Play back the recorded tape on your camcorder.
(
5
)
Start recording on the VCR.
S VIDEO
LANC
DV
DV IN/OUT
: Signal flow
(not supplied)
DV IN/OUT
When you have finished dubbing a tape
Press
x
on both your camcorder and the VCR.
You can connect one VCR only using the i.LINK cable (DV connecting cable).
The following functions do not work during digital editing:
– Digital effect
– PB zoom
– Picture effect
You can also use your camcorder as a recorder
You can use your camcorder as a player or recorder without changing the connection.
If you record playback pause picture with the DV IN/OUT jack
The recorded picture becomes rough. And when you play back the picture using the
other video equipment, the picture may jitter.
Summary of Contents for Handycam DCR-PC5
Page 155: ......
Page 156: ...Sony Corporation Printed in Japan ...