Preparing to use the unit
17
DTP-T2000A 4-121-350-
11(1)
Connecting to a network with a DHCP
server
1
Turn on the development PC.
2
Configure the development PC.
Run the DHCP client software and configure
it so that the development PC can obtain the
IP address and other settings from the DHCP
server. Refer to the instructions supplied with
the development PC for details on how to
configure the PC to run the software and
obtain an IP address. Next, configure the
development PC to run a Web browser.
3
Configure the DHCP server.
When the IP address is automatically
obtained by the DHCP server, the specific IP
address allotted to a device is generally
different each time the device is connected to
the network. However, the use of the unit can
be made more convenient by setting the same
IP address to be allotted each time the device
is connected. Contact your network
administrator for details on how to set a static
IP address.
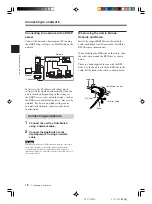
Turning on the unit
After configuring the TCP/IP settings of the
development PC, turn on the unit.
1
Connect the AC power cord to the AC
adaptor, then connect the AC adaptor
to the unit.
2
Insert the AC power cord into an
electrical outlet.
The power indicator turns orange, and the
unit enters standby mode.
3
Press the on/standby button.
This turns on the unit and starts system
initialization. During initialization, the power
indicator flashes green. This indicator stops
flashing when initialization is complete.
Caution
• When turning on the unit, be sure to use the supplied AC
adaptor.
• Do not operate the unit during initialization.
Setting up
Information necessary for
setup
The following information is required for the
setup of the unit.
• DHCP server availability
• IP address
• Subnet mask
• IP address of the default gateway
Check with your network administrator about the
structure of the network to which this unit will be
connected.
Preparing for setup
Before setting up the unit, you need to configure
your development PC.
Connecting to a network without a
DHCP server
1
Turn on the development PC.
2
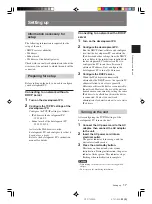
Configure the TCP/IP settings of the
development PC.
Configure the TCP/IP settings as follows:
• IP address of the development PC
192.168.0.2
• Subnet mask of the development PC
255.255.255.0
Activate the Web browser on the
development PC, and configure it so that it
does not use a proxy.
Refer to the development PC’s instruction
manual for details.
Setting up

