1-34
DSC-P71/P71M
72
Choosing images to
print
– Print mark
Mode dial setting:
You can designate certain images to be
printed.
This is convenient when you want to have
images printed in shops that follow DPOF
(Digital Print Order Format) specifications.
•
Print marks cannot be attached to movies
(MPEG MOVIE) or images recorded using
Clip Motion.
•
In E-MAIL mode, the Print mark will be
attached to the normal size image that was
recorded at the same time.
•
You can attach a print mark to images shot
using Multi Burst mode; all the images will be
printed on one sheet divided into 16 panels.
Single images
a
Turn the mode dial to
.
b
Display the image you want to
print using
b
/
B
.
c
Press the MENU button.
The menu appears.
d
Select “PRINT” using
b
/
B
,
then press the center
z
.
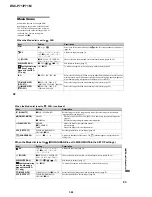
A
(Print) mark will be attached to
this image.
To delete a Print mark
In Step
4
, press the center
z
again. The
(Print) mark disappears.
Index (9 images) screen
a
Turn the mode dial to
and
press the W zoom button once
to switch to the Index (9
images) screen.
b
Press the MENU button.
The menu appears.
c
Select “PRINT” using
b
/
B
,
then press the center
z
.
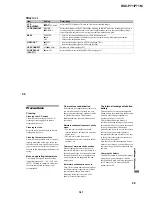
The frame around the image selected
turns green.
•
You cannot select “ALL”.
d
Select “SELECT” using
b
/
B
,
then press the center
z
.
The frame of the selected picture
changes to green.
•
You cannot select “ALL”.
e
Select the images you want to
print using the control button,
then press the center
z
.
A
(Print) mark is attached to the
image.
5
/
5
2048
SLIDE
OK
DELETE PROTECT
TO NEXT
MENU
•
SET
73
St
ill im
a
g
e
e
d
ittin
g
f
To print other images, repeat
Step
5
for each of them.
g
Press the MENU button.
The menu appears
h
Select “OK” using
B
, then
press the center
z
.
The setting of the
(Print) mark is
completed.
To delete a
(Print) mark
To delete a
(Print) mark, select an
image using the control button, and press
the center
z
.
To delete the Print marks
attached to all of your images
In Step
4
, select “ALL”, then press the
center
z
. Next, select “OFF”, and press the
center
z
.
To cancel the Print mark
operation
In Step
4
, select “CANCEL”, or select
“EXIT” in Step
8
, then press the center
z
.
Index (3 images) screen
a
Turn the mode dial to
, press
the W zoom button twice, and
the Index (3 images) screen
appears.
b
Display the image you want to
print in the center using
b
/
B
.
c
Press the MENU button.
The menu appears.
d
Select “PRINT” using
v
/
V
,
then press the center
z
.
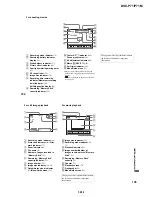
The image in the center will have a
(Print) mark attached to it.
e
To print other images, move
the image you want to print to
the center using
b
/
B
, and
repeat Step
4
.
To delete a Print mark
In Step
4
, press the center
z
again.
The
(Print) mark will disappear.
•
OK
10:30
PM
2002 7 4
100-0005
PROTECT
DELETE


