Contr
o
l f
o
r HDMI/
Extern
al A
u
dio
D
e
vic
e
71
GB
5
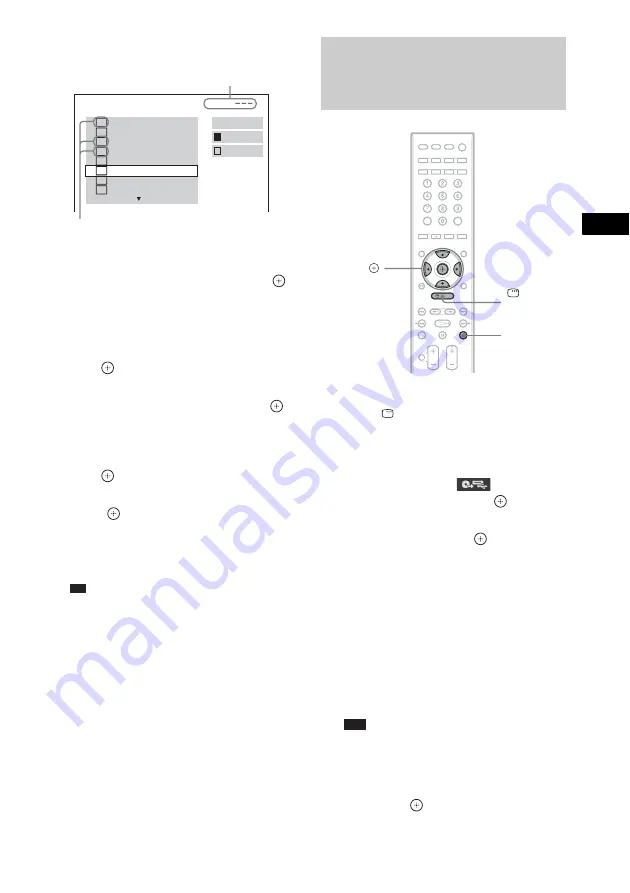
Select a track that you want to transfer.
x
To select the desired track
Press
X
/
x
to select the track, then press
.
The tracks are marked in the order that you
select.
x
To select all tracks on the audio CD
Press
C
/
X
/
x
/
c
to select [
x
ALL], then
press .
x
To cancel the track
Press
X
/
x
to select the track, then press
.
The mark on the track is removed.
x
To cancel all the track
Press
C
/
X
/
x
/
c
to select [
s
ALL], then
press .
6
Press
C
/
X
/
x
/
c
to select [START], then
press .
The system starts transferring and the
transfer status appears.
To cancel transferring, press
x
.
Tip
• The system automatically creates a new folder
to transfer tracks.
1
Load a DATA CD/DATA DVD.
2
Press
DISPLAY while the system is
in stop mode.
The Control Menu display appears on the
TV screen.
3
Press
X
/
x
to select
[USB
RECORDING], then press
.
4
Press
X
/
x
to select [TRACK] or
[FOLDER], then press
.
• [TRACK]: The folders recorded on the
DATA CD/DATA DVD appear. You can
transfer the desired MP3 file.
• [FOLDER]: The folders recorded on the
DATA CD/DATA DVD appear. You can
transfer all MP3 files in the folder. Go to
Step 6.
“Reading” appears in the front panel
display until the tracks/folders appear on
the TV screen.
Note
• It takes several minutes to display the tracks/
folders depending on the number of tracks/
folders.
5
Press
X
/
x
to select the desired folder,
then press
.
The MP3 files in the selected folder appear.
USB RECORDING
Free:
TRACK
01
1
START
ALL
TRACK
02
TRACK
03
2
TRACK
04
3
TRACK
05
TRACK
06
TRACK
07
TRACK
08
ALL
Available space of
the USB device
Tracks to be transferred.
Transferring MP3 files on a
DATA CD/DATA DVD into a USB
device
C
/
X
/
x
/
c
,
DISPLAY
x
Summary of Contents for 3-398-069-14(1)
Page 115: ......


