1 – Fusion R400 RAID USB 3.0 Features
1
➊ ➋
➍
➌
➎
➏
➐
➑ ➒
➓
➎
➎
➎
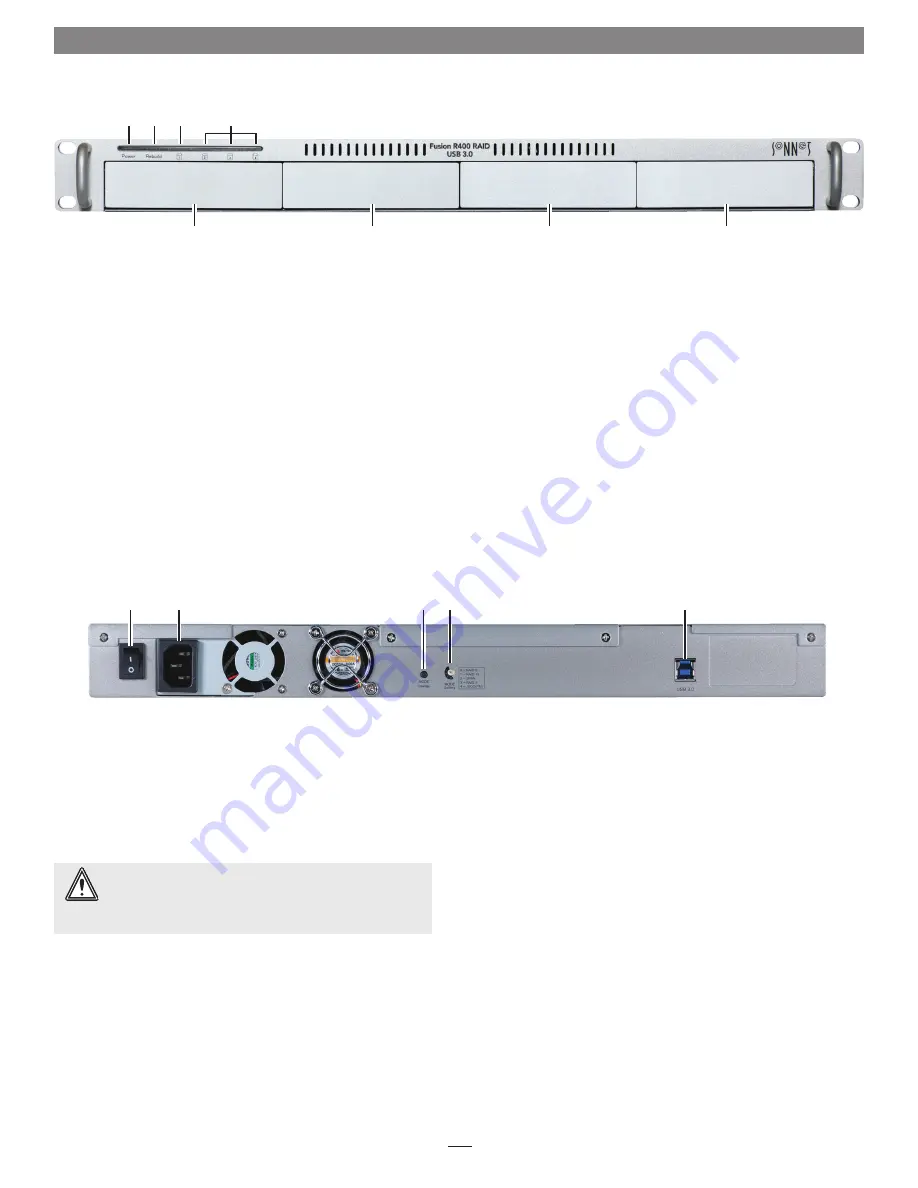
1 – Power Indicator LED
This blue LED lights when the Fusion R400 RAID USB 3.0 is
powered.
2 – Rebuild Indicator LED
This orange LED lights when the Fusion R400 RAID USB 3.0
is rebuilding the data on a RAID 5 or 10 RAID set.
3 – Mode Change Confirmation; Drive 1 Presence, Activity,
and Fault Indicator LED
This LED lights red when the Drive Mode Change Switch
is pressed. It also indicates Drive 1’s ready state (solid green),
read and write activity (flashes green), and fault status (OFF).
Note that the LED will remain off if the drive in drive bay 1
is not recognized.
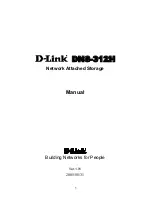
6 – Power Switch
7 – Power Cord Socket
8 – Drive Mode Change Switch
Press and hold this switch for three or more seconds to
activate the selected drive mode.
4 – Presence, Activity, and Fault Indicator LEDs for
Drives 2 – 4
These LEDs indicate the ready state (solid green), read and
write activity (flashes green), and fault status (OFF) for drives
2 – 4. Note that an LED will remain off if the corresponding
drive is not recognized (or if no drive is installed).
5 – Drive Tray
To remove a drive tray, press its handle in until it pops out,
then pull out the entire tray. To insert a drive tray, insert it
into the drive bay until it stops, and then push its handle in
until it latches closed.
9 – Drive Mode Setting Switch
Select the drive mode setting using this switch.
10 – USB 3.0 Interface Port
This port is compatible with the included Sonnet USB 3.0
cable and other USB 3.0 cables. It is also compatible with
USB 2.0 cables. However; when a USB 2.0 cable is used, the
R400 RAID USB 3.0’s performance will be reduced by as much as
85 percent.
WARNING:
Once you press and hold the Mode Change
Switch for more than three seconds while the R400 RAID
USB 3.0 is powered, any files stored on the system are lost and
cannot be recovered!
Summary of Contents for Fusion R400
Page 2: ......


