


Chronis Smart RTS
14
Copyright © 2008 Somfy SAS. All rights reserved.
8. Mounting the Chronis Smart RTS
8.1 Before mounting the Chronis Smart
RTS
Before mounting the Chronis Smart RTS, select a loca-
tion for mounting and check that the Chronis Smart RTS
is able to control all products to which it is linked from
this location.
The minimum distance which must be kept between
RTS enabled products is 30 cm (e.g. 30 cm between any
RTS control points and/or between any control point and
any motor).
Caution! Do not mount the Chronis Smart RTS on a
metal surface.
Select a central location indoors in relation to the posi-
-
tion of the linked products.
Place the Chronis Smart RTS against the wall at the
-
selected location.
Press the down button (C) to check that the Chronis
-
Smart RTS controls all products:
If all the products are lowered, the Chronis Smart
►
RTS may be mounted in this location.
If one or more products do not move, move the
►
Chronis Smart RTS and check the operation. If
it still does not work, refer to “Problems with the
Chronis Smart RTS?”.
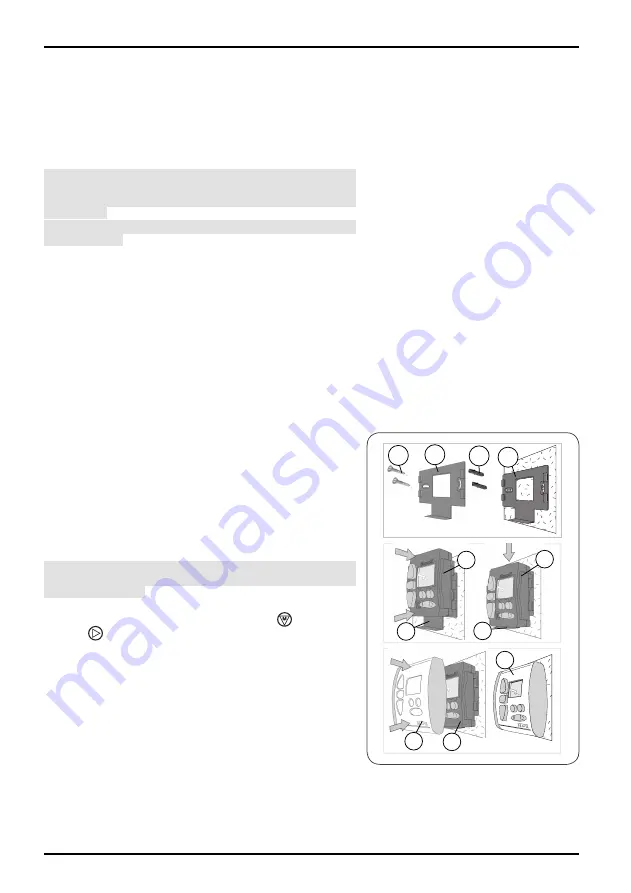
8.2 Mounting and
fi
tting
-
Mount the wall bracket (3):
Place the bracket against the wall with the retaining
-
bracket at the bottom.
Mark the two holes with a pencil.
-
The two holes must be 50 mm apart and horizon-
►
tally aligned.
Drill the two holes.
-
Insert the two plugs (6).
-
Mount the wall bracket (3) using the two screws (5).
-
Caution! If the screws provided are lost, do not use
roundhead screws. Only use
fl
athead screws with a
diameter of 6 mm.
Place the timer (2) on the wall bracket (3), with
-
the screen located above the Menu
and Sub-
menu
buttons:
Slide the timer downwards, into the guide rails until
-
it reaches the retaining plate.
Remove the protective
fi
lm from the screen.
-
Fit the
-
front cover (1):
Insert the front cover on the timer, allowing the
-
buttons to come through their housings.
Press the front cover until it clicks, indicating that the
-
front cover is correctly
fi
tted to the timer.
3
2
2
3
1
1
2
5
3
6
3


