


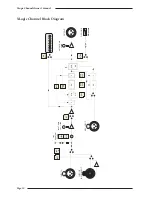


Dynamics Adjustments
If the dynamics circuitry requires adjustment the following procedure should be followed in the order shown, in
its entirety. All presets are on the 629602 card.
Equipment Required:
Calibrated audio oscillator, audio distortion analyser, audio level meter,
oscilloscope and a (digital) DC volt meter
Test Signal:
1kHz sinewave unless specified otherwise, level as specified
Input and Output:
Oscillator to Input A (or B), Output to either the distortion analyser or the level
meter, as specified below. Use the oscilloscope to monitor the measured signal.
Unit Setup:
Switch the dynamics IN and the EQ and Filter sections OUT, set all of the
dynamics controls anti-clockwise and release all switches
Distortion
Adjustment:
1. Connect the distortion analyser to the Output and set the oscillator level for
+20dBu.
2. Adjust VR24 for minimum distortion (< 0.02%).
Control Voltage Feedthrough
Adjustment:
1. Set the oscillator for 60Hz at –12.5dBu and connect the level meter to the Output.
2. Connect oscive to test point TP3 and oscillator –ve to test point TP6 (0VA)
using clip probes and a suitable lead.
3. Adjust the offset trim VR23 to null the control voltage feedthrough seen at the
output, typically less than –65dBu.
Sidechain Offset
Adjustment:
1. Connect the level meter to the Output and set the oscillator level for –28dBu.
2. Turn preset VR28 fully anti-clockwise.
3. Measure the DC voltage at test point TP4 relative to 0VA (use TP6) and adjust
VR25 for 0V ±10mV.
Compressor Threshold
Adjustment:
1. Set the oscillator level for +14dBu.
2. Connect the level meter to the Output. Check for +20dBu ±0.5dB.
3. Set the compressor ratio control fully clockwise and release the compressor
FST ATT and PK switches.
4. Adjust VR28 for a gain reduction of 4dB.
5. Press the FST ATT switch in and check for a gain reduction of 8.5dB ±0.25dB.
6. Reset the compressor ratio control fully anti-clockwise.
Gate Threshold
Adjustment:
1. Set the oscillator level for +4dBu and connect the level meter to the Output.
2. Set the gate/expander to ‘gate’ by releasing the EXP switch, set the gate range
and gate threshold controls fully clockwise.
3. Adjust VR27 so that the gate just switches on.
4. Check this adjustment by changing the oscillator level a little. Re-adjust VR27 if
necessary so that the gate just opens when a +10dBu signal @ 1kHz is applied.
Appendix
Page 23
Summary of Contents for XLogic Super Analogue
Page 1: ...Super Analogue Channel Owner s Manual ...
Page 2: ......
Page 29: ...Notes Appendix Page 25 ...


