BT-T080R User’s Manual
- 20 -
1
)
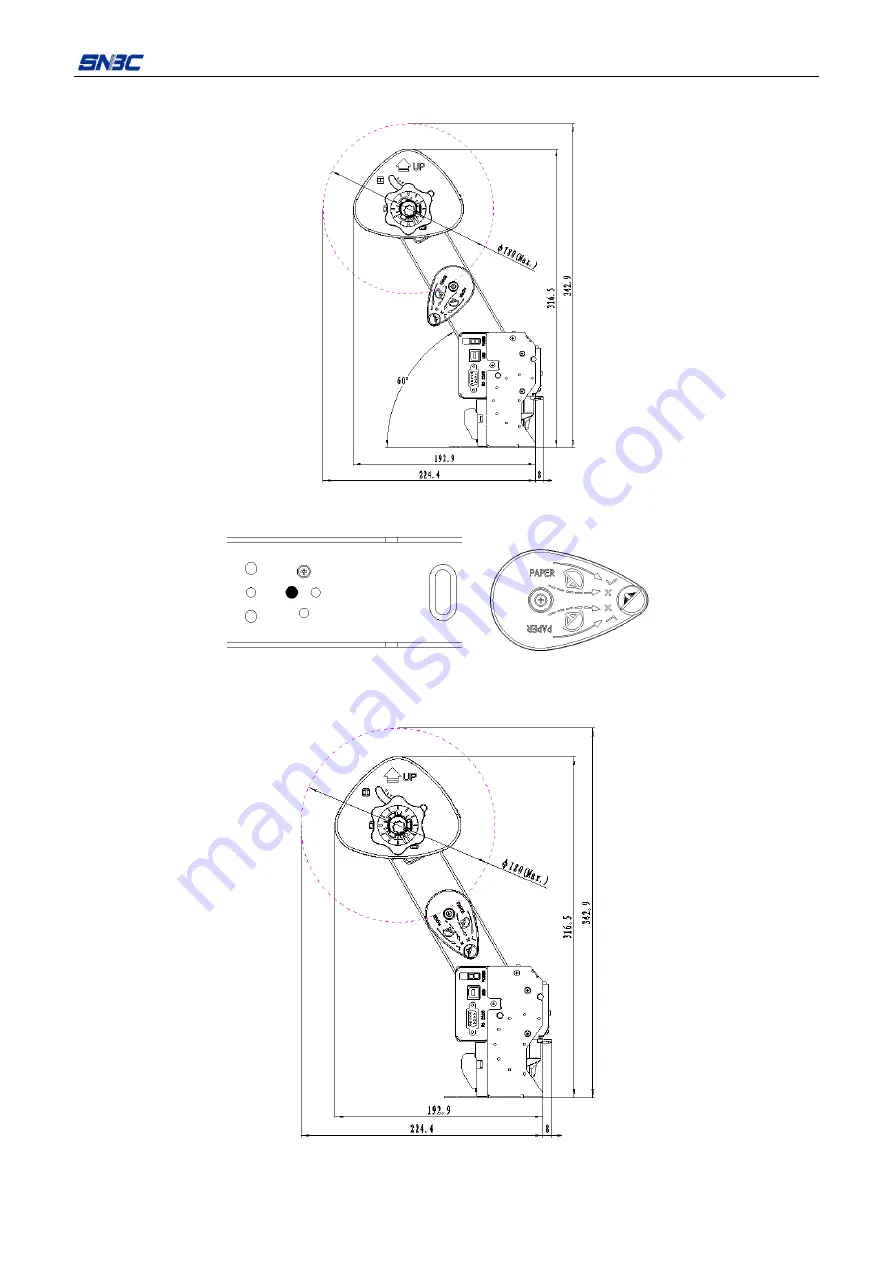
Paper roll with thermal layer outward
Figure 4.3.9 Module installation setting and size
Position 1 for installing buffer
Buffer shaft position 1
2
)
Paper roll with thermal layer inward
Figure 4.3.10 Module installation setting and size


