Wi-Fi Connection / Troubleshooting
Turning Wi-Fi On and Connecting to a Network
148
15.3 Turning Wi-Fi On and Connecting to a
Network
1.
From the Home screen, select
Tools > Settings > Configure Wi-Fi
.
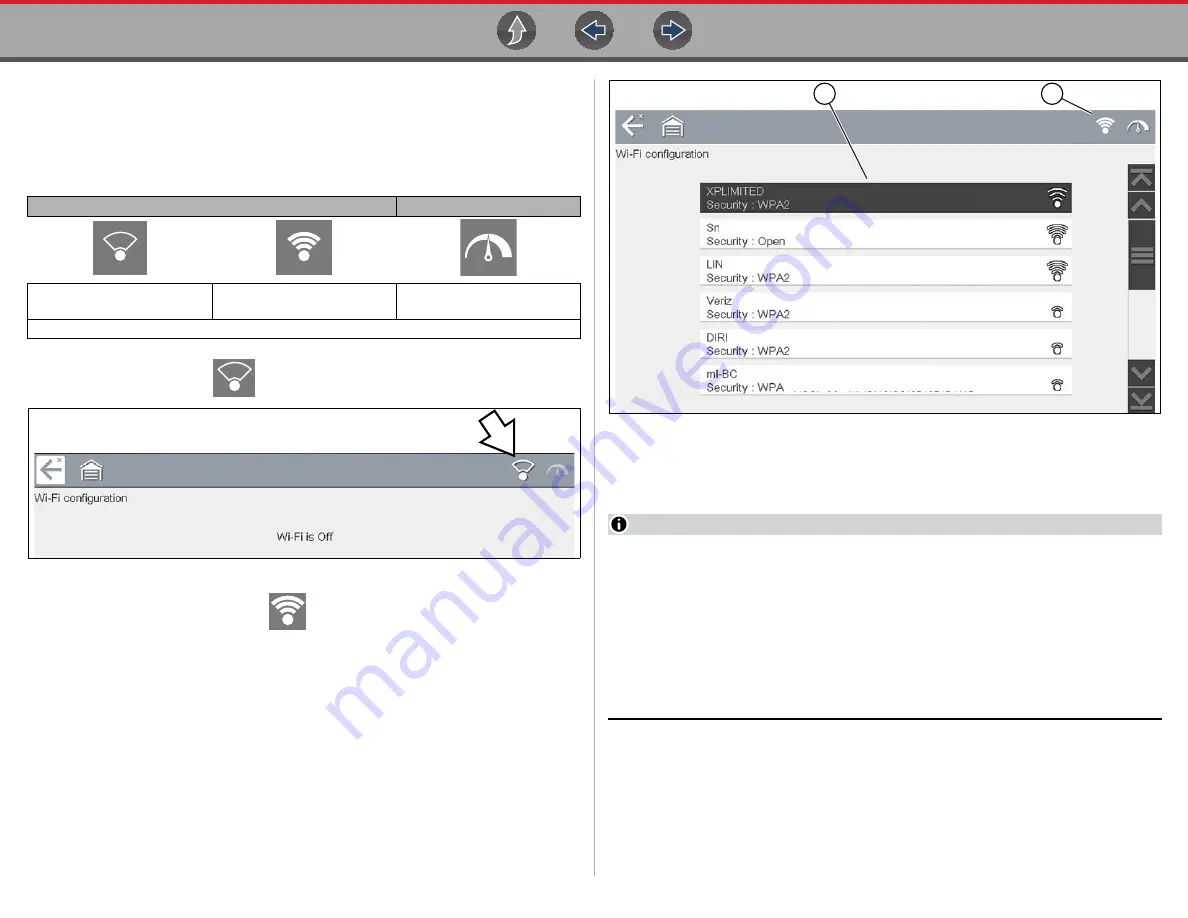
Familiarize yourself with the following Wi-Fi icons located in the toolbar.
2.
Select the
Wi-Fi
icon
to turn Wi-Fi on (
).
Figure 15-1
Wi-Fi Icon (shown off)
3.
The Wi-Fi icon will change to
, indicating Wi-Fi is on.
The screen will change to display available supported network connections.
4.
Select your network. Use the scroll feature to show all active connections
(
).
Figure 15-2
Wi-Fi Configuration Screen
1— Available Network Connections
2— Wi-Fi Icon
(Wi-Fi shown on)
NOTES
A password is required when choosing a secured (protected) network. Enter
the password using the on-screen keyboard and then select the check mark
on the keyboard to continue.
Networks with a proxy, challenge page, or that require the user to accept terms
of usage are not supported.
Wi-Fi performance varies depending on your wireless network equipment and
ISP.
5.
Select
Connect
to connect to your desired network or
Cancel
to cancel the
request.
6.
From the Connect confirmation screen select
OK
to continue using this
connection or
Forget
to disconnect this connection.
•
The screen will change to display your confirmed network connection and
Snap-on Cloud registration information. For Snap-on Cloud registration
Wi-Fi Icon (toggle type)
Wi-Fi Test Icon
Indicates Wi-Fi is OFF
(select to turn ON)
Indicates Wi-Fi is ON
(select to turn OFF)
Select to open
Wi-Fi Test screen
Displayed on Wi-Fi configuration screen only
1
2


