44
Trial Reduction - Confirm Sizing
Trial Reduction
After completing all of the bone cuts and
adjustments to the final surfaces, the incision
should be cleaned and dried thoroughly.
Once bone surface preparation is complete,
perform a trial reduction (Figure 68) with the
appropriate size trial femoral component and trial
tibial components as described in the
JOURNEY
™
II Total Knee Surgical Technique
. If the joint is too
tight, size the insert down to a thinner component
or resect more tibial bone.
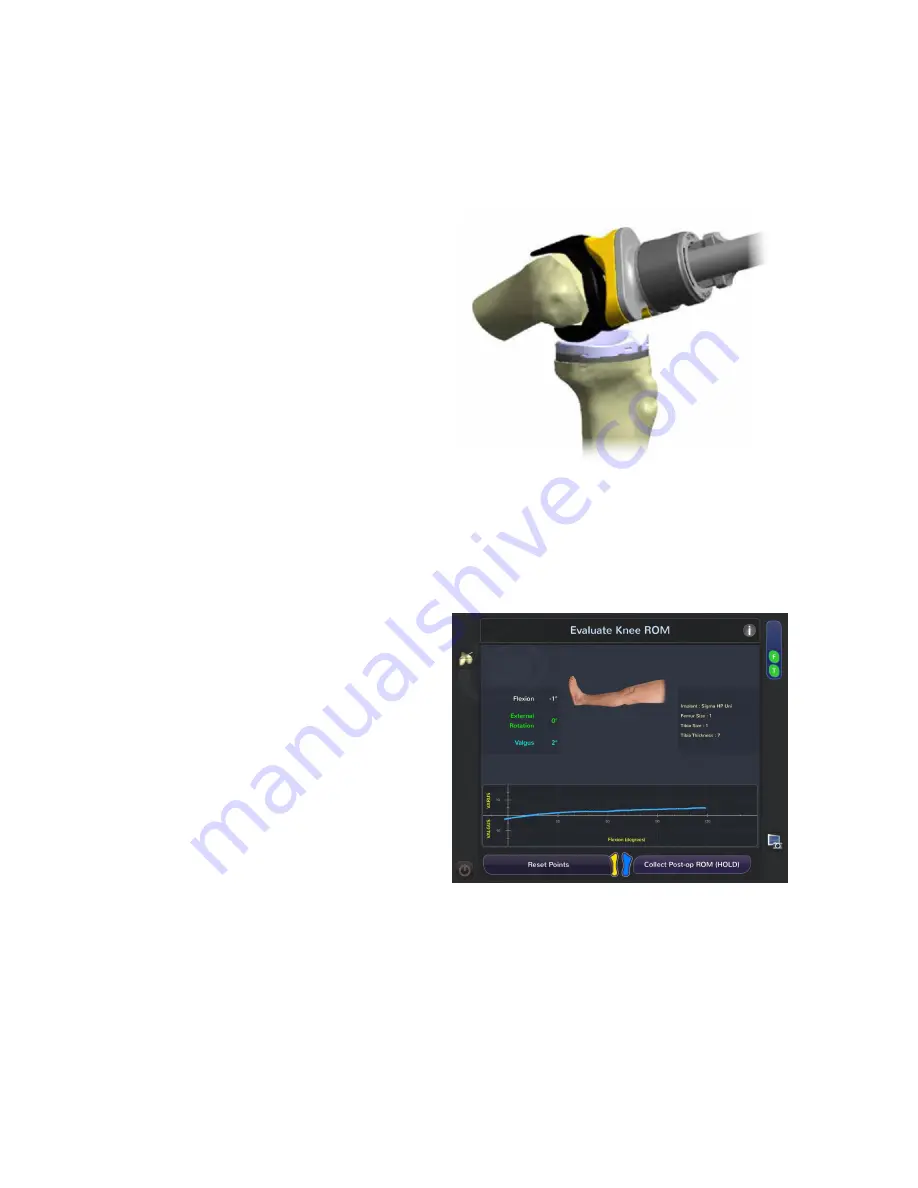
Click Finish on the cut screen to evaluate trial
implants throughout range of motion (ROM) (Figure
69). Holding down the collect button, or footpedal,
move the patient’s leg through range of motion to
collect and display the varus/valgus balance of the
knee. Confirm the final long-leg alignment in this
screen.
Dynamic Test
The Trial Tibial Component must remain perfectly
stable during ROM assessment (Figure 69).
Hold the leg in extension, ensuring that the
femur and tibia tracker arrays are visible to the
camera and confirm that the long-leg mechanical
alignment is as expected by reading out the Varus/
Valgus reading in blue on the left hand of the
“Evaluate Knee ROM” screen.
The femoral component should be stable on the
tibial tray component. The tibia should not lift off in
flexion.
Fixation Preparation
After the dynamic test through the range of
motion, finish preparation of the fixation features
for the implantation of the final components, as
recommended in the JOURNEY™ II Total Knee
Surgical technique, using appropriate JOURNEY II
instruments and tools.
Figure 68.
Insert femoral and tibia trial components using the JOURNEY II
impactor set and select the appropriate bearing component.
9
Trial Reduction
Figure 69.
Assess final range of motion, graphing Varus/Valgus
throughout, confirm long-leg mechanical alignment.


