C
HAPTER
14
| System Tools
Remote Management
– 118 –
By default, the radio button “All the PCs on the LAN are allowed to access
the Router's Web-Based Utility” is checked. If you want to allow PCs with
specific MAC Addresses to access the Setup page of the Router's Web-
Based Utility locally from inside the network, check the radio button “Only
the PCs listed can browse the built-in web pages to perform Administrator
tasks”, and then enter each MAC Address in a separate field. The format for
the MAC Address is XX-XX-XX-XX-XX-XX (X is any hexadecimal digit). Only
the PCs with MAC address listed can use the password to browse the built-
in web pages to perform Administrator tasks while all the others will be
blocked.
After click the Add button, your PC's MAC Address will be placed in the list
above.
Click the Save button to save your settings.
N
OTE
:
If your PC is blocked but you want to access the Router again, use a
pin to press and hold the Reset Button (hole) on the back panel for about 5
seconds to reset the Router’s factory defaults on the Router’s Web-Based
Utility.
R
EMOTE
M
ANAGEMENT
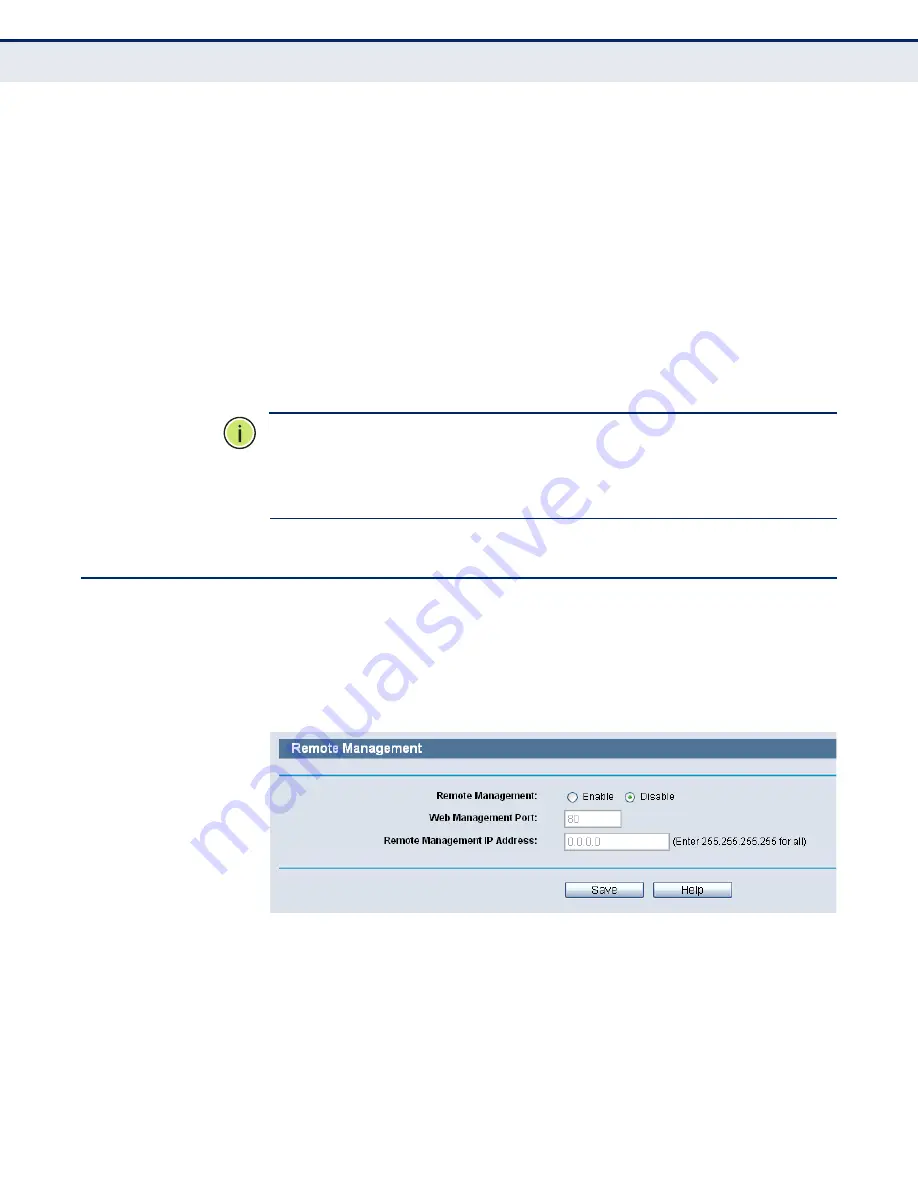
Choose menu “Security->Remote Management”, you can configure the
Remote Management function in the screen as shown in the following
figure. This feature allows you to manage your Router from a remote
location via the Internet.
Figure 106: Remote Management
◆
Web Management Port
- Web browser access normally uses the
standard HTTP service port 80. This Router's default remote
management web port number is 80. For greater security, you can
change the remote management web port to a custom port by entering
that number in the box provided. Choose a number between 1 and
65534 but do not use the number of any common service port.
Summary of Contents for BARRICADETM SMCWGBR14-N2
Page 1: ...USER GUIDE BARRICADETM N 802 11n Wireless 4 port Gigabit Broadband Router SMCWGBR14 N2...
Page 25: ...CHAPTER 2 Connecting the Router Connecting the Router 25 Figure 3 Hardware Installation...
Page 33: ...CHAPTER 3 Quick Installation Guide Quick Installation Guide 33 Figure 14 Quick Setup reboot...


