SMART LightRaise Installation and User's Guide
21
9
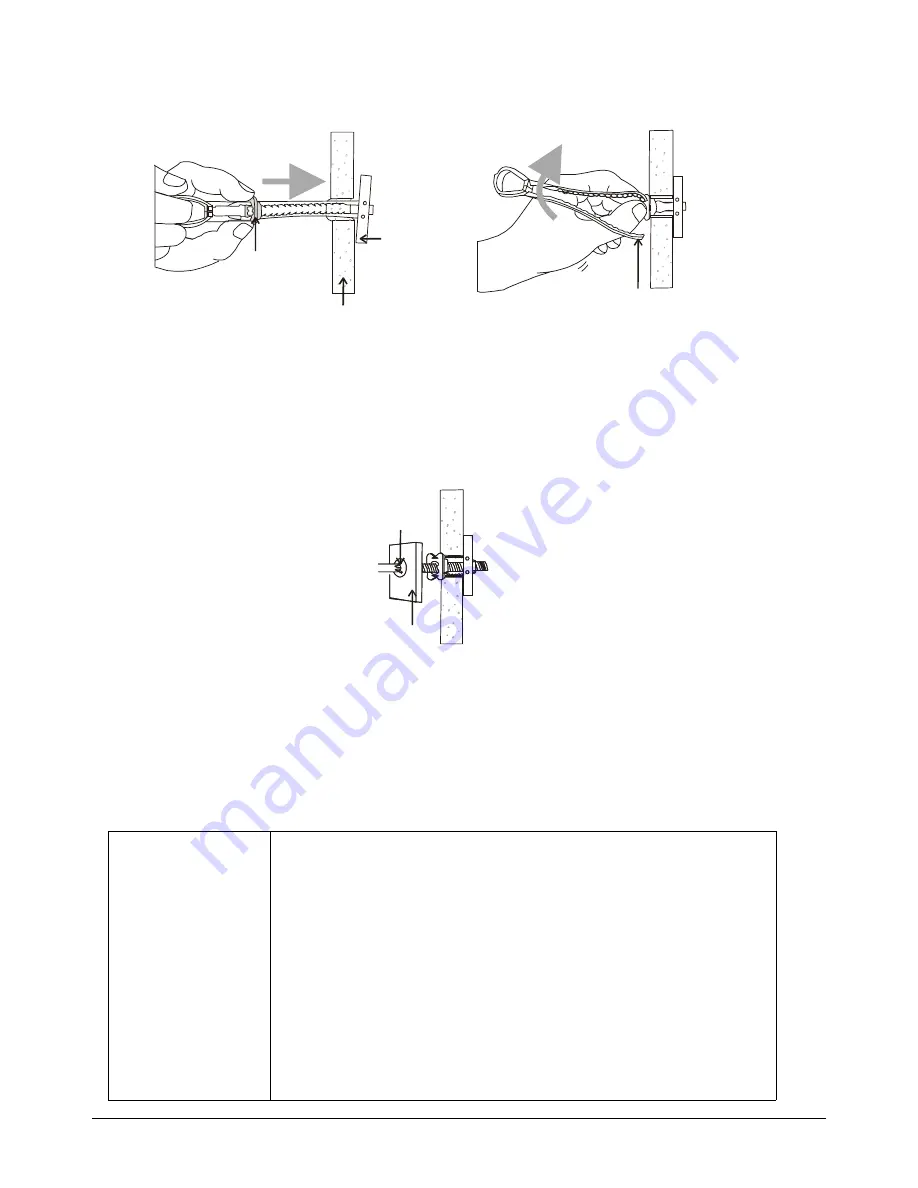
For each toggle bolt anchor, slide the plastic cap until it's flush with the drywall, and bend
the plastic handle to break it off.
Metal End
Wall
Plastic Cap
Plastic Handle
10
Hang the console bracket from the screws in the keyholes following the instructions in
step 3.
11
Line up the holes in the console bracket with each toggle bolt anchor. Insert by hand a
¼-20 UNC x 1½" Phillips pan head bolt into each toggle bolt anchor. Once the threads
begin to catch, you can use the Phillips hand screwdriver to tighten each bolt. Check
again that the console bracket is level.
Console Bracket
¼-20 UNC x 1½"
Phillips Bolts
12
Use the hand screwdriver to tighten the keyhole screws.
Marking the Wall and Mounting the Remaining Brackets
Use the console bracket previously installed as a starting point for your measurements. Mark
the wall for the keyhole locations. Mount the brackets on the wall.
NOTE:
For walls with studs, the hanger and spacer brackets don't have to be installed into studs.
Tools required:
Hardware required:
•
bubble
level
•
template tool (from previous procedure)
•
pencil
•
upper and lower boom brackets (from boom carton)
•
drill and an
appropriate bit
•
Phillips
#2
hand
screwdriver
•
Phillips
#2
electric
screwdriver (only
wood stud walls)
•
stud
finder
•
hanger and spacer brackets for SMART Board interactive whiteboard
(from boom carton)
•
fasteners for your type of wall:
•
concrete and cinder block walls: ¼ x 1¾" concrete screws
•
walls with wood studs: drywall anchors, #8 x 1¼" truss head screws,
#8 x 2½" Phillips round head wood screws and washers
•
walls with metal studs: drywall anchors, #8 x 1¼" truss head screws,
toggle bolt anchors and ¼-20 UNC x 1½" Phillips pan head bolts
NOTE:
Pushing
the bolt into the
anchor too hard
may cause the
plastic to break
and the metal
end to fall
behind the wall.


