


46
SMART LightRaise Installation and User's Guide
6. Finalizing the Installation
This procedure involves the following steps:
•
make the final connections
•
adjust your computer by installing SMART Board software and setting the energy-saving
features
Making the Final Connections
Position your mouse, wireless keyboard and IR receiver, then connect the main power and
network cables.
NOTE:
The keyboard can be stored on top of or inside the console.
Hardware required:
•
wireless
keyboard
•
power cable (from power kit)
To make the final connections:
1
Place your wireless keyboard and infrared receiver in a prominent location, such as on the
console or a nearby table. The keyboard is included in the console carton.
2
Obtain the IEC-C14 power cable from the power kit. Plug one end into the male socket of
the power bar inside the console.
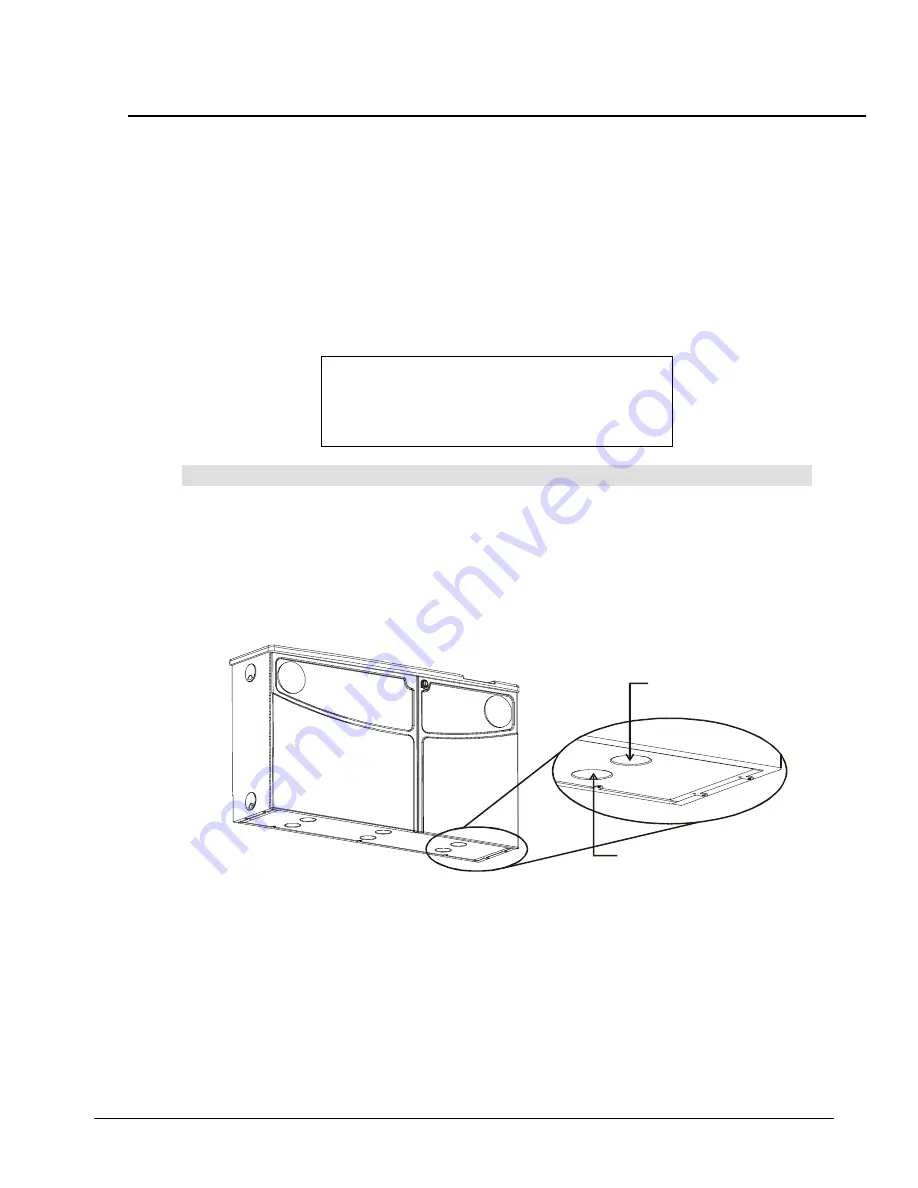
3
Feed the power cable through the rear ventilation opening on the underside of the
console, as shown below.
Front Ventilation Hole
(Don't use this for the
power cable)
Feed power cable ONLY
through this hole
IMPORTANT:
Don't use the front ventilation hole because the cable may get pinched
when the door closes.
4
Plug the other end of the power cable into the wall socket.
You'll see the System Off indicator glow red on the console's control panel and on the
SMART Board interactive whiteboard.
5
After choosing the cable grommet situated nearest your network wall socket, locate the
network cable, feed it through that grommet, and plug it into the wall connection.
6
Press the System On button on the control panel.
NOTE:
Unless
your network
wall socket is
right next to the
console, you'll
need to supply
a network patch
cable.


