


22
SMART LightRaise Installation and User's Guide
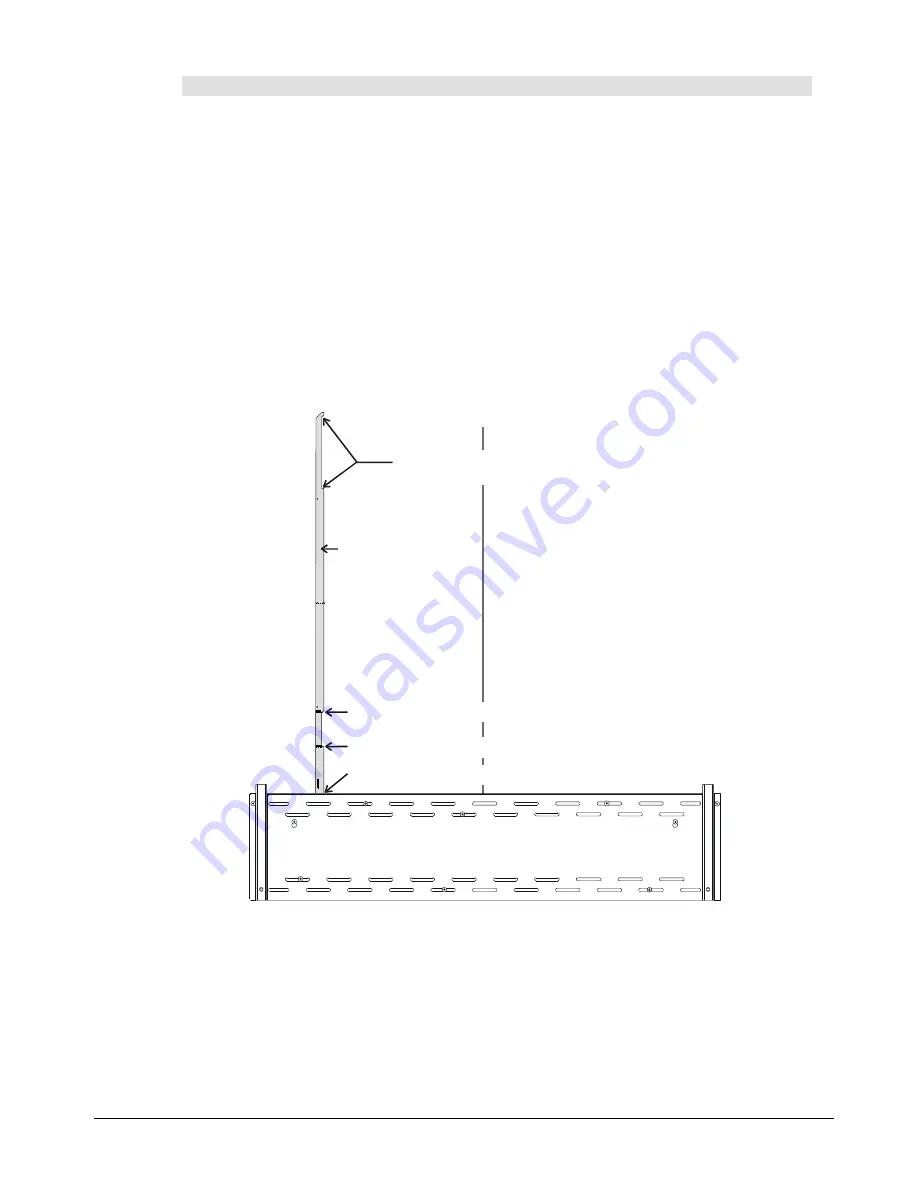
To mark the wall for the boom brackets:
1
On one side of the console bracket, place the flat (bottom) end of the template tool against
the top edge of the console bracket, ensuring the template tool is flush against the wall.
Use the level to make sure the template tool is vertical.
NOTE:
If you are not mounting the boom above the console, measure 26½"
(67.3 cm)
from the floor and make a mark. This mark is the same height as the top of the console
bracket. Then, from this mark, draw a level line and use the template tool to complete your
wall markings.
2
Use the pencil to mark horizontal lines at the upper and lower edges of the top notch, as
indicated in the illustration below.
3
Use one side of the bottom notch to mark the wall for the spacer bracket. For the SMART
Board 560 interactive whiteboard, use the upper edge of the notch. For the larger SMART
Board 580 interactive whiteboard, use the lower edge of the notch. When you're finished,
you'll have three marks on the wall on one side of the centerline.
Console Bracket
Template Tool
Centerline
Mark upper and lower edge of top notch
for both SMART Board 560 and 580
For SMART Board 560, use the upper edge of the bottom notch
For SMART Board 580, use the lower edge of the bottom notch
Template tool rests against the leveled console bracket
NOTE:
If your setup
doesn't include a
SMART Board
interactive white-
board, you don't
need to follow the
instructions for the
hanger and spacer
brackets.


