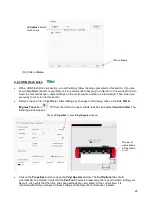
9
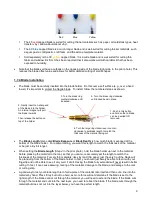
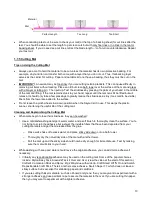
The 45
°
red
capped blade is suited for cutting thinner materials such as paper, all cardstock types, heat
transfer vinyl, and wall/auto/decal vinyl.
The 60
°
blue
capped blade is a much longer blade and is well-suited for cutting thicker materials, such
as gum paste, craft plastic, craft foam, and rhinestone template material.
Sold separately is the 30
°
yellow
capped blade. It is a wide blade and is well suited for cutting thin
fabric and window tint film. It has been reported that it also works well with cardstock that has been
exposed to humidity.
•
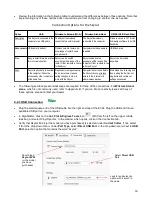
Note that the blades all have a cutback on the opposing side of the blade (right side, in the prior photo). This
reduces the blade offset value and allows for better detailed cutting of small shapes.
1.7.4 Blade Installation
•
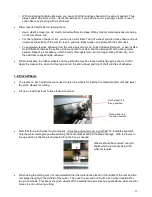
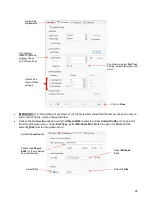
The blade must be carefully inserted into the blade holder. Do this over a soft surface (e.g., over a hand
towel)
. It’s important to protect the fragile blade. To install, follow the numbered steps as shown:
•
The
Blade Length
(also called
Blade Exposure
or
Blade Depth
) is how much blade is exposed at the
bottom of the blade holder. For optimal cutting, you want this length to match the thickness of the material
or be just a tiny bit longer.
•
When setting the
Blade Length
(
Step 4
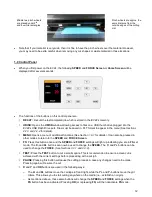
in the prior photo), hold the blade holder up next to the material
before pressing the material to the mat, so that you can more accurately set the length to match the
thickness of the material. For very thin materials, like vinyl and thin paper, just the very tip of the blade will
be protruding from the bottom of the blade holder. In fact, you should just barely be able to feel it with your
fingertip and not be able to see it very well, if at all. Having the blade fully extended will never result in better
cutting. In fact, it can cause skewing, tearing of the material, damage to the blade, and damage to the mat
or cutting strip.
•
A good way to test your blade length is to fold a piece of the material onto itself and then cut a line into the
material by hand. Press firmly but not too hard, as more force will not determine if the blade is set to the
right length. If the blade cannot cut through the material, you will need to extend the blade. If the blade cuts
through the material and cuts into the next layer, you need to retract the blade. If the blade cuts through the
material but does not cut into the layer below, you have the perfect length.
Red Blue
Yellow
3. Turn the brass ring
counterclockwise until
loosened.
4. Turn the large ring clockwise or counter-
clockwise to set blade length to match the
thickness of the material being cut.
5. Turn the brass ring clockwise
until locked back in place.
1. Push in this button
and hold so that a blade
can be inserted OR
removed.
2. Gently insert non-sharp end
of the blade into the holder.
An internal magnet will pull
the blade inwards.
Then release the button on
top of the holder


