background image

22

Parts list

Hardware Pack

Please note that deviations are possible.

Base Plate

Column

Hardware Pack

Straps

Front Cover

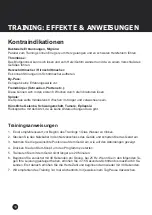
Plate Platform

Manual and Plug 

and Cable

Seals

M10 Nuts

16mm Wrench

6mm Inbus Wrench

SCOPE OF DELIVERY

Summary of Contents for STUDIO VIBRATION PLATE PRO 2350

Page 1: ......

Page 2: ...sen Händen berühren Das laufende Gerät nicht umsetzen oder transportieren Wenn das Gerät nicht in Betrieb ist schalten Sie es ab und ziehen Sie den Stecker In Betrieb gehaltene Elektroartikel sind ständige Risiken für Kurzschlüsse und Feuer Stecken Sie keine Fremdkörper in die Öffnungen des Geräts Personen mit einem Gewicht von mehr als 180 kg dürfen dieses Produkt nicht benutzen Das Gerät darf ni...

Page 3: ...ced Training 15 Advanced Trainingsübungen 16 Sonstiges Sicherheitshinweise 19 Reinigung 19 Fehlerbehebung 19 Garantiebedingungen 38 INHALTSVERZEICHNIS Um dir beim Aufbau zu helfen haben wir ein Demovideo erstellt das du dir hier auf unserem YouTube Kanal anschauen kannst All unsere Videos findest du auf unserem YouTube Kanal https www youtube com skandika Europe https youtu be P91HX29r_kE SCHAU DI...

Page 4: ...Hardware Pack Achtung Abweichungen sind möglich Bodenplatte Säule Hardware Pack Bänder vordere Abdeckung Standfläche Anleitung und Stromkabel Dichtungen M10 Muttern 16mm Schlüssel 6mm Innensechskantschlüssel LIEFERUMFANG ...

Page 5: ...5 DE Haltegriff Hauptkonsole Säule Konsole Standfläche Bodenplatte AUSSTATTUNG ...

Page 6: ...e Platte benutzen Schritt 2 1 Säule über die Löcher für die Befestigungsschrauben positionieren und darauf achten die Oberfläche nicht zu beschädigen Säule mit den 4 Dichtungen und Muttern mit der Platte ver binden 2 Eine Person hält das Gerät schräg während die zweite Person die Schrauben mit dem Schlüs sel von unten festzieht MONTAGE ...

Page 7: ... die Verbindung überprüft Schritt 4 1 Eine Person hält das Gerät schräg während die zweite Person die Abdeckplatte positioniert und auf der Unterseite der Säule festschraubt Schritt 5 1 Legen Sie die Anti Rutschmatte unter die Platte Eine Person positioniert den Haltegriff wäh rend die zweite Person ihn festschraubt MONTAGE ...

Page 8: ...t 4 Koordination 5 Dehnung Massage Schritt 6 1 Haltebänder durchfädeln und die Länge einstellen Legen sie die Trittplatte auf die Stehfläche Verbinden Sie das Netzkabel schalten Sie das Gerät ein und testen Sie die Funktion Bedienung MONTAGE WIRKUNGSWEISE ...

Page 9: ... Amplitude und Beschleunigung Die Gesamt Zeit ist die Summe aller verbleibenden Übungs Zeiten eines Programms zzgl der automatischen Pausen zwischen den Übungen Jedes Programm hat sechs verschiedene Übungspositionen die jeweils unterschiedliche Einstellungen für Übungs Zeit Frequenz Amplitude und Beschleunigung haben Mit den u n d Tasten können Sie die gewünschte Übungsposition wählen Starten Sie ...

Page 10: ...prache mit dem Arzt da es keine Untersuchungen dazu gibt Trainingsanweisungen 1 Es ist empfehlenswert vor Beginn des Trainings 1 Glas Wasser zu trinken 2 Stecken Sie das Netzkabel in den Netzanschluss des Geräts und schalten Sie das Gerät ein 3 Nehmen Sie die gewünschte Position auf dem Gerät ein wie auf den Abbildungen gezeigt 4 Drücken Sie den Start Knopf um das Programm zu starten 5 Trainieren ...

Page 11: ...KE Stellen Sie sich auf das Gerät die Beine hüft breit auseinander Fußspitzen leicht nach au ßen Die Knie direkt über die Füße die Beine leicht gebeugt In eine leichte Hocke gehen Sie sollten eine Spannung im unteren Rücken Ge säßmuskeln Quadrizeps und den Innenseiten der Oberschenkel spüren K 02 BREIT GESTANDENE KNIEBEUGE Stellen Sie einen Fuß in die Mitte des Geräts Das andere Bein auf den Boden...

Page 12: ...Sie sollten eine Spannung im Bizeps spüren K 05 BIZEPSCURLS ARMBEUGER Stellen Sie sich vor das Gerät Ziehen Sie die Bänder nach oben neben Ihren Körper Drü cken Sie die Schulterblätter zusammen und die Brust nach vorne Ziehen Sie die Arme gleich mäßig nach hinten um Spannung im oberen Rücken und im Schulterbereich zu spüren K 06 GEBEUGTER ZUG RÜCKEN Stellen Sie sich auf das Gerät Füße auf Schul te...

Page 13: ...nen und drücken Sie die Hände fest auf die Platte und beugen Sie die Ellenbogen nach außen Bauchspannung hal ten K 09 LIEGESTÜTZ BRUST Bringen Sie Ihren Körper in eine weite Haltung das Gesäß nach hinten durchgedrückt den Rücken runden Dehnung der Rückseite Beine Rücken Halten Sie den Griff fest und verblei ben in der Dehnposition S 10 OBERSCHENKEL RÜCKSEITE Greifen Sie vorn an die Platte legen Si...

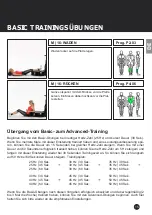
Page 14: ...12 OBERSCHENKEL INNEN Seitlich auf die Platte legen den Oberkör per über die Platte herausragen lassen Seite wechseln M 13 OBERSCHENKEL AUSSEN PO Beinrückseite auf die Platte legen Po kann mit abgelegt werden M 14 OBERSCHENKEL RÜCKSEITE PO Oberschenkel Vorderseite auf die Platte legen auf die Unterarme stützen Bauch immer frei bleibend Nicht auf die Platte legen M 15 OBERSCHENKEL VORDERSEITE Prog ...

Page 15: ...szeit an So können Sie sich langsam auf 50 Hz bei 60 Sekunden Dauer steigern Trainingsplan 25 Hz 30 Sek 30 Hz 30 Sek 35 Hz 30 Sek 25 Hz 45 Sek 30 Hz 45 Sek 35 Hz 45 Sek 25 Hz 60 Sek 30 Hz 60 Sek 35 Hz 60 Sek 40 Hz 30 Sek 45 Hz 30 Sek 50 Hz 30 Sek 40 Hz 45 Sek 45 Hz 45 Sek 50 Hz 45 Sek 40 Hz 60 Sek 45 Hz 60 Sek 50 Hz 60 Sek Wenn Sie die Basic Übungen nach diesen Vorgaben erfolgreich absolviert und ...

Page 16: ... am Holm oder an den Haltegriffe abstützen und den Oberkörper aufrollen Den Oberkörper langsam vor und zurück bewegen K 02 GERADER BAUCHMUSKEL Legen Sie die Hände schulterbreit auf die Plat te strecken Sie die Beine längs aus gehen Sie mit dem Oberkörper so über die Platte dass Ellbogen und Schultergelenke in einer Linie sind und senken Sie den gesamten Oberkörper ab K 03 LIEGESTÜTZ Auf die Platte...

Page 17: ...nach unten bis Unter und Oberschenkel einen rechten Winkel bilden Er höhte Schwierigkeit Dynamisch ausführen K 06 BREITE HOCKE KNIEBEUGE Stellen Sie einen Fuß in die Mitte des Geräts Das andere Bein weit angewinkelt nach hinten ausstrecken Halten Sie den Rücken gerade und drücken Sie das Bein fest auf die Platte spannen Sie die Beinmuskeln an Führen Sie die Übung dymanisch aus langsam tief und hoc...

Page 18: ...hultern und Arm müssen in einer Linie sein Den Oberkörper nicht durchhängen lassen K 09 SEITSTÜTZ SCHRÄGER BAUCHMUSKEL RUMPF Stellen Sie sich vor die Platte Die Bänder so einstellen dass bei leicht gebeugten Armen die Ellbogen auf Schulterhöhe sind Die Handge lenke gerade lassen und die Bänder fest nach oben ziehen K 10 SCHULTER VORNE Stellen Sie sich auf die Platte den Oberkör per leicht nach vor...

Page 19: ...s Benutzen Sie das Gerät nicht in Feuchträumen wie Badezimmer Swimming Pool oder Spa Benutzen Sie es nicht wenn in der Umgebung zuviel Staub Öl Rauch oder beißende Gase sind Vermeiden Sie es die Oberfläche des Geräts durch schwere Objekte Schlagen oder Kratzen zu beschädigen Reinigung Stellen Sie sicher dass das Gerät ausgeschaltet und der Netzstecker von der Steckdose getrennt ist bevor Sie das G...

Page 20: ... when you are wet Placement in the vicinity of swimming pools whirlpools or a sauna is dangerous and will void the guarantee Wear appropriate clothing during workout Make sure that clothes do not get caught in the equipment Always wear sports shoes and never train barefoot with socks only or flip flops The equipment may only be used by one person at a time Before you start always check the proper ...

Page 21: ...m basic to advanced training 33 Advanced Training 34 Miscellaneous Security Instructions 37 Cleaning 37 Trouble shooting 37 Guarantee conditions 39 TABLE OF CONTENTS To help you with the setup process we have created a demonstration video which can be viewed on our youtube channel here Check out all of our videos at our youtube channel https www youtube com skandika Europe https youtu be P91HX29r_...

Page 22: ...ist Hardware Pack Please note that deviations are possible Base Plate Column Hardware Pack Straps Front Cover Plate Platform Manual and Plug and Cable Seals M10 Nuts 16mm Wrench 6mm Inbus Wrench SCOPE OF DELIVERY ...

Page 23: ...23 GB Handle Main Console Column Console Plate Platform Base Plate PARTS LIST ...

Page 24: ...d package and use as assembly base for the plate Step 2 1 Position the column above the holes for the fastening screws and avoid damage to the surface Connect the column to the plate with 4 seals and nuts 2 One person has to tilt the equipment while the second person is fastening the screws with the wrench ASSEMBLY ...

Page 25: ...n and is checking the connection Step 4 1 One person has to tilt the equipment while the second person is positioning the base cover for the plate and fastens it underneath the column Step 5 1 Position the anti slip mat underneath the plate One person should position the handle while the second person is fastening it ASSEMBLY ...

Page 26: ...e 3 Flexibility 4 Coordination 5 Stretching massage Step 6 1 Feed the straps through and adjust their length Put the base plate on the plate platform Con nect the cable switch on the equipment and test its function Operation ASSEMBLY EFFECTIVENESS ...

Page 27: ...ration The total time is the sum of all remai ning exercise times of one program plus the automated break intervals between the exercises Each program contains 6 different exercise positions with different settings for exercise time span frequency amplitude and acceleration You may select the desired exercise position with the and keys Start the program with the key After completion of an exercise...

Page 28: ...ise 3 4 times per week with a one day pause in between Contra indications Bacterial infections migraine While exercising the bacteria may be transported to the heart and cause permanent cardiac dysfunc tion Thrombosis The blood clot may be transported to the heart brain and lead to vascular blockage Heart pace maker brain pace maker Pace makers may be disturbed in their function By pass No evaluat...

Page 29: ...le while tightening your leg mu scles Now squat You should feel tension in your quadriceps your gluteal muscle and back P 01 SQUAT Place your feet on the plate and position them hip wide apart from each other with the tips pointing slightly outward Keep your back straight bend your knees slightly and lean for ward just a little while tightening your leg musc les Now squat You should feel tension i...

Page 30: ...and wrists straight bend your knees and lower arms slightly Now pull up the tapes until you feel tension in the biceps P 05 BICEP CURLS Position yourself in front of the equipment and pull the tapes next to your body up to your waist Squeeze your shoulder blades together and keep your chest in an upright position Pull the tapes evenly and feel tension in the upper back and shoulders P 06 UPPER BAC...

Page 31: ...r hands on the plate shoulder wide Slight ly turn your hands inward and your elbows out during push ups and hold your abdominal mu scles P 09 PUSH UPS Hold on to the handles and bring your body in a wide position by stretching your gluteals and slightly curving your back place your heels on the plate Stretch your back back thighs and legs S 10 BACK AND BACK THIGHS Hold on to the front end of the p...

Page 32: ...epeat with the other leg M 12 INNER THIGHS Position yourself sideways on the plate and let your body lean over the plate Switch sides and repeat M 13 OUTER THIGHS GLUTEALS Place your hamstrings and your gluteals on the plate M 14 HAMSTRINGS GLUTEALS Place your front thighs on the plate and put your weight on your lower arms Leave your stomach free of the plate M 15 FRONT THIGHS ...

Page 33: ...rtz setting by 5 HZ and start with a 30 second period This way you may slowly advance to 50 HZ and 60 seconds Training table 25 Hz 30 sec 30 Hz 30 sec 35 Hz 30 sec 25 Hz 45 sec 30 Hz 45 sec 35 Hz 45 sec 25 Hz 60 sec 30 Hz 60 sec 35 Hz 60 sec 40 Hz 30 sec 45 Hz 30 sec 50 Hz 30 sec 40 Hz 45 sec 45 Hz 45 sec 50 Hz 45 sec 40 Hz 60 sec 45 Hz 60 sec 50 Hz 60 sec Having successfully completed the basic t...

Page 34: ...gle resting your feet against the column Slowly crunch up and down P 02 STRAIGHT ABDOMINAL MUSCLES Position your hands on the plate shoulder wi de and straighten your legs Slightly turn your hands inward and your elbows out and align them with your shoulders during push ups P 03 PUSH UPS Sit on the plate with a slightly elevated torso and one of your legs stretched out and the other one at a 90 de...

Page 35: ...straight bend your knees slightly and lean for ward just a little while tightening your leg muscles Now squat Place your hands on the column then lower your squat until thighs and calves form a right angle P 06 WIDE SQUAT Put one foot on the centre of the plate Stretch out the other leg in a wide angle Keep your back straight and your leg firmly on the plate Also tighten your leg muscles Go slowly...

Page 36: ...line and your legs and feet parallel P 09 SIDESUPPORT DIAGONALABDOMINALMUSCLES TORSO Stand in front of the plate Adjust the tapes so that your elbows are aligned with your shoul ders when the tapes are under tension Pull up lift the tapes with straight wrists and slightly curved elbows P 10 SHOULDERBLADES FRONT Place your feet on the plate and position them hip wide apart from each other Keep your...

Page 37: ...es Protection of the device Never use in damp surroundings like bath rooms close to swimming pools etc Never use the device in surroundings with dust oil smoke or acrid gases Avoid damaging the surface of the device by scratches beats or heavy objects Cleaning Make sure the device is switched off and the mains plug is disconnected before cleaning the appli ance Never use caustic abrasives petrol o...

Page 38: ...anische Beschädigungen irgendwelcher Art aufweist Der Kundendienst kann Sie nach telefonischer Rücksprache zur Reparatur bzw zum Tausch von Teilen welche Sie zugesandt bekommen ermächtigen In diesem Fall erlischt der Garantieanspruch selbstverständlich nicht 4 Garantieleistungen bewirken weder eine Verlängerung der Garantiefrist noch setzen sie eine neue Garan tiefrist in Gang 5 Weitergehende oder...

Page 39: ...correct handling or maintenance especially non observance of instruction manual or if the device shows mechanical damages of any type After telephonic consultation the customer service can authorize you for repairs and or for exchange of parts which you were sent In this case the guarantee claim does not obviously expire 4 Guarantee services does not cause any extension of guarantee period or does...

Page 40: ...20171005 ...

Reviews: