


Introduction
P77
-65-
No.
現 象
Problem
檢查 及調 整
Exam and Adjustment
7.
斷 線與 縫 合不順
Broken Thread and
Rough/Uneven Stitch
Q:
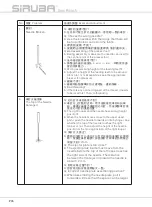
線架的 線孔 沒有 磨 光?
A:
用砂 布把線孔周 圍 磨 光。
Q: The thread hole of the thread stand did not polish?
A: Use emery cloth to polish the surroundings of the
thread hole.
Q:
線的選擇 錯 誤?
A:
更換較 好的 線 , 使粗細 線 均勻。
Q: Choose the wrong thread?
A: Change a better thread to balance the threads.
Q:
線的張 力調 整不 好?
A:
注意 左右勾針的 線 不 要太 鬆 ,要 調 整一 支 針線時 也
要注 意到 有關 的 線 變化。
(
1.)
拉緊針 線 → 左 勾 針 線 會鬆 → 右 勾 針 線會緊 。
(
2.)
拉緊 左勾針 線 → 右 勾針線 會 鬆 → 針 線 也 會
鬆 。
(
3.)
拉緊右 勾針 線 → 左 勾 針線 會 鬆 → 針 線 會鬆 。
Q: Cannot adjust to the best thread tension?
A: Please be noted that the threads of the left/right
looper should not be too loose. When adjust the
position of one needle, the related changes of the
threads are needed to be noticed.
(1.) Pull the needle thread tightly --> the left looper is
looser --> the right looper is tighter
(2.) Pull the left looper thread tightly --> the right
looper is looser --> the needle thread is looser,
too.
(3.) Pull the right looper thread tightly --> the left
looper thread is looser --> the needle thread is
looser.
Q:
押具 彈簧 調整 不 良?
A:
調整 押具彈性配 合所 要用 的布料
Q: Incorrect adjustment of the presser foot spring?
A: Adjust the presser foot flexibility to fit the fabric.
Q:
切 刀磨 損 ?
A:
磨利 刀口或更換 新品 。
Q: The knife is worn?
A: Sharpening the knife or changing a new one.
Q: The differential ratio not match?
Q:
差 動 比未配合?
A:
調整配合布 料的 差動 送 料 。
Q: The differential ratio not match?
A: Adjust the differential feeding to match the feeding
fabric.
8.
環縫不 出線
The Thread does not Come
Out When Doing Chainstitch
Q:
環勾 針線 凸輪 調整不 當 ?
A:
調整適 當 的凸 輪 方 位。
Q: The cam of the chain stitch looper is not
appropriate?
A: Adjust the cam to an appropriate position.
Summary of Contents for 700QD
Page 1: ...700QD 988QD INSTRUCTION BOOK 700Qe 988Qe...
Page 2: ......
Page 3: ......
Page 4: ......
Page 8: ...2 P2...
Page 10: ...P4...
Page 11: ...Introduction 5 P5...
Page 12: ...6 P6...
Page 13: ...Introduction 7 ground P7...
Page 88: ...P82...
Page 89: ...Introduction P83...
Page 90: ...P84...
Page 91: ...Introduction P85...
Page 92: ...P86 74 All machine components must be...
Page 93: ......


