background image

8. Other Features

129

5.

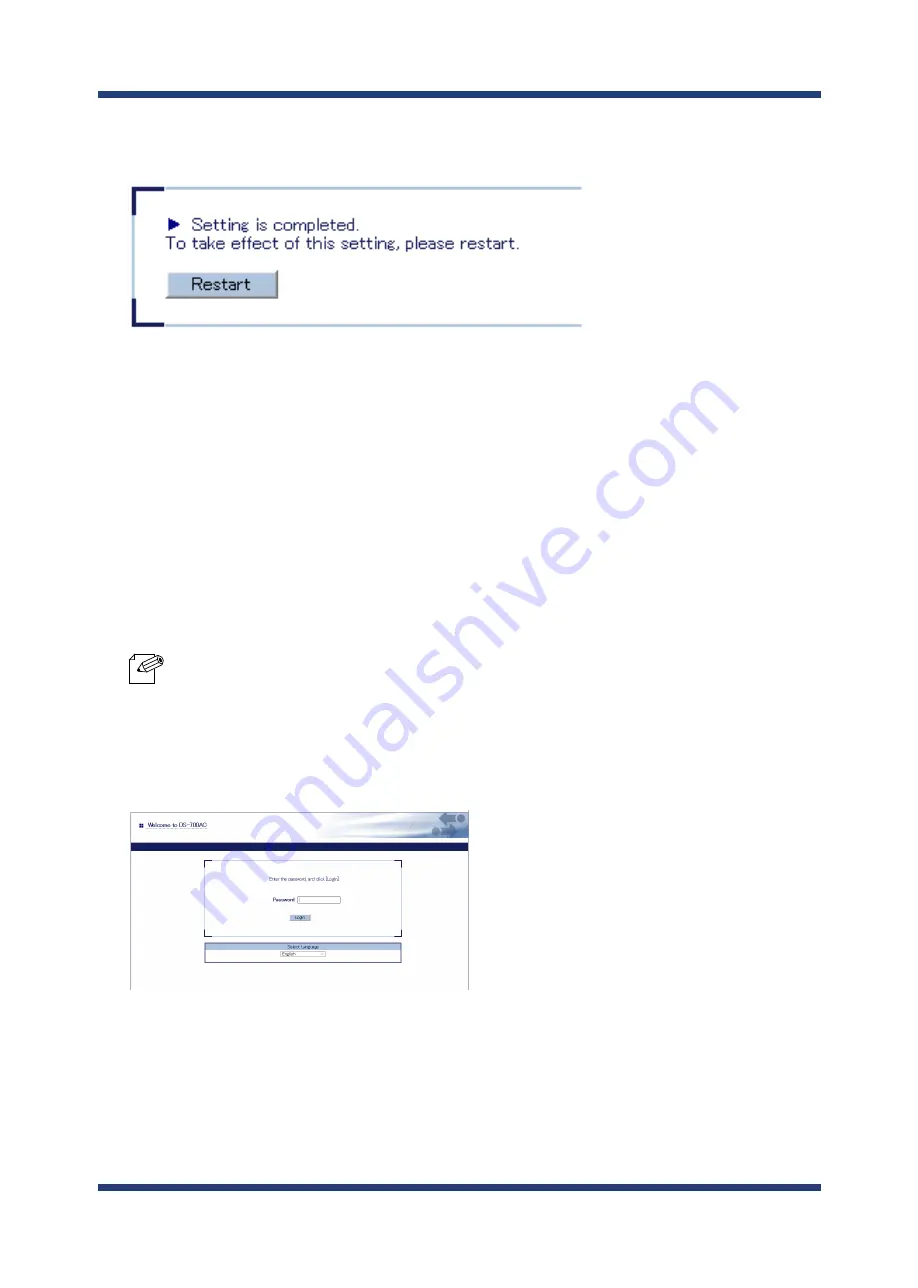
The Restart page is displayed. Click 

Restart

 to restart DS-700AC.

The changes will take effect after restart.

When the login page is displayed, the reboot is completed.
Finish the Web browser.

6.

Access the Web page of DS-700AC.

1.

 - For how to display the Web page of DS-700AC, refer to 

8-1-1. Displaying the Web page of DS-700AC

.

Note

The login page is displayed.
Enter the password for DS-700AC and click 

Login

.

2.

8-4-2. Using Service Management Configuration

Summary of Contents for DS-700AC

Page 1: ...User s Manual DS 700AC...

Page 2: ...Copyright 2021 silex technology Inc All rights reserved WA106490XB...

Page 3: ...fications 14 2 3 1 Hardware Specifications 14 2 3 2 Software Specifications 18 2 4 About Wireless Interference 19 2 5 Parts and Functions 21 3 Before You Begin 25 3 1 Supported Configuration Methods 2...

Page 4: ...43 Connect a network cable to and power on DS 700AC 43 Configure the network settings from your PC 44 5 1 3 Enable the new settings 50 5 2 Configuration via WPS 53 5 2 1 Confirm that your wireless rou...

Page 5: ...ser to display the Web page 83 8 1 2 Status Information 85 USB Device Status 85 System Status 86 UPnP Status 88 OpenVPN Status 89 Wireless Status 90 8 1 3 Network Settings 91 General Configuration 91...

Page 6: ...Management Configuration 129 8 4 3 Filtering Accesses from a Particular PC 132 8 4 4 Server Certificate 135 8 4 5 Changing Root Password 138 8 5 Maintenance Feature 140 8 5 1 About ECO Mode 140 About...

Page 7: ...1 What is SX Virtual Link Lite 166 Difference from SX Virtual Link 166 8 7 2 Installing SX Virtual Link Lite 167 8 7 3 SX Virtual Link Lite Setting 170 Using SX Virtual Link Lite 170 SX Virtual Link...

Page 8: ...Blank page...

Page 9: ...1 Thank you for purchasing the USB Device Server DS 700AC This manual provides information on how to configure and use DS 700AC Please read the 1 2 Safety Instructions carefully before using DS 700AC...

Page 10: ...Edge and Azure are either registered trademarks of Microsoft Corporation in the United States and or other countries Safari is registered trademark of Apple Inc in the United States and or other coun...

Page 11: ...cates the warning and caution Example Danger of the electric shock This symbol indicates the prohibited actions Example Disassembly is prohibited This symbol indicates the actions users are required t...

Page 12: ...objects on top of this product It may cause fire electrical shock or malfunction Do not roll up or wrap the AC cord It may cause fire or an electrical shock Do not plug or unplug the AC adaptor or any...

Page 13: ...stove Locations subject to extreme changes in temperature Near strong electromagnetic sources magnet radio wireless device etc Do not pull on the cord to disconnect the plug from the power supply The...

Page 14: ...Silex Technology Inc is not liable for any injury fire property damage etc that may arise as a result of using this product for these facilities or control systems Silex Technology Inc is not liable f...

Page 15: ...u cannot find the relevant problem in this manual or on our website or if the corrective procedure does not resolve the problem please contact Silex Technology Customer Support Latest firmware downloa...

Page 16: ...8 DS 700AC User s Manual Blank page...

Page 17: ...2 About DS 700AC 9 2 About DS 700AC...

Page 18: ...ems that came with DS 700AC 2 1 Package Contents Following items are bundled with DS 700AC If you find any items missing please contact your point of purchase DS 700AC AC adaptor Setup Guide Distribut...

Page 19: ...authentication and encryption methods are supported Authentication method Encryption mode Open None WEP WPA2 Personal AES WPA3 Personal AES WPA WPA2 Personal AUTO WPA2 Enterprise AES WPA3 Enterprise A...

Page 20: ...cess Point supports WPS Wi Fi Protected Setup you can configure the wireless settings easily using the push switch Silex Technology shall not be liable for any loss or damage of data in data storage d...

Page 21: ...The AMC Manager provides the useful features as follows Remote device control and monitoring Bulk configuration and firmware updates Depending on the USB printing device specification the Printer aut...

Page 22: ...LINK LED LAN Port 2 LINK Green Orange POWER Yellow TOP 3 POWER Green WLAN Orange Green SETTING Red Green Network interface RJ 45 x 1port 10BASE T 100BASE TX 1000BASE T Auto sensing Wireless network i...

Page 23: ...consumption 5 4W excluding USB bus power Temperature 0 C to 40 C 32 F to 104 F Humidity 20 to 80 RH Non condensing Storage environment Temperature 10 C to 50 C 14 F to 122 F Humidity 20 to 90 RH Non...

Page 24: ...ential installation This equipment generates uses and can radiate radio frequency energy and if not installed and used in accordance with the instructions may cause harmful interference to radio commu...

Page 25: ...forme aux CNR d Innovation Sciences et D veloppement conomique Canada applicables aux appareils radio exempts de licence L exploitation est autoris e aux deux conditions suivantes 1 L appareil ne doit...

Page 26: ...nly one printer can be connected using Raw Port LPD printings For the latest compatibility information for each operating system visit our website https www silextechnology com About USB Hub connectio...

Page 27: ...fere with each other Microwave scientific instruments pacemaker or other medical equipment etc Licensed radio station in a factory Small power radio station A non licensed radio station Do not use DS...

Page 28: ...o low Be sure to use only W56 channel and not to use W52 W53 channels outdoors Wireless devices using 2 4GHz band The same frequency band of DS 700AC is used for a microwave industry science medical e...

Page 29: ...en Turns on when DS 700AC is powered on 2 WLAN LED Blink Orange Searching for Access Points blinks at 1 sec interval ON Green Has connected to Access Point in Infrastructure mode Blink Green Receiving...

Page 30: ...ASE T ON ON Orange Indicates a network port status 10BASE T ON 100BASE TX ON 8 POWER LED ON Yellow Lights up when DS 700AC is powered on 9 Network Port Connect a network cable 10BASE T 100BASE TX 1000...

Page 31: ...2 About DS 700AC 23 11 MAC Address MAC Address of DS 700AC Example If the MAC Address is 84 25 3F 00 11 22 it is noted as 84253F001122 BOTTOM 11 E A XXXXXXXXXXXX...

Page 32: ...24 DS 700AC User s Manual Blank page...

Page 33: ...3 Before You Begin 25 3 Before You Begin This page introduces the supported configuration methods for DS 700AC...

Page 34: ...k settings from your PC using the configuration utility that you downloaded from our website For this method a network cable is required If you plan to use DS 700AC in a wireless network please obtain...

Page 35: ...essing the wireless connection button on your router and the push switch on DS 700AC For this configuration method a wireless router supporting WPS is required To see if your router supports WPS refer...

Page 36: ...ion information to a USB flash drive and connecting it to DS 700AC you can configure the network settings For this configuration method a USB flash drive is required Only a few KB of free memory is re...

Page 37: ...r wireless router Access Point The information explained in this page is specific to your network and cannot be provided by Silex technical support For how to confirm each setting please refer to the...

Page 38: ...racters are used Enter 5 characters if the key size is 64bit or 13 characters if the key size is 128bit For Hexadecimal a value consists of numbers 0 9 and English letters A F Enter a 10 digit value i...

Page 39: ...ails on how to install the driver please refer to the operation manual that came with the USB device Collect your wireless setting information To use DS 700AC in your wireless network DS 700AC must ha...

Page 40: ...Installing the Application to PC for how to install the necessary applications on your PC Configuration using WPS feature of your wireless router If your wireless router supports WPS Wi Fi Protected...

Page 41: ...er AC adapters may cause unexpected damages If DS 700AC has been used in another network reset it to the factory default settings before you start the configuration Please refer to 8 5 2 Resetting to...

Page 42: ...34 DS 700AC User s Manual Blank page...

Page 43: ...4 Software Overview 35 4 Software Overview...

Page 44: ...is to automatically assign an IP Address using the DHCP server Assign IP Address Select this to manually configure IP Address subnet mask and default gateway Enter a Subnet Mask and Default Gateway if...

Page 45: ...screen to configure the wireless settings Network Key Enter the WEP Key or Pre Shared Key of the wireless network you want to connect to Confirm Network Key Select this to manually configure IP Addres...

Page 46: ...rtual Link that is necessary to use DS 700AC SX Virtual Link allows you to connect your PC to a USB device that is connected to a device server Use SX Virtual Link when you connect disconnect to from...

Page 47: ...Remote Message to Another User to Request for Disconnect When you are sharing a USB device with several users and one of them occupies the USB device for a long time you can request to the user to dis...

Page 48: ...Access the URL below on the PC to use to configure DS 700AC URL https www silextechnology com 1 Go to the Support page and select the product model 2 Download the utilities below and extract them on t...

Page 49: ...5 Configuration 41 5 Configuration...

Page 50: ...Network Cable Use to connect DS 700AC and network devices such as an Ethernet Hub broadband router and PC USB Cable Use to connect DS 700AC and USB devices A USB Cable is not required if the device is...

Page 51: ...nnect a network cable to DS 700AC and the other end to an Ethernet Hub or wireless router Connect an AC adapter to DS 700AC 1 and power plug to an outlet 2 1 2 5 1 2 Start Setup DS 700AC Power Outlet...

Page 52: ...e is not connected Check that the network cable is plugged in properly If the WLAN LED is on even though the network cable is plugged in properly DS 700AC may have the setting which does not allow a w...

Page 53: ...nfiguration 45 Click Configure using the setup utility Recommended 3 The User Account Control window is displayed Click Yes 4 Click Yes in the message below 5 Device Server Setup is displayed Click Ne...

Page 54: ...is not displayed in the list click Search If this does not help refer to 9 2 1 Problems During Setup DS 700AC is not displayed in the search result of the Device Server Setup in Troubleshooting Note...

Page 55: ...ick Next The IP address used in the above screen is a sample address Please specify an IP address appropriate for your environment Enter a Subnet Mask and Default Gateway if necessary If there are no...

Page 56: ...e checked at 3 2 Necessary Wireless Setting Information for Network Key and Confirm Network Key respectively and click Next 10 If the wireless network that you wish to use is not shown in the list cli...

Page 57: ...depending on your selection If an error occurs after clicking Execute please refer to 9 2 1 Problems During Setup Communication error occurs when configuring with Device Server Setup in Troubleshooti...

Page 58: ...plug from the power outlet 1 and the network cable from DS 700AC 2 1 If you plan to use DS 700AC on a wired network it is not necessary to unplug the network cable Tip Power Outlet AC Adaptor USB Dev...

Page 59: ...back to 3 2 Necessary Wireless Setting Information and check the wireless setting information once again If the Wireless LED is off the network cable is plugged in If you plan to use DS 700AC in a wi...

Page 60: ...are SX Virtual Link For details on how to install SX Virtual Link refer to 6 Installing the Application to PC To use Print Server feature configure the necessary settings for standard Windows printing...

Page 61: ...1 Confirm that your wireless router supports WPS Depending on your wireless router WPS may need to be enabled manually For details refer to the operation manual that came with your wireless router If...

Page 62: ...with your wireless router Please use only one wireless router If two or more routers are waiting for wireless connections DS 700AC will not be able to connect properly While performing this configura...

Page 63: ...refer to the operation manual that came with your wireless router Please use only one wireless router If two or more routers are waiting for wireless connections DS 700AC will not be able to connect...

Page 64: ...and then power it on again Connect the USB device s that you wish to use over the network to DS 700AC It is not necessary to install the applications if you plan to use printers with the standard win...

Page 65: ...00AC to a network 5 3 1 Necessary Items USB Flash Drive For saving the configuration information that will be used for setup Please use a drive formatted in FAT32 Only a few KB of space is required an...

Page 66: ...downloaded Device Server Setup file on your desktop Double click Dssetup exe to start the Device Server Setup utility 1 Click Device Server Configuration 2 Click Configure using a USB flash drive 3 S...

Page 67: ...59 The User Account Control window is displayed Click Yes 4 Device Server Setup is displayed Click Next 5 Read the software license agreement and click Yes 6 Insert the USB flash drive into your PC a...

Page 68: ...settings appropriate for your environment 9 If you are not sure how to determine the IP address to set refer to 9 2 1 Problems During Setup How should I determine the way to assign an IP address to D...

Page 69: ...Mask and Default Gateway if necessary Tip If you plan to use DS 700AC in a wireless network configure the wireless settings Enter the wireless settings that you have checked at 3 2 Necessary Wireless...

Page 70: ...ecute 11 The information displayed here will differ depending on your selection Tip Before clicking Next follow the instructions on the window Remove the USB flash drive from your PC and go on to 5 3...

Page 71: ...ower Outlet AC Adaptor DS 700AC After the configuration information is transferred from the USB flash drive DS 700AC will automatically reboot itself It takes about 60 seconds to complete the transmis...

Page 72: ...d properly In such a case go back to 3 2 Necessary Wireless Setting Information and check the wireless setting information once again If the Wireless LED is off the network cable is plugged in If you...

Page 73: ...do not plan to use the Device Server feature from the PC used for this setup If you will only use a printer with standard Windows printing Tip The setup is now complete To use the Device Server featur...

Page 74: ...66 DS 700AC User s Manual Blank page...

Page 75: ...6 Installing the Application to PC 67 6 Installing the Application to PC...

Page 76: ...nk on window environment Install SX Virtual Link according to the instructions below If you have completed the configuration and continue to install the application start from 3 in this section Extrac...

Page 77: ...alling the Application to PC 69 5 Read the SOFTWARE LICENSE AGREEMENT and click Yes 6 Select a folder to install SX Virtual Link into and click Next 4 SX Virtual Link Install wizard is displayed Click...

Page 78: ...70 DS 700AC User s Manual 7 Enter a Group Name to be displayed in the Start Menu Click Next 8 Click Start to begin the installation When Windows Security screen is displayed click Install TIP...

Page 79: ...ase add SX Virtual Link to the exception list in your security software Refer to the FAQ on our website https www silextechnology com for details on adding an application to the exception list SX Virt...

Page 80: ...72 DS 700AC User s Manual Blank page...

Page 81: ...7 Using USB Devices Connected to DS 700AC 73 7 UsingUSBDevicesConnectedtoDS 700AC...

Page 82: ...not running click Start All apps silex Tools SX Virtual Link In Windows 7 click the button on the notification area bottom right corner of your desktop to display the tasktray icons The SX Virtual Lin...

Page 83: ...it using SX Virtual Link Double click Double click the USB device in SX Virtual Link s main window Use a button Select the USB device and click the Connect button in SX Virtual Link s main window If...

Page 84: ...ht click on the USB device in SX Virtual Link s main window and click Disconnect in the menu displayed Use a keyboard Select the USB device using the up down arrow keys and press Alt D on your keyboar...

Page 85: ...art SX Virtual Link SX Virtual Link has an Online Help which provides helpful information on its usage How to access the Online Help is as follows 2 In SX Virtual Link s main window click the Help but...

Page 86: ...78 DS 700AC User s Manual Blank page...

Page 87: ...8 Other Features 79 8 Other Features...

Page 88: ...e Web configuration page complies with HTTP 1 0 RFC1945 HTML 3 0 The operating status of the connected USB device is automatically refreshed in every 30 sec Note This page explains how to configure ad...

Page 89: ...ge of DS 700AC There are 2 ways to display the Web page described below From the SX Virtual Link s main window select the USB device and click the Properties button 1 8 1 1 Displaying the Web page of...

Page 90: ...onfiguration page will be displayed Enter the password to configure for DS 700AC and click Submit When the login password is already configured this page is not displayed Note 3 The login page is disp...

Page 91: ...he IP address that is configured on DS 700AC in the address bar of the Web browser Press the ENTER key Example Enter 172 25 72 57 and press the ENTER key 1 When the login password is already configure...

Page 92: ...USB device and DS 700AC Network Conf Configures the network settings of DS 700AC Security Configures the access control for DS 700AC Maintenance Provides the initialization reboot and firmware update...

Page 93: ...XX Manufacturer Name Displays the manufacturer name of the USB device If the manufacturer name cannot be obtained it is displayed as VendorID VID 0xXXXX USB Speed Displays the bus data transfer rate o...

Page 94: ...Name Details Printer Name Displays the name of the printer If the printer name cannot be obtained it is displayed as ProductID PID 0xXXXX Raw Port No Displays the TCP port number for RAW mode printin...

Page 95: ...SS and Wired LAN Operation is ENABLE Extended Subnet Mask Shows the extended subnet mask This is displayed when Network Mode is WIRELESS and Wired LAN Operation is ENABLE Extended Gateway Shows the ex...

Page 96: ...r Information Name Details Server Search Displays the port forwarding setting registered to IGD to search for DS 700AC Server Connect Displays the port forwarding setting registered to IGD to connect...

Page 97: ...enVPN Status page displays the VPN connection status and IP Address OpenVPN Status Name Details Connect Status Displays the VPN connection status IP Address Displays the VPN IP address Log Displays th...

Page 98: ...s of DS 700AC Name Details Current SSID Displays the current SSID Current Channel Displays the current channel Transfer Rate Displays the wireless transmission rate RSSI Displays the wireless signal s...

Page 99: ...that is not used by other devices DS700 xxxxxx xxxxxx is the last 6 digits of the MAC address Network Mode Select the type of network connection AUTO Automatically detects the connection type If a ne...

Page 100: ...interface selected at Gateway Interface ENABLE IPv4 Configuration Interface Configuration Name Details Default Wired LAN Operation Enable Disable the simultaneous operation of wireless LAN and wired L...

Page 101: ...y When Wired LAN Operation is ENABLE the information for both wireless LAN and wired LAN is displayed 0 0 0 0 Default Gateway Set a gateway address If 0 0 0 0 is set this setting is disabled When DHCP...

Page 102: ...igher priority 0 0 0 0 Default Gateway Set a gateway address If 0 0 0 0 is set this setting is disabled When DHCP is enabled a default gateway address obtained from it will be given higher priority 0...

Page 103: ...Enable Disable the NTP protocols ENABLE NTP Server Set the host name or IP Address for NTP server pool ntp org Local Time Zone Set Local Time Zone this product 9 00 Time Synchronization Displayed whe...

Page 104: ...P Configuration Name Details Default UPnP Control Enable Disable a function to set port forwarding to IGD over UPnP ENABLE External Port Set an external port number to configure for IGD This port numb...

Page 105: ...figuration Registration Status Displayed when the OpenVPN Client is enabled Name Details OpenVPN Configuration Shows the information of connection destination Name Details Default OpenVPN Client Enabl...

Page 106: ...0BASE T Full 100BASE TX Half 100BASE TX Full In most cases AUTO is used If the LINK lamp on your HUB does not light up when this product is turned on configure this setting to match that of the HUB AU...

Page 107: ...ss configuration can be done by selecting Access Point from a list and entering WEP Key or Pre Shared Key for network key Detailed Configuration Users can manually configure the necessary wireless set...

Page 108: ...9 1 Useful Information How can I use two or more USB devices It is impossible to print to printers or MFPs connected to other PCs via SX Virtual Link Also when printers or MFPs are busy with standard...

Page 109: ...access the Web page of DS 700AC and check the destination printer port assigned to the printer connected to DS 700AC STEP 1 Select a printing protocol STEP 2 Take notes of the destination printer por...

Page 110: ...printers refer to 9 1 Useful Information How can I use two or more USB devices It is impossible to print to printers or MFPs connected to other PCs via SX Virtual Link Also when printers or MFPs are b...

Page 111: ...r Query the printer and automatically select the driver to use check box and click Next 5 Select the method to add a printer Click Add a printer using a TCP IP address or hostname and click Next 4 In...

Page 112: ...e and see the result of printing If the print result is OK click Finish The print setting has been completed 8 Select a printer driver Select the printer driver you want to use and click Next 6 If you...

Page 113: ...nal printing only standard Windows printing cannot be used When using standard Windows printing only one printer can be used at a time To connect 2 or more printers SX Virtual Link must be used It is...

Page 114: ...elect the driver to use check box and click Next 4 In most cases the default port name is used If you wish to change the port name enter a unique name that is not used for other ports Note Select the...

Page 115: ...and click Next 6 Click Print a test page and see the result of printing If the print result is OK click Finish The print setting has been completed 7 If you are going to use the Raw port printing clic...

Page 116: ...nect 2 or more printers SX Virtual Link must be used It is impossible to print to printers or MFPs connected to other PCs via SX Virtual Link Also when printers or MFPs are busy with standard Windows...

Page 117: ...9 4 Select Raw for Protocol enter the port number the one displayed on the Web page for Port Number and click OK 5 Click the General tab Click Print Test Page confirm that the test print is output cor...

Page 118: ...uration Page 8 3 1 Easy Wireless Configuration Access the Web page of DS 700AC 1 The login page is displayed Enter the password for DS 700AC and click Login 2 For how to display the Web page of DS 700...

Page 119: ...r restart 5 When the login page is displayed the reboot is completed Finish the Web browser 6 In case of the followings the wireless devices are not displayed in Wireless Network List Click Detailed C...

Page 120: ...ration Access the Web page of DS 700AC 1 For how to display the Web page of DS 700AC refer to 8 1 1 Displaying the Web page of DS 700AC Note The login page is displayed Enter the password for DS 700AC...

Page 121: ...e each setting and click Submit 5 Name Details Default Value SSID Set the SSID of your wireless network The SSID is an ID that distinguishes a wireless LAN network from others For wireless devices to...

Page 122: ...h a wireless device using Pre Shared key WEP key setting is not used for this mode WPA2 Enterprise WPA3 Enterprise Uses IEEE802 1X for network authentication For encryption mode AES can be used Pre Sh...

Page 123: ...he same as that of the wireless device you wish to connect to 12345678 WEP Name Details Default Value WEP Enable Disable WEP encryption ON OFF If WEP encryption is used wireless communication will be...

Page 124: ...te password to use for client authentication on the EAP authentication This setting is necessary when a password is set to the client certificate None Client Certification Select a client certificate...

Page 125: ...r Features 117 The Restart page is displayed Click Restart to restart DS 700AC The changes will take effect after restart 6 When the login page is displayed the reboot is completed Finish the Web brow...

Page 126: ...follows Item Compatible standards Key exchange method RSA Key size 512bit 1024bit 2048bit Signature algorithm SHA1withRSA SHA224withRSA SHA256withRSA SHA384withRSA SHA512withRSA MD5withRSA Saving Form...

Page 127: ...b page of DS 700AC refer to 8 1 1 Displaying the Web page of DS 700AC Note The login page is displayed Enter the password for DS 700AC and click Login 2 The Web page of DS 700AC is displayed From the...

Page 128: ...DS 700AC User s Manual The Wireless LAN Configuration page is displayed Click Detailed Configuration tab 4 The detailed wireless configuration page is displayed Configure each setting and click Submi...

Page 129: ...r client authentication on the EAP authentication This setting is necessary when a password is set to the client certificate None Client Certification Select a client certificate to use for client aut...

Page 130: ...Method Necessary Necessary Client Certification Necessary Client Certificate Password Optional Server Authentication Optional Optional Optional CA Certification Optional Optional Optional Auto PAC Pro...

Page 131: ...8 3 4 Smart Wireless Setup Access the Web page of DS 700AC 1 For how to display the Web page of DS 700AC refer to 8 1 1 Displaying the Web page of DS 700AC Note The login page is displayed Enter the...

Page 132: ...page as it will be used again after you enter the PIN code on the Access Point side 2 Open the Web page of Access Point using the Web browser Internet Explorer Microsoft Edge etc Enter the PIN code an...

Page 133: ...Setup page of DS 700AC after the WPS is started on the Access Point Click Smart Wireless Setup Execute 4 The Smart Wireless Setup will begin 5 When the configuration is completed DS 700AC will be con...

Page 134: ...6 Remove the power plug from the outlet and the network cable from DS 700AC 7 Connect the USB device that you wish to share over the network to DS 700AC using a USB cable and insert the power plug of...

Page 135: ...ote The login page is displayed Enter the password for DS 700AC and click Login 2 The Web page of DS 700AC is displayed From the left menu on the Web page click Security USB Port 3 This page explains...

Page 136: ...by configuring a password to USB3 0 port when the USB device server feature is used When ENABLE is selected the configured password is activated and the password authentication performs when a device...

Page 137: ...the login page is displayed the reboot is completed Finish the Web browser 6 Access the Web page of DS 700AC 1 For how to display the Web page of DS 700AC refer to 8 1 1 Displaying the Web page of DS...

Page 138: ...User s Manual The Web page of DS 700AC is displayed From the left menu on the Web page click Service Management 3 4 The Service Management Configuration page is displayed Configure each setting and c...

Page 139: ...not be able to access the Web page unless DS 700AC is reset to factory defaults Enable Print Server Enable Disable access to DS 700AC when the print server feature is used If ENABLE is selected acces...

Page 140: ...ter the password for DS 700AC and click Login 2 8 4 3 Filtering Accesses from a Particular PC This page explains how to restrict access from particular PCs using an IP filter function The Web page of...

Page 141: ...rt end addresses to specify the range of access filter Example Not configured 0 0 0 0 0 0 0 0 Access from 192 168 0 0 192 168 0 255 is allowed denied 192 168 0 0 192 168 0 255 Access only from the spe...

Page 142: ...0AC User s Manual 5 The Restart page is displayed Click Restart to restart DS 700AC The changes will take effect after restart When the login page is displayed the reboot is completed Finish the Web b...

Page 143: ...f DS 700AC Note The login page is displayed Enter the password for DS 700AC and click Login 2 8 4 4 Server Certificate This page explains how to set a self signed certificate on Web page in order to e...

Page 144: ...lowing symbols and spaces can be used Organization Name Set an organization name for the server certificate 0 to 64 alphanumeric characters The following symbols and spaces can be used Locality Name S...

Page 145: ...r Features 137 5 The Restart page is displayed Click Restart to restart DS 700AC The changes will take effect after restart When the login page is displayed the reboot is completed Finish the Web brow...

Page 146: ...0AC 1 For how to display the Web page of DS 700AC refer to 8 1 1 Displaying the Web page of DS 700AC Note The login page is displayed Enter the password for DS 700AC and click Login 2 By default no pa...

Page 147: ...and click Submit Name Details Default New Password Set the administrative password in ASCII string up to 8 characters This password is used as authentication password for changing the settings from th...

Page 148: ...n page is displayed Enter the password for DS 700AC and click Login 2 ECO Mode is a power saving mode that DS 700AC switches to when it has been idle for a specified period of time When in ECO Mode US...

Page 149: ...ave Mode If DS 700AC is idle for the specified amount of time it will automatically switch into ECO mode When the USB device connection utility is started or DS 700AC is accessed for a particular purp...

Page 150: ...using the print server feature is not performed Because SX Virtual Link regularly communicates with DS 700AC DS 700AC will not switch to ECO Mode if SX Virtual Link is running To start ECO Mode shut d...

Page 151: ...while resetting to factory default Do not press the push switch when DS 700AC is turned on again after it was reset to the factory default settings Remove the AC plug from the electric outlet 1 Push...

Page 152: ...e of DS 700AC refer to 8 1 1 Displaying the Web page of DS 700AC Note The login page is displayed Enter the password for DS 700AC and click Login 2 The Web page of DS 700AC is displayed From the left...

Page 153: ...configuration page is displayed Click Yes 5 A confirmation message is displayed Click OK 6 The factory default configuration will begin 7 When the login page is displayed the factory default configur...

Page 154: ...C from the power outlet 2 Insert the AC plug back into the power outlet again 3 The reboot will be complete in 30 seconds Access the Web page of DS 700AC 1 For how to display the Web page of DS 700AC...

Page 155: ...her Features 147 The Web page of DS 700AC is displayed From the left menu on the Web page click Maintenance Restart 3 4 The Restart page is displayed Click Yes 5 The reboot will be complete in 30 seco...

Page 156: ...148 DS 700AC User s Manual 6 When the login page is displayed the reboot is completed Finish the Web browser...

Page 157: ...ating Firmware Please download the latest firmware file from our website For how to download the firmware file refer to 4 2 Downloading the Utilities Access the Web page of DS 700AC 1 For how to displ...

Page 158: ...on the Web page click Maintenance Firmware Update 3 4 The Firmware Update page is displayed Click Browse to select the firmware file to be loaded to DS 700AC Check that the file name is displayed in...

Page 159: ...s 151 6 The firmware update will begin 7 When the login page is displayed the firmware update is completed See the bottom left of the login page and check the version information is changed 8 Finish t...

Page 160: ...S Router port forwarding setting If your router does not support UPnP a rule of port forwarding to DS 700AC needs to be manually set For the Dynamic DNS settings refer to the operating manual that com...

Page 161: ...ible to access the Web page of DS 700AC via the Internet UPnP Control is set to ENABLE by default TIP UPnP function setting Access the Web page of DS 700AC 1 The login page is displayed Enter the pass...

Page 162: ...o set the external port for a port forwarding function If this port number has already been used for another device or when there are multiple DS 700AC units it needs to be changed Note 5 The Restart...

Page 163: ...8 Other Features 155 Enter the password for DS 700AC and click Login 7 The Web page of DS 700AC is displayed From the left menu on the Web page click Status UPnP 8...

Page 164: ...e it is impossible to connect to DS 700AC via NAT The reason of Registration Failure might be the followings The external port is already in use The destination IP address is already in use UPnP Statu...

Page 165: ...eatures 157 SX Virtual Link Setting Start SX Virtual Link 1 For how to start SX Virtual Link refer to 7 Using USB Devices Connected to DS 700AC In SX Virtual Link s main window click the Options butto...

Page 166: ...checked at step 9 of UPnP function setting for Port and click OK 4 For Address the external IP address of DS 700AC can be set However please note that the IP address changes automatically when DS 700A...

Page 167: ...warding Setting The Web page of DS 700AC cannot be accessed via the Internet If the deletion fails the registered IGD information will not be deleted TIP Access the Web page of DS 700AC 1 The login pa...

Page 168: ...160 DS 700AC User s Manual UPnP Status page is displayed Click Delete 4...

Page 169: ...allowed for Azure VNET To search for DS 700AC via Azure VPN Gateway it is necessary to set the DS 700AC s IP address of VPN to the device server search address of SX Virtual Link USB3 0 Internet examp...

Page 170: ...00AC 1 The login page is displayed Enter the password for DS 700AC and click Login 2 For how to display the Web page of DS 700AC refer to 8 1 1 Displaying the Web page of DS 700AC Note The Web page of...

Page 171: ...DS 700AC The changes will take effect after restart When the login page is displayed the reboot is completed Finish the Web browser 6 4 OpenVPN Configuration page is displayed Select ENABLE for OpenV...

Page 172: ...User s Manual SX Virtual Link Setting Start SX Virtual Link 1 For how to start SX Virtual Link refer to 7 Using USB Devices Connected to DS 700AC In SX Virtual Link s main window click the Options bu...

Page 173: ...er Features 165 3 Check the check box of Enable the search address enter the DS 700AC s IP address of VPN for Address and click OK 4 The Options window is displayed Click the Search for device servers...

Page 174: ...SB device connection is lost as the device server is turned off etc it will be reconnected automatically when the device server is turned on again This page explains the USB device connection service...

Page 175: ...irtual Link Lite Extract the downloaded Device Server Setup file on your desktop Double click Dssetup exe contained in the Device Server Setup folder to start the Device Server Setup installer 1 Click...

Page 176: ...168 DS 700AC User s Manual Select your language and click Next 4 SX Virtual Link Lite installation wizard is displayed Click Next 5 Read the SOFTWARE LICENSE AGREEMENT and click Yes 6...

Page 177: ...8 Other Features 169 Click Start to begin the installation 7 SX Virtual Link Lite has been installed Click Finish 8...

Page 178: ...s Follow the instructions below to start it Follow the instructions below to start SX Virtual Link Lite Setting manually For Windows 10 Click Start All Apps silex Tools SX Virtual Link Lite Setting Fo...

Page 179: ...to connect automatically 3 Click Apply 4 Click Yes in the message below 5 The setting will take effect on SX Virtual Link Lite When it is finished SX Virtual Link Lite Setting will be closed and the...

Page 180: ...the USB connection password or encrypted connection Options Opens the option dialog window Broadcast address can be configured on this window Refresh Refreshes the main window by searching the device...

Page 181: ...16 addresses can be registered The broadcast address needs to be registered in case you want to search for networks beyond the router If no broadcast addresses are specified only device servers in a...

Page 182: ...n be uninstalled from Uninstall a program in the Control Panel How to uninstall SX Virtual Link To uninstall SX Virtual Link administrator privilege is required Click Start All Apps silex Tools and ri...

Page 183: ...8 Other Features 175 When a screen below is displayed click Restart 4 SX Virtual Link has been uninstalled A confirmation message is displayed Click Yes to start the uninstallation 3...

Page 184: ...can be uninstalled from Uninstall a program in the Control Panel How to uninstall SX Virtual Link Lite To uninstall SX Virtual Link Lite administrator privilege is required TIP Click Start Control Pan...

Page 185: ...8 Other Features 177 When a screen below is displayed click Restart 4 SX Virtual Link has been uninstalled A confirmation message is displayed Click Yes to start the uninstallation 3...

Page 186: ...178 DS 700AC User s Manual Blank page...

Page 187: ...9 Troubleshooting 179 9 Troubleshooting...

Page 188: ...main window and then unplug it from DS 700AC Unplugging the USB device while it is being used might lead to data corruption For details on SX Virtual Link see 7 Using USB Devices Connected to DS 700A...

Page 189: ...ration information with it and Device Server Setup you have downloaded from our website you can change the settings as you did for the setup For details refer to 5 3 Configuration via a USB Flash Driv...

Page 190: ...rint server feature For the print server feature refer to 8 2 About the Print Server Feature at Other Features If the IP address of DS 700AC changes while the print server feature standard Windows pri...

Page 191: ...and other cables and reboot the connected devices The startup of DS 700AC may not have been completed Solution It takes up to 30sec for DS 700AC to get ready after it is powered on Please wait until...

Page 192: ...same network segment environment without a router as your PC Solution During the initial configuration place DS 700AC and PC in the same network segment Communication error occurs when configuring wi...

Page 193: ...g on the number assigned categorized to 3 classes below Numbers making up the IP address are either network numbers indicating network or host numbers indicating each network device each number indica...

Page 194: ...e check the LED status of DS 700AC and the Ethernet Hub DS 700AC is connected to If the LED indicates improper status replace the AC plug and other cables and reboot the connected devices The startup...

Page 195: ...Also if there is a router between the PC and DS 700AC check that the default gateway address is properly configured Microsoft Windows Version 6 1 7601 C Copyright c 2009 Microsoft Corporation All righ...

Page 196: ...s powered on If the USB device is not powered on confirm the AC adaptor is connected properly Also if the USB device is a bus powered device it may require power exceeding the maximum power capability...

Page 197: ...in SX Virtual Link but an error occurs when they are connected you need to check the USB device specification as well as the PC settings Software required to work the USB device device driver may not...

Page 198: ...olution When you use isochronous devices such as Web camera USB speaker etc please connect them directly to DS 700AC You may be using DS 700AC on a 100BASE TX 10BASE T network Solution For isochronous...

Page 199: ...may be placed in a location subject to weaker radio wave signals Solution Move DS 700AC closer to your wireless router If there is an obstacle between them remove it Please try to use DS 700AC in a ro...

Page 200: ...192 DS 700AC User s Manual Blank page...

Reviews: