background image

31

AUS

1300 777 137 

[email protected] 

www.signifyelectronics.com.au

Basic Operations (cont)

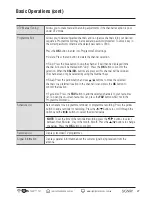
Setup Settings

Language

Allows you to select your desired OSD 

language for on-screen display menu. 

Defaults as English.

TT Language

Teletext*. Choose from West, East, Russian, 

Arabic and Farsi.
*Teletext or Austext is no longer available, 

nor is there any plan for a replacement 

teletext service in Australia. For more 

information, please visit the websites of 

the Australian channel providers. However, 

one teletext option, “closed captions”, is 

still working on most Australian television 

channels. This service allows you to 

activate subtitles while watching normal 

television programmes that provide it.

Audio Language

Can only be selected in DTV mode: 

Select your desired audio language. The 

availability of this function depends on the 

tuned-in channel.

Subtitle Language Can only be selected in DTV mode: Allows 

you to select your desired audio languages. 

Press the  /   buttons to select the 

primary and secondary audio language. The 

availability of this function depends on the 

tuned-in channel. To turn on the subtitle 

display, please press subtitle button on the 

remote.

Hearing Imparied

Select On or Off to set Subtitle Language for hearing impaired mode.

Aspect Ratio

Choose from Auto, 4:3, 16:9, Zoom1 or Zoom2.

PVR File System

Allows you: To check the connected USB storage device in order to store PVR files.  

 To format your USB storage device: The PVR file system can set as FAT32 / FAT64. USB 

storage devices that are 32gb and below will usually be formatted in FAT32, those devices 

above 32gb should be using a FAT64 (exFAT) system. Please see page 37 for instructions 

on how to format your storage device and page 49 for further Trouble Shooting.  

 To set the folder size of timeshifting and PVR: Please check the instructions included with 

your storage device to determine what system your device is formatted in. After setting 

PVR file system size, you are able to start PVR. 

Summary of Contents for EA0815

Page 1: ...AUS 1300 777 137 service unclebills com au www signifyelectronics com au Instruction Manual EA0815 ...

Page 2: ...nings 08 Important Safety Instructions 09 Installation 11 TV Overview 16 TV Connections 18 Remote Control 20 Getting Started 22 Turn On the TV 22 First Time Setup 22 Tuning Setup 23 Basic Operations 24 Selecting an Input Source 24 Main Menu 25 Channel Settings 26 Picture Settings 28 Sound Settings 29 Time Settings 30 Setup Settings 31 Lock Settings 32 ...

Page 3: ...ic Programme Guide EPG 34 Personal Video Recording PVR 35 Important Notes for Using PVR USB Media Function 40 Connecting to a PC 41 Basic Operations 43 Trouble Shooting 50 Important Information about Ultra High Definition 4K TV 52 Customer Support 54 Product Specifications 54 Media Specifications 57 ...

Page 4: ...may have a technical fault we will assist you in rectifying the issue We can generally solve most problems simply and quickly over the phone so please always phone us first We are sure that you will enjoy using this product and you can expect to gain years of service from this product when it is used and maintained in the correct manner Should you encounter any problem before returning the product...

Page 5: ...red to send the product at their own expense to the nearest Signify Authorised Service Centre for repair After the repair the product will be available for collection or return to the purchaser at a fee upon request Signify in home service can be made available at a fee if requested 1 A 6 month replacement warranty is applicable to all accessories such as remotes power adaptors and cables as long ...

Page 6: ...ith The product is purchased in an Auction The product is incorrectly assembled or installed NOTE If any repairs or services requested by the customer are outside of the terms and conditions of this warranty or where a fault is determined to be outside of the terms and conditions of the warranty during an in home service call the customer shall be charged for the cost of the repair and or the in h...

Page 7: ... Signify may charge you for any labour parts or transport costs incurred by Signify or its agent in assessing your claim If you have any issues with this product or require further information please contact our helpful customer support team via phone or email details below The product comes with a full 1 year warranty for your piece of mind In many cases we will resolve the issue without you havi...

Page 8: ...ymbol within an equilateral triangle is intended to alert you to the presence of non insulated dangerous voltage within the product s enclosure that may be of sufficient magnitude to constitute a risk of electric shock to persons The exclamation point within an equilateral triangle is intended to alert you to the presence of important operating and maintenance servicing instructions in the literat...

Page 9: ... in risk of fire or electric shock Unplug this TV during lightning storms or when unused for long periods of time Not doing so may result in risk of fire or electric shock Always grasp the plug when disconnecting the power cord Pulling the cord can damage the internal wire and may cause risk of fire Never touch the power plug with wet hands The TV is not intended for use by persons including child...

Page 10: ...TV from the power supply before cleaning Only use a soft dry and static free cloth for cleaning the cabinet and stand of the TV do not use a damp cloth Never clean with industrial strength polish wax benzene paint thinner air freshener lubricant detergent or other chemicals Wipe off any moisture dirt or dust on the power plug pins with a clean and dry cloth The LED panel used in this product is ma...

Page 11: ...d the TV to a suitable support Only use furniture that is stable and can safely support the TV Ensure the TV does not have any overhang of the supporting furniture Educate children about the dangers of climbing onto the furniture to reach TV controls Do not place the TV on cloth cushions or any other similar materials Never stand on lean on or push the unit or its stand If the furniture has to be ...

Page 12: ...ing Some accessories may be located in cut out sections of the internal packaging so ensure you do not miss any items and discard them by mistake Once all items are removed from the packaging use the list above to check that nothing is missing If any items appear to be missing contact our Signify Warranty Service Hotline 3 Once all accessories have been accounted for prepare a location where you c...

Page 13: ...nd stable Lay a soft cloth or blanket over the surface to protect the screen of the TV NOTE Always unplug the TV from power outlet when assembling or moving the TV 2 Observe the markings L or R on the base stand Ensure the longer leg of each TV base stand is facing outwards from the front of the TV and slide the rectangular section on the top of the TV base stand into the designated slot on the re...

Page 14: ...e for securing the TV stand ONLY If you are wall mounting the TV please consult with qualified personnel for further instructions on installing the bracket and wall support Remove the TV Stand Base from the TV 1 Before removing the TV base stands ensure you have a table or a desk ready to lay the TV on Ensure the surface is flat and clean and lay a soft cloth or blanket over the surface to protect...

Page 15: ...he antenna or TV network should be plugged into the 75Ohm coaxial cable jack at the lower back side of the TV NOTE The antenna cable is not included and can be purchased from all good Electronics retailers 2 If you are using an indoor antenna and the TV reception is not satisfactory you can adjust the position of the antenna but it is strongly suggested to use the outdoor antenna 15 AUS 1300 777 1...

Page 16: ... unclebills com au www signifyelectronics com au TV Overview 1 2 TV Front View and Connections 3 4 5 6 7 8 9 L AUDIO R VIDEO White Red 11 12 TV Back View and Connections 13 14 15 16 17 18 19 20 21 Yellow Green Blue Red Orange 10 ...

Page 17: ...the volume level or move right 9 POWER 10 POWER CABLE INPUT 11 HEADPHONES OUTPUT 12 HDMI1 V2 0 supports UHD resolution 13 HDMI2 V2 0 supports UHD resolution 14 PC AUDIO INPUT 15 VGA INPUT 16 AV INPUT COMPOSITE Connect to basic AV devices such as VCR DVD or camcorder 17 COAXIAL OUTPUT Digital output to AV receiver 18 2 x USB INPUT 19 Y Pb Pr INPUT COMPONENT Supports both SD Standard Definition and ...

Page 18: ...able or adaptor for the connection and the R AUDIO L terminal on DVI for sound output NOTE Some devices connected with HDMI might not recognise a TV with Ultra HD and might not work correctly or show distorted picture or sound Please note that this is not a product fault of the TV ARC Audio Return Channel Connect a HDMI cable from an external digital audio system ARC enables the TV to directly out...

Page 19: ...e RCA audio cables by connecting the R Right red and L Left white and CVBS yellow video cables into the corresponding coloured video input on the rear of the TV Connect the other ends to corresponding audio and video out connectors to the external AV device NOTE Colours for video inputs and cables must correspond on both devices VGA and Audio Connect a VGA cable not included and 3 5mm audio cable ...

Page 20: ...e remote control point it towards the IR sensor at the front of the TV The remote control can work up to a range of approximately five metres from the TV and at an angle of up to 30 each to the right and left of the IR sensor The operating distance may vary according to the brightness of the room The remote control will not operate if the path is blocked Do not drop step on or otherwise impact the...

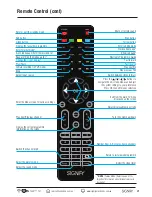
Page 21: ... favourites programme Change the size of display Initiate recording in PVR mode Enter the menu screen for various settings Play next Previous channel Select input source Go to index page Enter the recorded list Display the current programme information on the screen Select the sound mode Reveal or hide the hidden words Enter Teletext mode Play Pause Stop Select the picture mode Exit from the main ...

Page 22: ...NT Make sure the power cord is in good working order before inserting it fully into the outlet Do not use a damaged power cord or plug and do not try to insert the power cord into a loose outlet First Time Setup 1 When you turn on the TV for the first time or you have reset the TV to its factory settings the First Time Setup menu will pop up on the screen to assist you set up your TV as illustrate...

Page 23: ...lable when Scan Type Network Scan is selected Symbol Rate Only available when Scan Type Network Scan is selected Sorting by LCN Logical Channel Numbers LCN s are used in Australia to identify broadcasters and services some of which may not be present at all times 1 Select Start by pressing the OK button to activate Auto Scan After the scan has complete the channels are then arranged in a preset or...

Page 24: ...D resolution HDMI2 V2 0 supports UHD resolution HDMI3 V1 4 supports full HD 1080p resolution USB 2 x USB input Selecting an Input Source Press the INPUT button on the remote or on the lower right side of the front panel on the TV to display the input source list on the TV Press the buttons to select the desired input source and then press the OK button to confirm your selection NOTE When you switc...

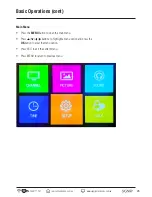
Page 25: ...electronics com au Basic Operations cont Main Menu Press the MENU button to open the main menu Press buttons to highlight a menu option and press the OK button to enter the menu option Press EXIT to exit the current menu Press MENU to return to previous menu ...

Page 26: ... select the desired country and mode then move to START to start scanning NOTE If ATV DTV is selected the first 50 of the scan will be for ATV tuning the second half will be for DTV tuning If required the user has the option to exit the tuning process at any time by pressing the EXIT button ATV Manual Tuning Allows you to make manual fine tuning adjustments if the channel reception is poor under A...

Page 27: ...ill be skipped The channel can only be selected by using the Number Keys Swap Press the yellow button and use buttons to move the selected channels to a preferred location in the channel list and press the OK button to confirm the location Favourites Press the FAV button to add the selected channels to your favourites list To open the on screen favourites list press the FAV button whilst not in th...

Page 28: ... soft edges Colour Temp Choose from Warm Cold and Normal Noise Reduction Choose interference noise modes from Off Low Medium and High Screen Press the ENTER button to select main menu to adjust the screen only available in PC Dynamic CR When Dynamic Contrast Dynamic CR is turned on the TV automatically adjusts the brightness of the TV backlight in response to the image being projected However deta...

Page 29: ...e of the left or right speaker Auto Volume Enables you to apply moderate sound control to avoid sudden volume increases when switching between broadcast channels or during commercials When it is turned On unexpected volume increases in the sound modulation are decreased Surround Sound Choose from SRS TruSurround TruSurround and Off SPDIF Transmits digital audio to an external audio system Choose f...

Page 30: ...lock 02 Jan 07 26 Time Zone Berlin GMT 1 Sleep Timer Off r e m i T f f O r e m i T n O Auto Standby 4H OSD Timer 15S Swap Back MENU Exit EXIT Adjust Time Settings Sleep Timer Ensure the actual time is first set before using this mode Press the buttons to select a period of time after which the TV automatically switches to standby mode 10min 20min 30min 60min 90min 120min 180min 240min or Off The t...

Page 31: ...ected in DTV mode Allows you to select your desired audio languages Press the buttons to select the primary and secondary audio language The availability of this function depends on the tuned in channel To turn on the subtitle display please press subtitle button on the remote Hearing Imparied Select On or Off to set Subtitle Language for hearing impaired mode Aspect Ratio Choose from Auto 4 3 16 ...

Page 32: ...l Lock Parental Guidance and Hotel Mode will be enabled and applied Set Password If you had already changed the password enter the current password Channel Lock Enter the password You can use the Channel Lock to lock selected channels the system lock must be set to On for this function to operate Press the buttons to select the desired channel and then press the green button on the remote control ...

Page 33: ...ormation or no information at all the function will not operate Selections are No Block Block All Block G Block PG Block M Block MA Block AV Block R NOTE Once the Parental Guidance mode is turned On you can set viewing restrictions for DTV TV reception only but not input source from HDMI or component NOTE The program rating threshold will block access to any programmes and channels with the select...

Page 34: ...ore you can view any EPG information you have to activate each channel for which you want to view programme information To do this press the buttons to select a channel in the left column then press OK button to confirm Press the buttons to switch between rows Press the buttons to select a different channel programme in the list and press OK button to activate the channel Press the yellow button t...

Page 35: ...ramme To stop recording press the REC button again to bring up operations dialogue window as below then press the buttons until Stop is highlighted and press the OK button Press the button to confirm the stoppage of the recording Option 2 Scheduled Recording in DTV mode Refer to the instructions under Scheduled Record on page 39 to start scheduled recording by EPG schedule CAUTION DO NOT remove th...

Page 36: ... another channel or select another function while in recording mode The file recorded can only be used in this TV Do not copy it to any other device Play Pause Fast Backward Fast Forward NOTE There are 4 speeds to which the TV can fast backward fast forward the playback file x2 x4 x8 x16 To change speeds press the or button until the required speed is acquired Skip backward to previous file or ski...

Page 37: ...ause fast forward or rewind the live TV programme Personal Video Recording PVR cont Timeshifting in DTV Mode The timeshift function allows you to pause the live TV signal then resume playback at your convenience Ensure that a formatted USB storage device has been inserted to the TV USB port When watching a programme in DTV mode press the button to initiate the timeshifting function and pause the T...

Page 38: ...be altered unless you perform re formatting Scheduled and Manual Recording will still take priority on disk if there is not enough space on the disk Select Disk Select the ports connected to your USB storage device indicated as C or D If 1 or 2 is indicated there is nothing connected to the port Check PVR File System Select Start to check the PVR File on the USB storage device The display will sho...

Page 39: ...ess the OK button to open the calendar and set the start date YYYY MM DD Press the button to key in the start time hours minutes using the number buttons on the remote control End Time date Press the OK button to open the calendar and set the end date YYYY MM DD Press the button to key in the end time hours minutes using the number buttons on the remote control Save the setting and return to the p...

Page 40: ...ting the USB storage device ensure the TV is not in USB mode otherwise the USB device or the files stored in it may be damaged Ensure any USB storage devices connected to the TV do not use exceed 500mA power rating In order to operate a desktop type of hard drive with the TV you will need to use a compatible power adaptor Ensure the format of the photos movies and text files are within the support...

Page 41: ... refer to the PC instruction manual for the required setting that needs to be selected 4 Turn on the PC NOTE This connection and power up sequence is very important as it will ensure both devices are protected from power spikes NOTE A HDMI cable not included can also be used to connect your PC to the TV as long as the PC is fitted with a HDMI output Both sound and picture will be generated through...

Page 42: ...the INPUT button on the remote control or on the right side of the TV to display the Source menu press the buttons to select the USB source then press the OK button to confirm to exit Media Centre press the INPUT button to return to other sources NOTE To play any file in the PVR Folder please press the Index button to view the list of recorded programmes Playable File Format Photo jpg jpeg Music m...

Page 43: ...gate through the below on screen buttons by pressing the buttons on the remote and then pressing the OK button to activate the corresponding function Play Pause the slideshow This function can also be activated by pressing the button on the remote Skip to the previous photo This function can also be activated by pressing the button on the remote Skip to the next photo This function can also be act...

Page 44: ...ime refers to when the file was loaded onto the USB disk mobile hard disk Rotate the image 90º clockwise Rotate the image 90º anti clockwise Zoom in up to 3 different sizes 2x 4x or 8x Zoom out up to 2 different sizes x x Navigate move the point of view by pressing the buttons on the remote Press the OK button again to exit the Move View function NOTE This function will only activate when zoomed i...

Page 45: ...ate the corresponding function Play Pause the audio file This function can also be activated by pressing the button on the remote Rewind the current audio file by up to 4 speeds 2x 4x 8x 16x This function can also be activated by pressing the button on the remote Fast forward the current audio file by up to 4 speeds 2x 4x 8x 16x This function can also be activated by pressing the button on the rem...

Page 46: ...o Displays general information on the audio file to which is currently playing including Album Title Bit Rate Artist Sampling Year and Size Goto Time Using the buttons and numerical keypad on the remote navigate through the on screen display to input the desired time to skip to NOTE Invalid Operation will show on screen if the input time exceeds the length of the audio file ...

Page 47: ...rresponding function Play Pause the video file This function can also be activated by pressing the button on the remote Rewind the current video file by up to 5 speeds 2x 4x 8x 16x 32x This function can also be activated by pressing the button on the remote Fast forward the current audio file by up to 5 speeds 2x 4x 8x 16x 32x This function can also be activated by pressing the button on the remot...

Page 48: ...ges Subtitles may not always be available Check with the manufacturer if the desired video file includes subtitles Slow down the current audio file by up to 4 speeds 2x 4x 8x 16x Manually control the frame by frame playback Every time the OK button is pressed the video file will step forward by 1 frame Using the buttons and numerical keypad on the remote navigate through the on screen display to i...

Page 49: ...s the button to start a slide show Navigate through the below on screen buttons by pressing the buttons on the remote and then pressing the OK button to activate the corresponding function Skip to the previous page This function can also be activated by pressing the button on the remote Skip to the next page This function can also be activated by pressing the button on the remote Skip to the previ...

Page 50: ...io settings are properly set Ensure the volume is not muted If it is press the MUTE button on the remote control to restore the sound Check antenna position direction and connection If earphones are connected unplug them Adjust the volume to a suitable level by pressing the VOL VOL button No operations can be performed with the remote control unit Check the batteries are correctly installed The ba...

Page 51: ... the equipment Check antenna position direction and connection Horizontal vertical stripe on picture or picture is shaking Check the indoor antenna position direction and connection Can t play the USB device Please refer to page 40 for Important notes for Using PVR USB Media Function If the problem cannot be solved the USB storage device may not be formatted correctly To format the USB storage dev...

Page 52: ...nsoles computers can out put 4K signal To see if your unit can output 4K signal check the specifications of the product or contact the manufacturer for details 4K Photo 4K Output Connection Device Content Native Resolution Up Conversion HDMI USB Computer No No No No No No 4K Blu ray Disc Player No No No No No No Digital Still Camera Yes No No No Yes Yes 4K Video Camera No No No No No No 4K Media P...

Page 53: ...s may not be supported by your PC TV box or media player 4 Make your own via 4K camcorder or action cameras and play back via HDMI ports Note Please ensure you use HDMI cable which is 4K compatible NOTES 4K files can not be played via USB ports For detailed media file compatibility for USB port please see page 57 For HDMI connection use a cable that corresponds to HDMI1 4a HDMI1 and HDMI2 ports su...

Page 54: ...act us directly Our friendly technical support team will be happy to assist you In the event that the product has technical issue and is unrepairable we will provide you a Return Authorisation Number if the faulty product needs to be returned to store Customer Support Team 1300 777 137 Hours of Operation 9am 4 30pm Monday Friday 9am 3pm Saturday Hours of Operation are Australian Eastern Standard T...

Page 55: ...576i 576p 720p 1080i 1080p 2160i 2160p 3D De interface Yes 3D Com Filter Yes FEATURES OSD Language English French German Italian Spanish Portuguese optional Picture size 16 9 4 3 PVR YES HDMI 2 0 and 1 4 OTHER EPG Subtitle LCN TELETEXT Europe MHEG 5 UK TV Input ATV DVB T DVB C Video System ATV PAL SECAM DTV MPEG 2 MP ML MPEG 2 MP HL H 264 Sound System ATV BG DK I L L NICAM A2 DTV MPEG 1 layer 1 2 ...

Page 56: ...www signifyelectronics com au Product Specifications cont AUDIO Audio Output 10W x 2 Stereo Yes POWER Working Power consumption 120W AC Power Supply AC 100 240V 50 60Hz ACCESSORIES Remote Control Yes User Manual Yes Batteries for Remote Control Yes ...

Page 57: ... MP3 AAC AC3 not compatible mpg mpeg MPEG 1 MPEG 2 MP1 MP2 MP3 AAC AC3 not compatible mkv MPEG 2 4 H 264 Xvid RV30 RV40 VC 1 MP3 AAC PCM AC3 not compatible mov MPEG 4 H 264 MJPEG MP3 AAC PCM AMRNB AC3 not compatible dat MPEG 1 MP1 vob MPEG 2 MP1 MP2 MP3 PCM AC3 not compatible The maximum resolution and frame rate 1080p 30fps Max data rate 20Mbps rm rmvb RV30 RV40 AAC COOK The maximum and frame rat...

Page 58: ...s cont Codec Remark Media File Ext Video Audio Music mp3 N a MP3 Max resolution 1920 x 1080 wmv N a PCM Sample Rate 32K 48KHz Bit Rate 32K 320Kbps Channel Mono Stereo mp4 aac m4a N a AAC Sample Rate 8K 48KHz Bit Rate 24K 384Kbps Channel Mono Stereo Text txt ANSI UNICODE GB UTF8 File Size Max 10MB ...

Page 59: ...59 AUS 1300 777 137 service unclebills com au www signifyelectronics com au Notes ...

Page 60: ...60 AUS 1300 777 137 service unclebills com au www signifyelectronics com au Notes ...

Page 61: ... TV Artwork Size 148 x 210mm 3mm BLEED Item Code TBA UBA AMENDMENTS I DATE 18 11 16 UB MODIFIED Ben Factory channel ARTWORK SIGN OFF PRINTER FILE LOW RES DO NOT PRINT CATCHLINE C M Y K SIGNATURE SIGNATURE ...

Reviews: