O P E R A T I N G I N S T R U C T I O N S
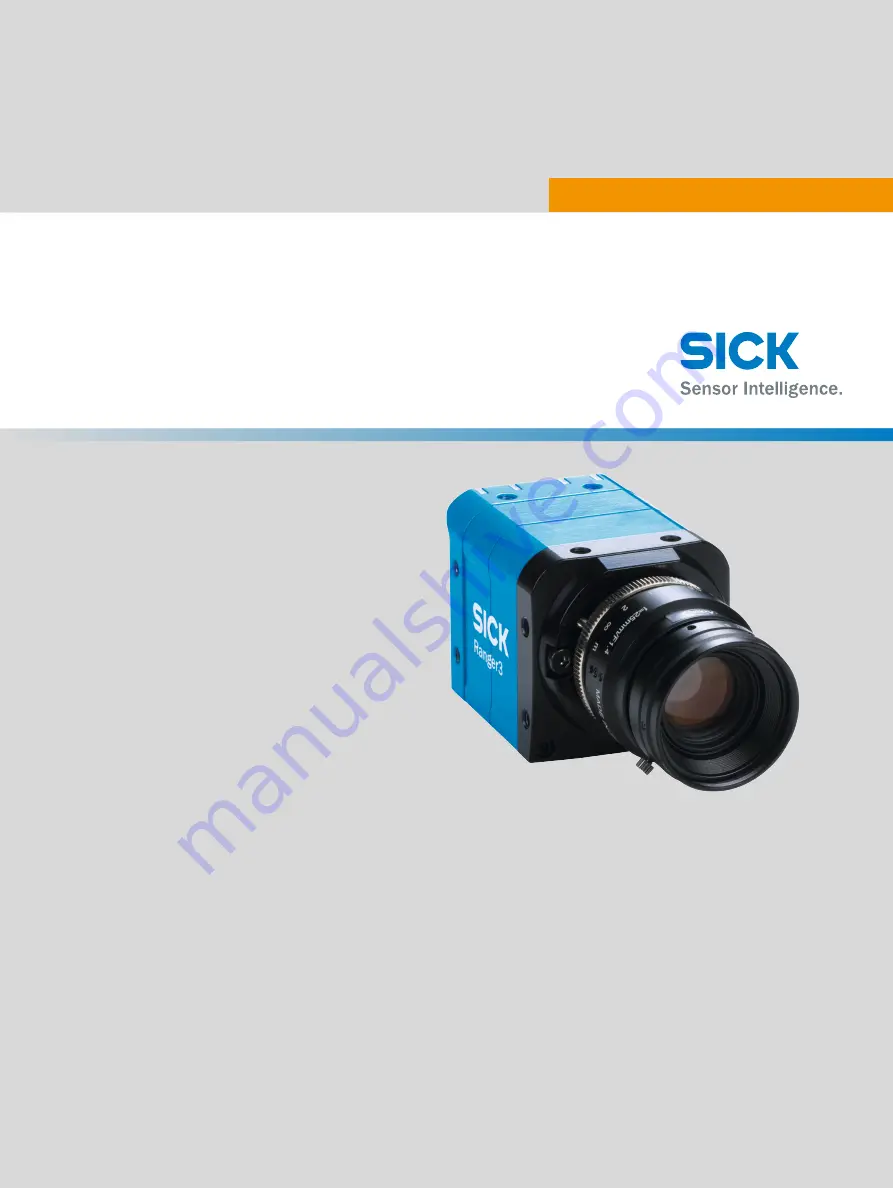
Ranger3
3D vision
Page 1: ...O P E R A T I N G I N S T R U C T I O N S Ranger3 3D vision ...
Page 2: ... within the limits of the legal determination of Copyright Law Any modifica tion abridgment or translation of this document is prohibited without the express writ ten permission of SICK AG The trademarks stated in this document are the property of their respective owner SICK AG All rights reserved Original document This document is an original document of SICK AG 2011 65 EU 2 O P E R A T I N G I N...
Page 3: ... Standards 13 3 4 1 GenICam 13 3 4 2 GigE Vision 13 4 Transport and storage 14 4 1 Transport 14 4 2 Unpacking 14 4 3 Transport inspection 14 4 4 Storage 14 5 Mounting 16 5 1 Mounting instructions 16 5 2 Required parts 16 5 3 Mounting the camera 16 5 3 1 Mounting an optical filter or a Scheimpflug adapter 17 6 Electrical installation 18 6 1 Wiring notes 18 6 2 Security 18 6 3 Connecting the camera ...
Page 4: ...ncoder 33 7 11 4 Frame triggering 34 7 12 Chunk data 35 7 13 Features 35 7 13 1 Device control 36 7 13 2 Image format control 38 7 13 3 Scan 3D control 39 7 13 4 Acquisition control 40 7 13 5 Digital I O control 41 7 13 6 Timer control 41 7 13 7 Encoder control 42 7 13 8 Event control 42 7 13 9 File access control 42 7 13 10 Chunk data control 43 7 13 11 Test control 43 7 13 12 Transport layer con...
Page 5: ...ntenance 67 9 1 Maintenance plan 67 9 2 Cleaning 67 10 Troubleshooting 68 10 1 Over triggering 68 10 2 Encoder line trigger setup tips 68 10 3 Network card settings 68 10 4 Rescue mode 68 10 5 Repairs 69 10 6 Returns 69 11 Decommissioning 70 11 1 Disposal 70 12 Technical data 71 12 1 Product data 71 12 2 Features 71 12 3 Performance 71 12 3 1 Light sensitivity 71 12 3 2 Maximum line rate 72 12 4 I...
Page 6: ...80 15 1 4 Main geometries 80 15 1 5 Sensor coordinate system 82 15 2 Recommended network card settings 83 15 2 1 Connecting multiple cameras 84 15 3 Connecting encoders 84 15 4 EU declaration of conformity Certificates 86 15 5 Scheimpflug adapters 86 CONTENTS 6 O P E R A T I N G I N S T R U C T I O N S Ranger3 8020774 14IM 2019 07 SICK Subject to change without notice ...
Page 7: ...n operating the machine or system in which the device is integrated For information about this refer to the operat ing instructions of the specific machine 1 2 Explanation of symbols Warnings and important information in this document are labeled with symbols The warnings are introduced by signal words that indicate the extent of the danger These warnings must be observed at all times and care mus...
Page 8: ...e to improper use Any improper use can result in dangerous situations Therefore observe the following information Device should be used only in accordance with its intended use All information in these operating instructions must be strictly observed 2 3 Limitation of liability Applicable standards and regulations the latest state of technological development and our many years of knowledge and ex...
Page 9: ...ork Safety Regu lations e g Master Electrician Other relevant regulations applicable in other countries must be observed The following qualifications are required for various activities Table 1 Activities and technical requirements Activities Qualification Mounting maintenance Basic practical technical training Knowledge of the current safety regulations in the workplace Electrical installation de...
Page 10: ...s voltages on metallic surfaces such as the housing Electrical voltage can cause severe injury or death Work on electrical systems must only be performed by qualified electricians Follow the notes in the operating instructions Install the grounding for the product and the system in accordance with national and regional regulations 2 7 Laser safety Whenever a laser module is used in combination wit...
Page 11: ...he image below the colors represent depth Figure 1 Example of 3D image 3 2 Measuring with a 3D camera Each time the 3D camera makes a measurement it measures along a cross section of the object in front of it The result of a measurement is a profile containing one value for each measured point along the cross section for example the height of the object along its width For the camera to measure an...
Page 12: ...t retrieves the profiles and processes the measurement data in them Before the camera can be used in a machine vision system the following needs to be done Find the right way to mount the camera and lighting Configure and optionally calibrate the camera to make the proper measure ments Write the application that retrieves and processes the profiles sent from the cam era For more information about ...
Page 13: ...SFNC Standardized names and types for common device features GenTL Transport layer interface for grabbing images GenTL SFNC Standardized names and types for transport layer interface For further information see www emva org standards technology genicam 3 4 2 GigE Vision GigE Vision is a camera interface standard that is based on the Gigabit Ethernet com munication protocol The GigE Vision standard...
Page 14: ...ntering 4 3 Transport inspection Immediately upon receipt in Goods in check the delivery for completeness and for any damage that may have occurred in transit In the case of transit damage that is visible externally proceed as follows Do not accept the delivery or only do so conditionally Note the scope of damage on the transport documents or on the transport com pany s delivery note File a compla...
Page 15: ...storage periods of longer than 3 months check the general condition of all components and packaging on a regular basis TRANSPORT AND STORAGE 4 8020774 14IM 2019 07 SICK O P E R A T I N G I N S T R U C T I O N S Ranger3 15 Subject to change without notice ...
Page 16: ...net cable for Gigabit Ethernet with M12 connector for the camera Power supply Line projecting laser 5 3 Mounting the camera When measuring range the camera is used together with a line projecting laser that illuminates the cross section of the object to be measured The camera and the laser are mounted so that the laser illuminates the object from one direction and the cam era views the object from...
Page 17: ... a Scheimpflug adapter On delivery there is a dummy filter in the camera to protect the sensor When you mount an optical filter or a Scheimpflug adapter you remove the dummy filter so that the sensor is unprotected Make sure to be in a dust free environment and pay special attention to cleanliness Mounting an optical filter 1 Use the provided tool and remove the dummy filter 2 Mount the optical fi...
Page 18: ...n the electrical sys tem If the cable insulation is damaged disconnect the voltage supply immediately and have the damage repaired Ensure that the ground potential is the same at all grounding points Where local conditions do not meet the requirements for a safe earthing method take appropriate measures e g ensuring low impedance and current carrying equipotential bonding Only skilled electricians...
Page 19: ...E The function of the camera is not tested and guaranteed for Power I O cables longer than 10 meters NOTE Use only shielded cables The shield has to be terminated at both ends of the cable There are two connectors on the back of the camera Gigabit Ethernet GigE and Power I O see figure 4 page 20 To prepare the camera for operation do as follows 1 Remove the protection caps that cover the connectio...
Page 20: ... Input A Default RS422 TTL 7 Reserved 8 Reserved 9 Not connected 10 FRAME TRIGGER IN 24 V Frame trigger input or configurable 24 V Input Output Default Frame trigger input 11 ENC IN B Encoder Input B Default RS422 TTL 12 ENC IN B Encoder Input B Default RS422 TTL 13 LASER STROBE OUT11 5 V trigger output for Laser or Strobe 14 LASER STROBE OUT21 5 V trigger output for Laser or Strobe 6 ELECTRICAL I...
Page 21: ...a single channel encoder connect it to Encoder Input A A pin 5 and 6 Table 3 Signal levels for Power I O connector Signal Pins Low High Remark 24 V inputs 10 15 16 17 0 9 V 12 5 V_Supply Pulldown 22 5 kΩ TTL 5 6 11 12 0 0 8 V 2 V V_Supply RC termination 112 Ω 340 pF 24 V outputs 16 17 Output type Push pull Max output cur rent 100 mA 5 V outputs 13 14 Output type Push pull GigE connector 1 7 2 6 5 ...
Page 22: ...e mode due to software problems or overheating For more information see Rescue mode page 68 Link Data Off No Ethernet connection O Green Connection established 1 gigabit s Ö Green Ethernet frames are being transmit ted or received Laser O Green Laser output active Not imple mented O illuminated Ö flashing 6 ELECTRICAL INSTALLATION 22 O P E R A T I N G I N S T R U C T I O N S Ranger3 8020774 14IM 2...
Page 23: ...eployment kit SDK can be downloaded from the SICK Support Portal supportportal sick com 1 Log in to the SICK Support Portal 2 Navigate to the Ranger3 product page 3 Under Releases click the link corresponding to the latest version of the Ranger3 SDK 4 Download the SDK zip file 5 Unzip the SDK and follow the instructions in the README txt file The SDK contains the Ranger3 Studio software applicatio...
Page 24: ...res related to the usage of quadrature encoders EventControl Contains the features related to the generation of Event notifications by the device FileAccessControl Contains the File Access control features Scan3dControl Contains the features related to the control of the 3D scan features ChunkDataControl Contains the features related to the Chunk Data Control TestControl Contains the features rela...
Page 25: ... area This corner has the coordi nates 0 0 in the imager x y coordinate system All measures are given in pixels NOTE In GenICamTM devices such as Ranger3 imager coordinates are defined as x y In more general terms image sensor coordinates are usually defined as u v see Sensor coordinate system page 82 OffsetY OffsetX Width Height Y X 0 0 Figure 5 Image area and 2D region The 2D intensity image is ...
Page 26: ...ault which means that high values in the range data correspond to low values on the imager Y axis If the parameter is set to Standard high range values correspond to high values on the imager Y axis and the visu alized 3D object appears upside down See figure 8 and figure 9 for examples Figure 8 RangeAxis set to Reversed Figure 9 RangeAxis set to Standard 7 4 3 Device scan type The camera can be c...
Page 27: ...r decreasing the number of enabled components 7 5 Exposure time and measurement speed Once the height of the sensor region is set there are two other parameters that affect the line rate of the camera AcquisitionLineRate The rate at which the lines in a frame are captured Hz Only applicable when the camera is in free running mode ExposureTime The time μs during which the sensor region is exposed T...
Page 28: ...Start signals is 1 maximum Acquisi tionLineRate The higher the line rate the shorter the cycle time TimerDuration LineStart LaserStrobeOut SensorTrigger t2 ExposureTime t1 t0 Figure 10 Laser is on only during exposure 7 7 3D profiling 7 7 1 Laser impact position on the sensor The basic function of the 3D measurements is to compute the impact position of the laser line for all columns of the select...
Page 29: ... high not all laser peaks will be registered This will result in an image where some parts are missing Intensity 1 ROI start 4 ROI end 3 Sensor row 2 DetectionThreshold 6 6 5 Figure 12 Analog signal with noise 1 Intensity 2 Sensor row 3 ROI end 4 ROI start 5 Detected peak 6 Not detected peaks 7 8 3D data formats The 3D data is delivered with 4 subpixel bits resolution The data can be represented w...
Page 30: ...ark areas in a scene HDR is suitable for improving the localization of the laser line when acquiring images containing both dark and bright materials such as bright objects towards a dark background or dark objects with bright prints Figure 13 Acquisition of profiles Figure 14 Resulting profile linear non HDR mode Figure 15 Resulting profile HDR mode Ranger3 uses an HDR principle called multiple s...
Page 31: ... be done in parallel For example If the readout time is 33 μs and the exposure time is 30 μ the total cycle time is 33 μs for linear mode and 63 μs for HDR For information about how to enable HDR imaging for Ranger3 see Enabling HDR imaging page 59 7 11 Triggering Triggering is used to control the initiation and rate of data acquisition Different trigger ing concepts and modes are presented below ...
Page 32: ... triggering concept are only applicable for 3D images while the 2D image triggering concept is only relevant for 2D images Frame triggering The camera will acquire frames based on an external input signal for example from a photoelectric switch The acquisition of profiles can either be free running or triggered by an input signal as described in the sections Free running and Line triggering below ...
Page 33: ...el encoder The default definition of a pulse is a full four phase cycle on the encoder inputs This gives a pulse counter that is robust to jitter and noise on the inputs A four phase encoder can handle movements in both directions forward and back ward The camera can be configured to react to the pulses in different ways resulting in different ways to trigger profiles The different line triggering...
Page 34: ...the state of the Frame trigger signal and the settings of the acquisition control parameters See the table and the figure below Parameter settings TriggerSelector FrameStart TriggerMode TriggerSelector Off The camera acquires profiles continuously TriggerSelector FrameStart TriggerMode TriggerSelector On The acquisition of a new series of profiles that is captur ing of a new frame starts each time...
Page 35: ... class IBoolean corresponds to the data type boolean The Visibility column defines which user that sees a feature in the parameter editor see Parameter editor page 47 Note that the visibility level of some standard fea tures has been adjusted compared to the recommended setting The Access column defines if the feature is readable R writeable W or both RW R W means that for some selector values the...
Page 36: ...mmable device identifier Beginner RW DeviceSFNCVersionMajor int Major version of the Standard Features Naming Con vention that was used to create the device s GenICam XML Expert R DeviceSFNCVersionMinor int Minor version of the Standard Features Naming Con vention that was used to create the device s GenICam XML Expert R DeviceSFNCVersionSubMinor int Sub minor version of Standard Features Naming C...
Page 37: ...fails Values Primary Secondary Expert R DeviceNextBootPath enum The boot path that will be used after the next soft reset1 This is normally set to secondary to boot the res cue version of the system if an unexpected reset occurs Values Unknown Primary Secondary Guru R DeviceBootCount int Accumulated number of times the device has been booted Beginner RO DeviceOperationTime int Accumulated operatio...
Page 38: ...nd streaming Values Off On Expert R ComponentEnable RegionSelec tor ComponentSelector bool Controls if the selected component streaming is active Expert RW PixelFormat RegionSelector Com ponentSelector enum Format of the pixels provided by the device Values Mono8 Coord3D_C8 Mono12p Mono16 Coord3d_C16 Expert R W TestPattern RegionSelector Com ponentSelector enum Selects the type of test pattern tha...
Page 39: ...apt to the laser peak width on the sensor Values Small size 7 pixels peak width 2 4 pixels Normal size 15 pixels peak width 3 8 pixels default Large size 31 pixels peak width 7 15 pixels Beginner RW DetectionThreshold Scan3dEx tractionSelector int Minium reflectance signal that can be detected as a peak position A higher value reduces detectability of weak peaks reflections on dark material and a ...
Page 40: ...um Specifies the internal signal or physical input line to use as the trigger source The selected trigger must have its TriggerMode set to On Values Encoder FrameTriggerInput LineStart LineTrigger Input Beginner R TriggerActivation TriggerSelector enum Specifies the activation mode of the trigger Values RisingEdge LevelHigh Beginner R W TriggerDelay float Specifies the delay in microseconds to app...
Page 41: ...Inverter LineSelector bool Controls the inversion of the selected input or output line The line signal is inverted if checked i e set to true Expert RW 7 13 6 Timer control Table 22 Test control standard SFNC selector Selector Type Description Visibility TimerSelector enum Select the laser or sensor trigger output to configure Values LaserStrobe1Timer LaserStrobe2Timer Expert Table 23 Test control...
Page 42: ...ue Off Expert RW Table 25 Encoder control standard SFNC command Command Description Visibility Access EncoderReset Does a software reset of the selected encoder and starts it The encoder starts counting events immedi ately after the reset Expert W 7 13 8 Event control Table 26 Event control standard SFNC selector Selector Type Description Visibility EventSelector enum Selects which Event to signal...
Page 43: ...r Write operations the number of success fully read written bytes is returned Guru R FileOpenMode FileSelector enum Selects the access mode in which a file is opened in the device Values Read Write ReadWrite Guru RW FileSize FileSelector int The size of the selected file in bytes Guru RW Table 30 File access control standard SFNC commands Command Description Visibility Access FileOperationExecute ...
Page 44: ...l Guru R GevSCPHostPort int Controls the port of the selected channel to which a GVSP transmitter must send data stream or the port fromwhich a GVSP receiver may receive data stream Guru R GevSCPSPacketSize int Specifies the stream packet size in bytes to send on the selected channel for a GVSPtransmitter set by negotiation between the device and PC during connec tion or specifies the maximum pack...
Page 45: ...ration scheme Expert RW GevPersistentDefaultGateway int Controls the persistent default gateway for this logical link It is only used when the device boots with the Per sistent IP configuration scheme Expert RW GevTimestampTickFrequency int The timestamp tick frequency in Hz Used for time stamping frames chunks and events Expert R GevDiscoveryAckDelay int Indicates the maximum randomized delay the...
Page 46: ...era and instantly see how the changes affect the measurement result The GUI is therefore useful for finding the best parameter settings for a certain application Once the camera has been set up to deliver measurement data that meets the require ments the settings can be saved in a parameter file on the PC 8 1 1 Menus Figure 20 Menus Four menus are available The File menu includes the following alt...
Page 47: ... search field in the upper left corner Figure 22 Parameter editor Visibility options The visibility options Beginner Expert and Guru defines which features that are shown in the Parameter editor They are described in the table below Table 37 Visibility options Beginner Basic features that are enough to operate the camera Expert In addition to the basic features also features that require a more in...
Page 48: ... a locked input field to unlock it and stop the image acquisition 8 1 2 1 Visibility options The visibility options Beginner Expert and Guru defines which features that are shown in the Parameter editor They are described in the table below Table 38 Visibility options Beginner Basic features that are enough to operate the camera Expert In addition to the basic features also features that require a...
Page 49: ...you want to connect to a camera that is not on the same subnet as the NIC see Rec ommended network card settings page 83 Then you have to reconfigure the cam era to the same subnet before you can connect to it Figure 25 Workflow step Cameras Image Here you view the 2D image data This is what the camera sees when it is used as an ordinary camera OPERATION 8 8020774 14IM 2019 07 SICK O P E R A T I N...
Page 50: ...the image handling controls to manipulate regions and perspective when viewing images As an alternative to the buttons you can use a mouse with a scroll wheel as described below Button Name Description Select Click and drag to change the size and position of the image Shortcut command Ctrl Q 8 OPERATION 50 O P E R A T I N G I N S T R U C T I O N S Ranger3 8020774 14IM 2019 07 SICK Subject to chang...
Page 51: ...original viewing position Z X Y Figure 28 3D navigation control 8 1 4 1 Pointer information If you use the Select image handling control and move the mouse pointer over the image area some information is shown For a 2D image the coordinates and the inten sity value of each point are displayed This information is useful for example when you set the height of a region see Setting sensor region page ...
Page 52: ...ns network statistics such as lost data Figure 32 Statistics tab 8 1 7 General information At the bottom of the screen the following information is shown Model of the device Name of the device DeviceUserID IP address of the device MAC address of the device Serial number of the device Software version Frame ID of the image that is currently displayed NOTE The frame ID is reset each time the camera ...
Page 53: ...e device see Editing IP settings page 53 e Click Connect When the device is connected the Image workflow step is displayed and the Para meter editor opens 3 In the Image workflow step click Start to view the 2D images and the laser line 8 2 1 1 Editing IP settings Before you connect to the camera you can set non persistent IP address subnet mask and gateway These settings will be lost if the camer...
Page 54: ...nd GevPersis tentDefaultGateway parameters 3 Re start the camera to apply the updated parameters 8 2 2 Adjusting focus Workflow step Image When the camera is connected look at the 2D image and the laser line and do the fol lowing adjustments 1 If needed adjust the tilt of the camera so that the laser line is horisontal in the image This is to make sure that the laser line appears along the sensor ...
Page 55: ...ile menu select Export configuration 2 Find a place to store the file name it and click Save The parameter settings are saved as a csv file 8 2 5 Editing parameters Workflow step Image Data collection When you adjust the parameters you look at the 2D or 3D image to see the result You can take a snapshot after each adjustment and compare the images to find the best configuration You cannot edit the...
Page 56: ... is not visible see the figure in the middle below Figure 34 Too short exposure time Laser line hardly visible Figure 35 Normal exposure time Laser line bright but not saturated No background visi ble Figure 36 Too long exposure time Laser line wide and saturated The background is visi ble 3 Set RegionSelector to Region1 4 Set the ExposureTime parameter to the same value as for Region0 This will g...
Page 57: ...ive visible noise 6 Turn the laser on 8 2 5 3 Setting sensor region Workflow step Image To adjust the height and position of the sensor region that is used to generate the 3D image data Region1 see Extraction regions page 25 follow the steps below NOTE For best image quality make sure that the whole width of the laser line is within the region NOTE The values of the Height and OffsetY parameters m...
Page 58: ...witch to 16 bits data according to the steps below 1 In the Parameter editor set RegionSelector to Scan3dExtraction1 2 Set ComponentSelector to Range 3 Set PixelFormat to Coord3D_C16 8 2 5 4 Enabling reflectance measurements Workflow step Data collection To enable collection of laser reflectance values in addition to the range data follow the steps below 1 Open the Parameter editor and select the ...
Page 59: ...ata collection To enable HDR imaging 1 Open the Parameter editor and select the AcquisitionControl category 2 Set MultiSlopeMode to PresetSoft PresetMedium or PresetAggressive PresetSoft increases the dynamic range by a factor 2 PresetMedium increases the dynamic range by a factor 6 PresetAggressive increases the dynamic range by a factor 15 NOTE Using HDR affects the maximum exposure time In Area...
Page 60: ...Encoder To acquire profiles based on the line trigger input signal select LineTriggerIn put Enabling free running 1 Set the TriggerSelector parameter to LineStart 2 Set the TriggerMode parameter to Off to acquire profiles with a regular time interval 3 To set the acquisition rate For 3D images adjust the AcquisitionLineRate parameter For 2D images adjust the AcquisitionFrameRate parameter Enabling...
Page 61: ...ht map scaling page 64 9 To adjust the scene lighting use the menus and sliders in the GUI see Light con trol page 64 8 2 7 View modes View mode for 2D images For 2D images Intensity is the only available view mode In this mode color is propor tional to the intensity values of the pixels View modes for 3D images When you view a 3D image you can select different ways to color it The following view ...
Page 62: ... proportional to x coordinate Y Color is proportional to y coordinate Z Color is proportional to depth z coor dinate Suitable to show large variations in depth 8 2 8 Color range When you adjust the color range you adjust the interval that will be colored in the image As default the available color spectrum covers the whole range between the minimum and the maximum value of the data If your object ...
Page 63: ...he bot tom of the window 2 To select color or black and white click the Settings symbol 8 2 9 Data presentation Using the Options button you can select different ways to present the image data 1 To view the data as a continuous surface select Surface Figure 45 Data presentation Surface 2 To view the data as a point cloud select Points and use the slider to set the size of the points OPERATION 8 80...
Page 64: ...ure 48 No scaling Figure 49 Scaling of X axis Figure 50 Scaling of Z axis 8 2 11 Light control In the Scene lighting section you can select lighting effects for the dataset Use the Light color list to change the lighting color All colors in the RGB spectrum are available Use the Light direction graph to adjust the position of the scene lighting effect Use the Shininess slider to adjust the shining...
Page 65: ...uring the data collection When recording is active each acquired buffer is streamed to the connected PC and saved in a selected target folder NOTE The recording is automatically stopped when the image acquisition stops 1 Click the correct workflow step Image for recording of 2D buffers Data collection for recording of 3D buffers 2 Click File 3 In the dialog box that appears select a target folder ...
Page 66: ... all log messages click Clear The log messages are always automatically saved as a java log but when you use the Save to file button the saved log will have a different format and you can select the file location 8 2 14 Updating firmware To update the camera s firmware you load an aes file in the following way 1 In the Device menu select Firmware update 2 Find and select the firmware file and clic...
Page 67: ...list Check screw connections and plug connectors Interval depends on the place of use ambient conditions or operational regulations Recommended At least every 6 months Specialist Check that the unused connections are sealed with protective caps or plugs Interval depends on ambient condi tions and climate Recommended At least every 6 months Specialist 9 2 Cleaning NOTICE Equipment damage due to imp...
Page 68: ... trigger This makes it possible to see if the inputs are switching as expected In the EncoderControl section the EncoderValue parameter can be used to see how the encoder input signals are counted by the camera The EncoderReset command will reset the counter to 0 10 3 Network card settings For problems related to the network card settings see Recommended network card settings page 83 10 4 Rescue m...
Page 69: ...ice department without consultation b The device must be sent in the original packaging or an equivalent padded pack aging NOTE To enable efficient processing and allow us to determine the cause quickly please include the following when making a return Details of the contact person Description of the application Description of the fault that occurred TROUBLESHOOTING 10 8020774 14IM 2019 07 SICK O ...
Page 70: ...ste NOTICE Danger to the environment due to improper disposal of the device Disposing of devices improperly may cause damage to the environment Therefore observe the following information Always observe the valid regulations on environmental protection Separate the recyclable materials by type and place them in recycling containers 11 DECOMMISSIONING 70 O P E R A T I N G I N S T R U C T I O N S Ra...
Page 71: ...y triggered 3D measurements Yes Reflectance measure ments Yes Scatter measurements Yes Exposure modes Linear HDR ProFlex Front Yes 12 3 Performance Image sensor SICK CMOS with ROCC technology Active imager size 15360 μm H 4992 μm V Sensor resolution 2560 px x 832 px Pixel size 6 μm x 6 μm Scan frame rate 46000 3D profiles s Scan frame rate full frame 7000 3D profiles s 3D height resolution 16 bits...
Page 72: ...d sensor rows for Ranger3 is shown in figure 56 0 0 100 200 300 400 500 600 700 800 900 1000 1100 Number of rows Line rate kHz 5 10 15 20 25 30 35 40 45 50 1 2 3 4 Figure 56 The maximum line rate as a function of the number of sensor rows used 1 Line rate kHz 2 Number of rows 3 Ranger3 2560 columns 4 Bandwidth limitation for 2560 columns 12 4 Interfaces Configuration software Ranger3 Studio 12 TEC...
Page 73: ...ns Power I O M12 17 pin male Gigabit Ethernet M12 female Connector material Nickel plated brass Supply voltage 24 V DC 20 Power consumption 12 W Current consumption Imax 1 5 A Enclosure rating IP 20 Enclosure rating with lens hood IP 65 67 by ProFlex Front Scheimpflug adapter Yes by ProFlex Front Interchangeable optical fil ter Yes by ProFlex Front Housing material Aluminium Housing color Blue var...
Page 74: ...12 7 Dimensional drawings Figure 57 Ranger3 dimensions 12 TECHNICAL DATA 74 O P E R A T I N G I N S T R U C T I O N S Ranger3 8020774 14IM 2019 07 SICK Subject to change without notice ...
Page 75: ...ccessories and where applicable mounting information can be found online at www sick com Ranger3 ACCESSORIES 13 8020774 14IM 2019 07 SICK O P E R A T I N G I N S T R U C T I O N S Ranger3 75 Subject to change without notice ...
Page 76: ...14 Glossary 14 GLOSSARY 76 O P E R A T I N G I N S T R U C T I O N S Ranger3 8020774 14IM 2019 07 SICK Subject to change without notice ...
Page 77: ...ity intensity The intensity value of the pixels in a 2D sensor image line Contains one value for each measured point along a cross section of the object Same thing as profile line rate The rate at which the lines in a frame are captured Hz NIC Network Interface Card profile Contains one value for each measured point along a cross section of the object Same thing as line reflectance The reflected p...
Page 78: ...a point along the x axis the width of the object the higher up is that point on the object Figure 58 Coordinate system when measuring range 1 Width 2 Transport 3 Range When measuring range there are two angles that are interesting The angle at which the camera is mounted The angle of the incoming light incidence Both angles are measured from the normal of the transport direction The angle of the c...
Page 79: ...5 1 1 Occlusion Occlusion occurs when there is no laser line for the 3D camera to detect in the sensor image Occlusion will result in missing data for the affected points in the measurement result There are two types of occlusion Camera occlusion When the laser line is hidden from the camera by the object Laser occlusion When the laser cannot properly illuminate parts of the object Figure 60 Diffe...
Page 80: ...ller compared with using a lower resolution in the same ROI In general the height range and the resolution depend on the angle between the laser and the camera If the angle is very small the location of the laser line will not vary much in the sensor images even if the object varies a lot in height This results in a large height range but low resolution On the other hand if the angle is large even...
Page 81: ... other geometries Look away The camera and the lighting are mounted on the same side of the surface normal of the object This geometry can be useful for avoiding unwanted reflexes but requires more light than the other methods and gives lower reso lution x y z β α Ordinary Reversed ordinary α β α β Specular Look away As a rule of thumb the height resolution increases with the angle between the cam...
Page 82: ... that the v coordinate of a point that is close to the bottom of the screen v1 is greater than the v coordinate of a point that is higher up on the screen v2 0 0 u v u1 v1 u2 v2 Figure 61 Sensor image and coordinate system When the coordinates from the sensor image are used as 3D data a high value of the v coordinate will give a high range value In the coordinate system above parts of the object t...
Page 83: ...ing DHCP If no DHCP server is found the default for devices is to assign a Link Local Address LLA also called a Zero Configuration IP on the format 169 254 x y It is recommended to define a persistent IP address which can be used when a device boots Which IP configuration option that is used when a device boots is dictated by the TransportLayerControl parameters see Editing IP settings page 53 Ran...
Page 84: ... 168 1 52 192 168 1 5 192 168 0 5 192 168 2 5 192 168 0 51 NIC2 NIC3 NIC1 Figure 62 PC conncted to three cameras and external network using three separate NICs and one switch 15 3 Connecting encoders The RS 422 inputs on the camera have internal termination which makes it possible to connect an RS 422 encoder to the camera without requiring any external termination With this termination it is poss...
Page 85: ...Stegmann encoder RS 422 2 4 7 6 5 Figure 63 Wiring example 1 Camera 1 2 SICK Stegmann encoder RS 422 3 Camera 2 4 Phase2 RS 422 5 Phase1 RS 422 6 Phase1 RS 422 7 Phase2 RS 422 ANNEX 15 8020774 14IM 2019 07 SICK O P E R A T I N G I N S T R U C T I O N S Ranger3 85 Subject to change without notice ...
Page 86: ...etexts Printed copies of the license texts are also available on request 15 5 Scheimpflug adapters The Scheimpflug adapters for Ranger3 make it possible to create a camera setup where the plane of focus is parallel to the laser line This means that a subject that is not parallel to the image plane can be rendered sharply Adapters with three different tilt angles are available see Accessories page ...
Page 87: ...setup can be described with the following formula where a is the distance between the lens plane and the plane of focus f is the focal distance between the lens and the camera Ø is the tilt angle between the image plane and the lens plane and γ is the angle between the lens plane and the plane of focus ANNEX 15 8020774 14IM 2019 07 SICK O P E R A T I N G I N S T R U C T I O N S Ranger3 87 Subject ...
Page 88: ...exico Phone 52 472 748 9451 E Mail mario garcia sick com Netherlands Phone 31 0 30 229 25 44 E Mail info sick nl New Zealand Phone 64 9 415 0459 0800 222 278 tollfree E Mail sales sick co nz Norway Phone 47 67 81 50 00 E Mail sick sick no Poland Phone 48 22 539 41 00 E Mail info sick pl Romania Phone 40 356 17 11 20 E Mail office sick ro Russia Phone 7 495 283 09 90 E Mail info sick ru Singapore P...