Chapter 2. Installing and Set Up
2-7
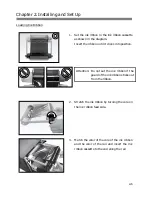
Loading Paper
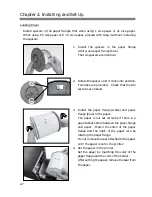
Install spacers in the paper flanges first when using L size paper or 2L size paper.
When using PC size paper or 6
×
9 size paper, proceed with Step 3 without installing
the spacers.
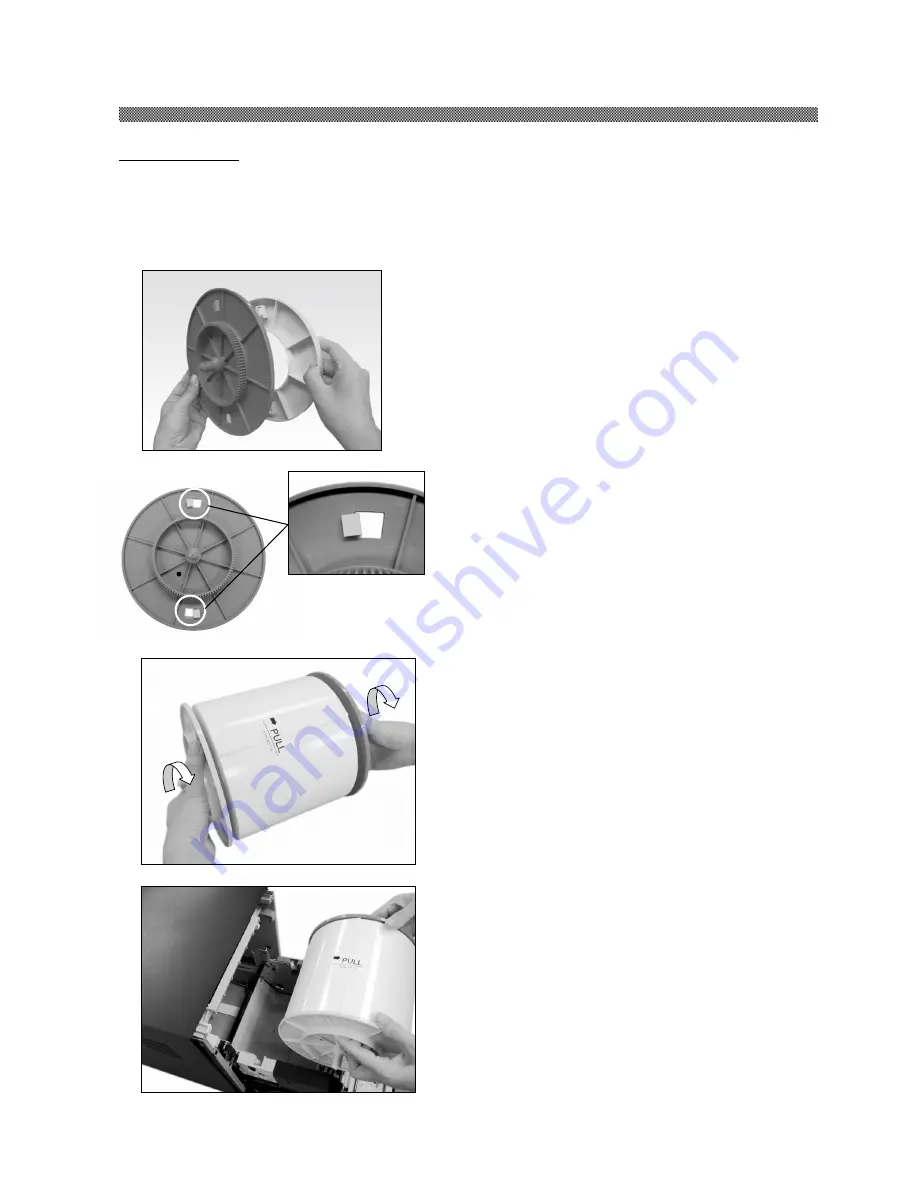
1. Install the spacers in the paper flange
(white) and paper flange (blue).
The two spacers are identical.
2. Rotate the spacer until it clicks into position.
Two locks are provided. Check that the two
sections are locked.
3. Install the paper flange (white) and paper
flange (blue) in the paper.
The paper is not set correctly if there is a
gap of about 10mm between the paper flange
and paper. Match the notch of the paper
flange and the notch of the paper core by
rotating the paper flange.
Do not remove the seal attached to the paper
until the paper is set in the printer.
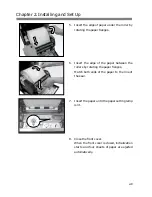
4. Set the paper in the printer.
Set the paper by matching the color of the
paper flange and the color of the holder.
After setting the paper, remove the seal from
the paper.
Summary of Contents for CHC-S2145
Page 2: ......
Page 11: ...Chapter 1 Important Safety Instruction 1 6 MEMO ...
Page 21: ...Chapter 2 Installing and Set Up 2 10 MEMO ...
Page 29: ...Chapter 4 Routine Maintenance 4 4 MEMO ...
Page 35: ......

