UX-A1000U
2 – 5
4. Entering the printer diagnostic mode
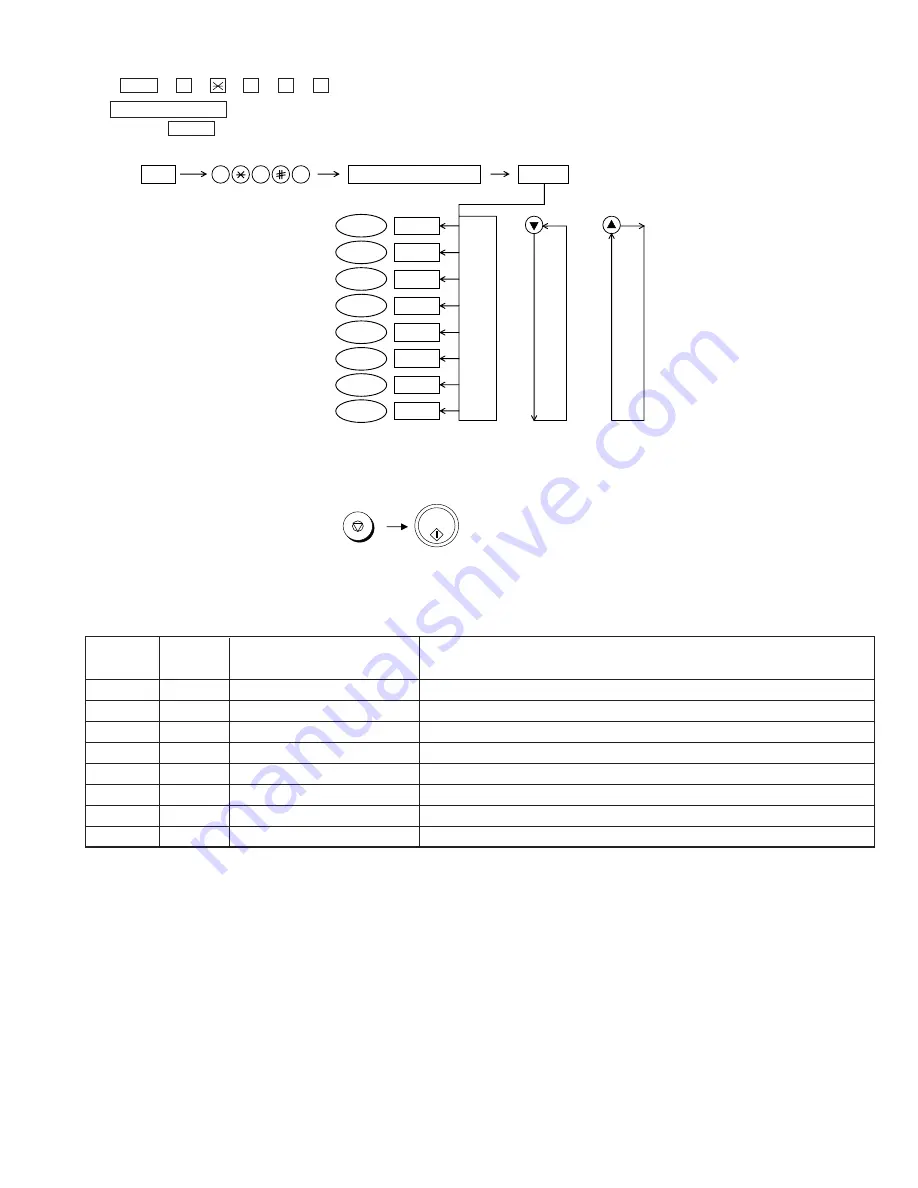
Press FUNC
→
9
→
→
8
→
#
→
6 , and the following display will appear.
PRINT DIAG MODE
Then press the START key. Select the desired item with the up key or the down key or select with the rapid key. Enter the mode with the START key.
(Diag
•
specifications)
If the diagnostic mode cannot be set, repeat the diagnostic mode operation, performing the following operation.
After the power is turned on and "WAIT A MOMENT" is indicated, press the STOP key.
In relation with the process response (request from Production
Engineering) "WAIT A MOMENT" clock indication may appear depending
on STOP key timing. If the STOP key is held down, "MEMORY CLEAR?"
appears.
FUNC
PRINT DIAG MODE
9
8
6
START
4% DATA PRINT AGING
Rapid2
Rapid1
ASF AGING
Rapid3
ASF SKEW CHECK AGING
Rapid4
CROSS PATTERN
Rapid5
INITIAL CARTRIDGE DATA SETTING
Rapid6
Rapid7
PRINTER DOWNLOAD
START
START
KEY
STOP
KEY
+
"Power ON"
START
START
START
START
START
IJP LIST MODE
START
Rapid8
PRINTER ERROR CHECK MODE
START
START/
MEMORY
6. Printer diagnostic items description
6. 1. 4% data print aging
This mode is the aging mode that prints the text pattern of 4%
6. 2. ASF aging (all white)
This mode is the aging mode that tests the performance of the ASF function.
6. 3. ASF skew check aging
This mode is the aging mode that tests the performance of the ASF function.
Detailed of check patterns
1. Top skew
2. Bottom skew
3. Top margin
4. Bottom margin
6. 4. Cross pattern
This mode prints the test pattern that tests the performance of the printer.
6. 5. Initial cartridge data setting
This mode makes the dot counter the setting for initial cartridge,
And this mode resets the following counter.
1. Replacement counter of the cartridge
2. Paper jam counter
6. 6. Printer download
This mode rewrites the software of the printer engine.
5. Printer diagnostic items
1
Rapid 1
4% DATA PRINT AGING
4% of printing data continue to be printed.
2
Rapid 2
ASF AGING
The feed of the paper is continued.
3
Rapid 3
ASF SKEW CHECK AGING
The frame pattern continues to be printed to check the inclination performance.
4
Rapid 4
CROSS PATTERN
The image data of the cross pattern to be printed.
5
Rapid 5
INITIAL CARTRIDGE DATA SETTING
It makes the dot counter the setting for the initial cartridge.
6
Rapid 6
PRINTER DOWNLOAD
This mode rewrites the software of the printer engine.
7
Rapid 7
IJP LIST MODE
The maintenance data is printed.
8
Rapid 8
PRINTER ERROR CHECK MODE
The cause of “PRINTER ERROR” message is displayed.
ITEM No.
Contents
Function
Rapid No.
2 – 5
Summary of Contents for UX-A1000
Page 51: ...UX A1000U 3 13 M E M O ...
Page 81: ...UX A1000U Control PWB parts layout Top side 6 8 DRSNS BROWN ORGSNS ORANGE FRSNS RED ...
Page 82: ...UX A1000U Control PWB parts layout Bottom side 6 9 FU101 FU100 ...
Page 86: ...UX A1000U TEL LIU PWB parts layout Top side 6 13 TEL LIU PWB parts layout Bottom side ...
Page 91: ...UX A1000U P IN YELLOW FU1 GREEN 3 3V Printer PWB parts layout Top side 6 18 ...
Page 92: ...UX A1000U Printer PWB parts layout Bottom side 6 19 ...
Page 98: ...UX A1000U FPC FPC Ink PWB parts layout Top side Ink PWB parts layout Bottom side 6 25 ...


