1 – 8
UX-A1000U
1
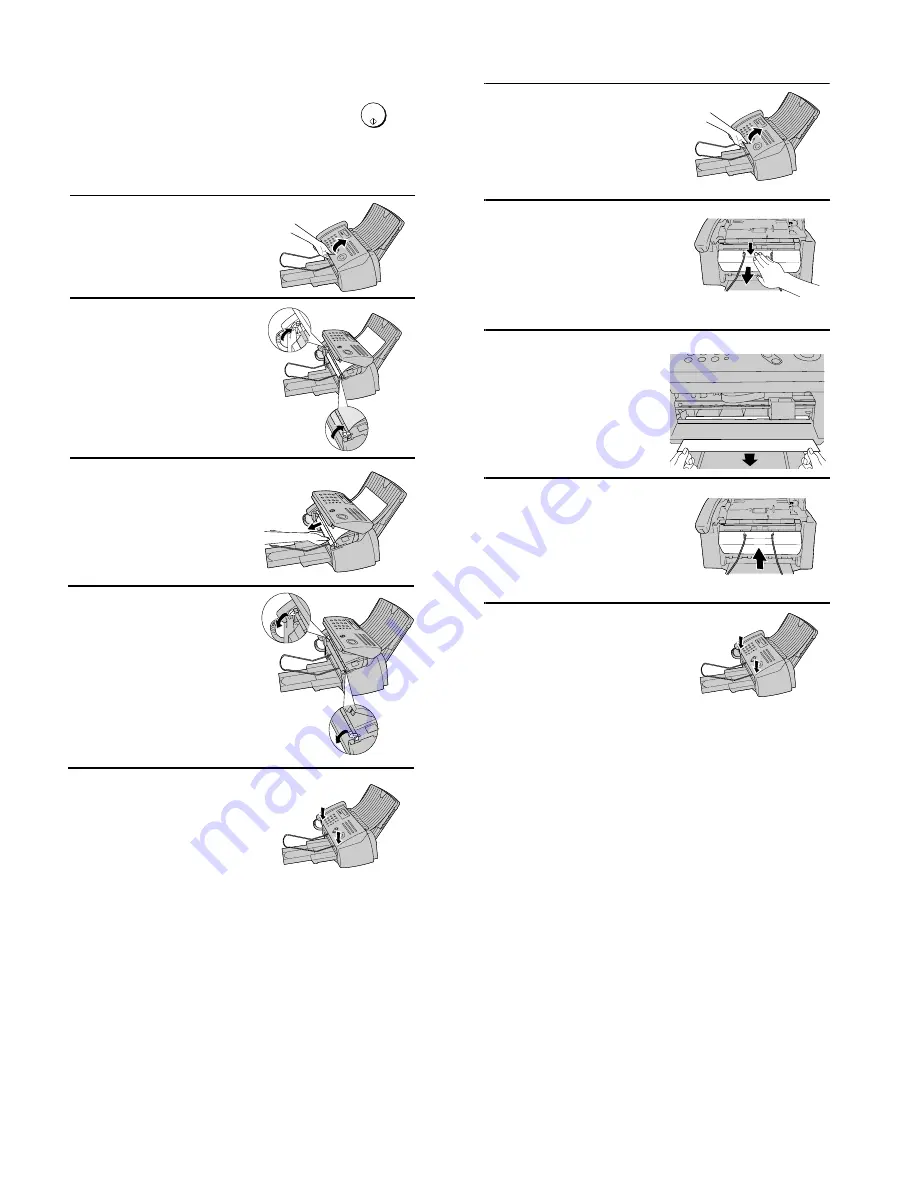
Open the operation panel.
2
Open the print compartment cover.
•
Press as shown and pull the cover
toward you.
3
Gently pull the jammed paper out of the
machine, making sure no torn pieces
of paper remain in the print
compartment or rollers.
4
Close the print compartment cover.
5
Close the operation panel, pressing
down firmly on both front corners to
make sure it clicks into place.
6. Clearing jammed printing paper
If the original document doesn't feed properly during transmission or copying,
or DOCUMENT JAMMED appears in the display, first try pressing
. If
the document doesn't feed out, remove it as explained below.
Important:
Do not try to remove a jammed document without releasing it as explained
below. This may damage the feeder mechanism.
1
Slowly open the operation panel until it
is half open.
2
Flip up the green levers on each side of
the white roller.
3
Gently remove the document.
•
Be careful not to tear the document.
START/
MEMORY
4
Flip down the green levers on each
side of the white roller.
5
Close the operation panel, pressing
down on both sides to make sure it
clicks into place.
5. Clearing a jammed document
Summary of Contents for UX-A1000
Page 51: ...UX A1000U 3 13 M E M O ...
Page 81: ...UX A1000U Control PWB parts layout Top side 6 8 DRSNS BROWN ORGSNS ORANGE FRSNS RED ...
Page 82: ...UX A1000U Control PWB parts layout Bottom side 6 9 FU101 FU100 ...
Page 86: ...UX A1000U TEL LIU PWB parts layout Top side 6 13 TEL LIU PWB parts layout Bottom side ...
Page 91: ...UX A1000U P IN YELLOW FU1 GREEN 3 3V Printer PWB parts layout Top side 6 18 ...
Page 92: ...UX A1000U Printer PWB parts layout Bottom side 6 19 ...
Page 98: ...UX A1000U FPC FPC Ink PWB parts layout Top side Ink PWB parts layout Bottom side 6 25 ...


