


MX-FXX1 SIMULATIONS, FAX SOFTWARE SWITCH 5 – 7
If there is any item under [
↓
], an active display is made and
item is shifted.
If there is no item over [
↓
], the display grays out and the
operation is invalid.
2)
Enter the set value with 10-key.
* When [C] key is pressed, the entered value is cleared.
3)
When [EXECUTE] button is pressed, it is highlighted and the
current set value is saved to EEPROM and RAM. Printing for
the adjustment is started.
After completion of printing, [EXECUTE] button returns to the
normal display.
* When [
↑
], [
↓
], [OK] button, [COLOR], or [BLACK] key is pressed,
the data are saved to EEPROM and RAM.
* When [C], [CA], [SYSTEM SETTINGS], or [EXECUTE] button
is pressed during printing, the operation is interrupted.
<Set range and default value of each setup>
* Items M are displayed as "Display item: Detail of display."
Example: EXECUTE MODE: AUTO
50
50-27
Purpose
: Adjustment
Function (Purpose)
: Used to adjust the image loss of scanned
image in the FAX/Scanner mode.
Section
: FAX/Scanner
Item
: Image quality
Operation/Procedure
1)
Use [FAX] button and [SCANNER] button to select the mode.
2)
Select the set item with [
↑
] and [
↓
] buttons.
The highlighted section of the set value is switched and dis-
played on the set setting area.
* If there is any item over [
↑
], an active display is made and
item is shifted.
If there is no item over [
↑
], the display grays out and the
operation is invalid.
If there is any item under [
↓
], an active display is made and
item is shifted.
If there is no item over [
↓
], the display grays out and the
operation is invalid.
3)
Enter the set value with 10-key.
* Press [C] key to clear the entered values.
4)
When [OK] button is pressed, the current entered value is
saved to EEPROM and RAM.
* When [
↑
], [
↓
] button, [COLOR], or [BLACK] key is pressed,
the data are saved to EEPROM and RAM.
* When [CLOSE] button is pressed, the display is shifted to the
copy basic screen of simulation.
* Copying can be performed also by pressing [COLOR]/[BLACK]
key.
Item
Display item & Detail of display
Content
Set range
Default value
Writing
A
AUTO
600dpi/Auto
1 to 99
50
YES
B
EXPOSURE1
600dpi/Exposure 1
1 to 99
50
YES
C
EXPOSURE2
600dpi/Exposure 2
1 to 99
50
YES
D
EXPOSURE3
600dpi/Exposure 3
1 to 99
50
YES
E
EXPOSURE4
600dpi/Exposure 4
1 to 99
50
YES
F
EXPOSURE5
600dpi/Exposure 5
1 to 99
50
YES
G
AUTO H_TONE
600dpi/Auto/Half tone
1 to 99
50
YES
H
EXPOSURE1 H_TONE
600dpi/Exposure 1/Half tone
1 to 99
50
YES
I
EXPOSURE2 H_TONE
600dpi/Exposure 2/Half tone
1 to 99
50
YES
J
EXPOSURE3 H_TONE
600dpi/Exposure 3/Half tone
1 to 99
50
YES
K
EXPOSURE4 H_TONE
600dpi/Exposure 4/Half tone
1 to 99
50
YES
L
EXPOSURE5 H_TONE
600dpi/Exposure 5/Half tone
1 to 99
50
YES
M
EXECUTE MODE
AUTO
Print mode
600dpi/Auto
1 to 12
1
1 (AUTO)
NO
EXP1
600dpi/Exposure 1
2
EXP2
600dpi/Exposure 2
3
EXP3
600dpi/Exposure 3
4
EXP4
600dpi/Exposure 4
5
EXP5
600dpi/Exposure 5
6
AUTO H_TONE
600dpi/Auto/Half tone
7
EXP1 H_TONE
600dpi/Exposure 1/Half tone
8
EXP2 H_TONE
600dpi/Exposure 2/Half tone
9
EXP3 H_TONE
600dpi/Exposure 3/Half tone
10
EXP4 H_TONE
600dpi/Exposure 4/Half tone
11
EXP5 H_TONE
600dpi/Exposure 5/Half tone
12
0
A:
A
㧦
50
㧧
AUTO
B
㧦
50
㧧
EXPOSURE1
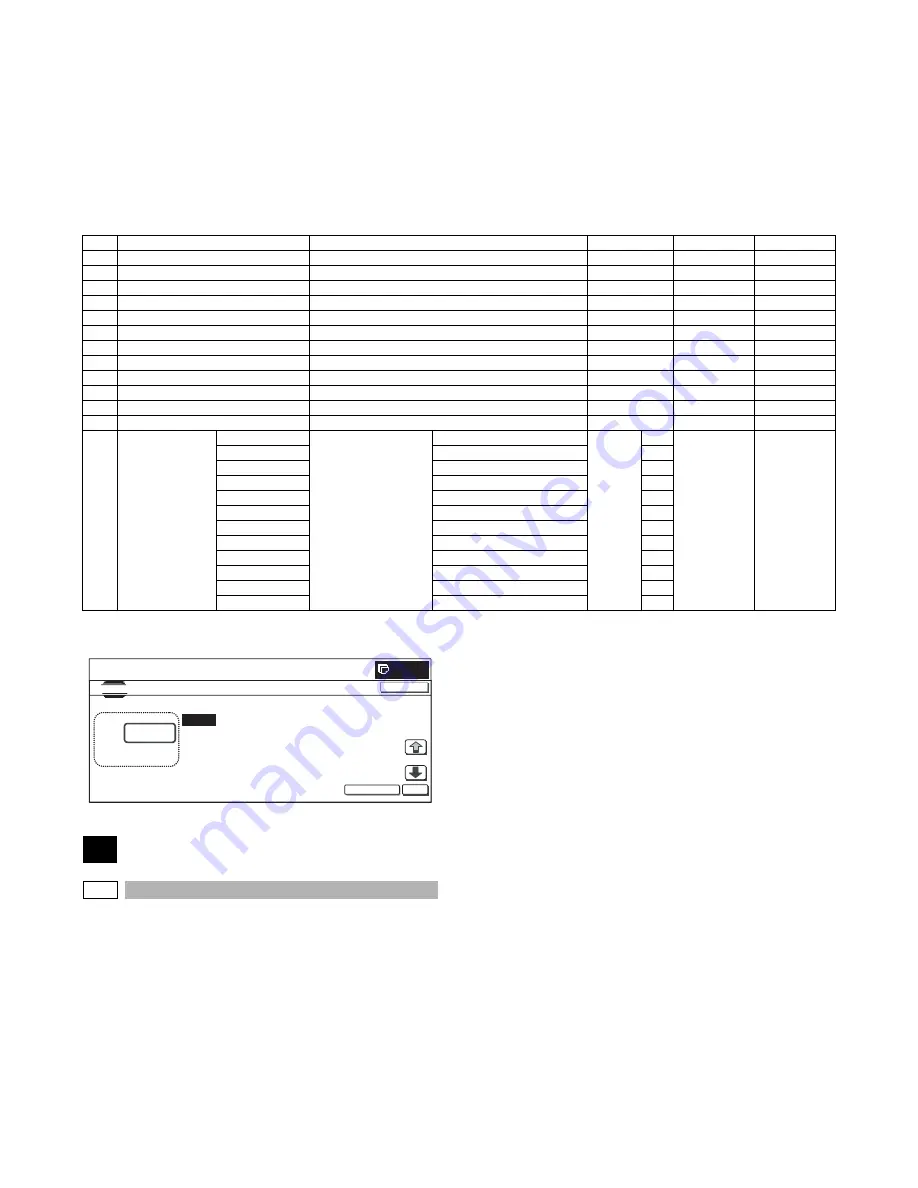
SIMULATION
NO.46-45
EXPOSURE ADJUSTMENT(FAX
㧦
600DPI)
50
㨇
1
㨪
99
㨉
OK
TEST
EXECUTE
CLOSE
C
㧦
50
㧧
EXPOSURE2
D
㧦
50
㧧
EXPOSURE3
Summary of Contents for MX-FXX1
Page 76: ...Memo ...
Page 77: ...Memo ...


