Lead Inspection
6-1
6
Chapter 6: Lead Inspection
6-1 Outline
Purpose
Examples
Inspect the condition of IC leads and connector pins based on positional
information obtained from the gray scale search function. (No. of leads or pins that
can be detected: Max. 128 pieces)
Applications Inspect IC leads or connector pins
Lead
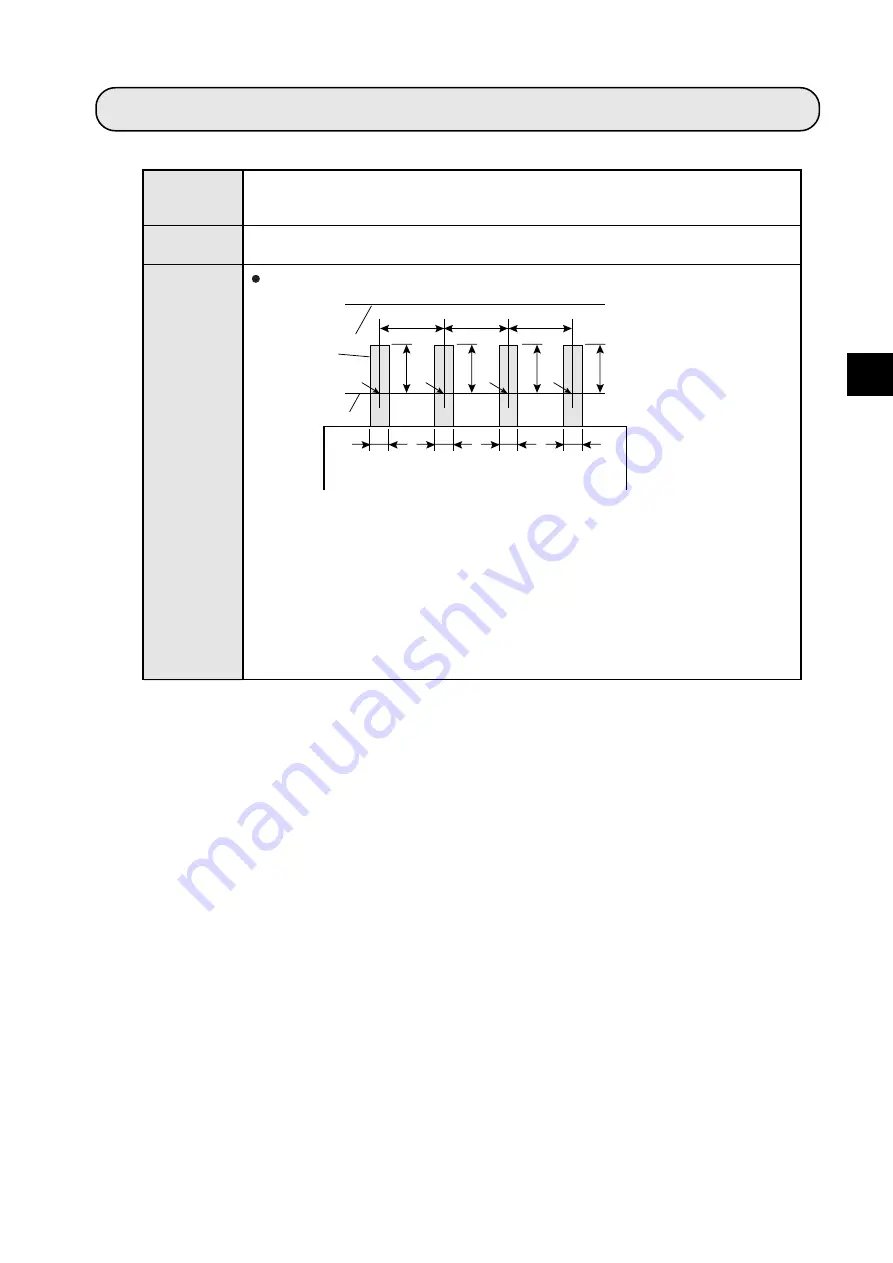
[Lead inspection]
Inspect the layout of the IC leads and connector pins
K0
K1
K2
K3
D1
D0
W0
W1
W2
W3
D2
L3
L0
L1
L2
Lead measure-
ment limit line
Reference line
・
Inspection procedure
1
Determine the measurement points (K0 to K3) from the mid points of the
leads and the reference line.
2
Calculate the maximum and minimum distances between the leads (D0 to
D2) on the reference line.
3
Calculate the maximum and minimum lead lengths (L0 to L3), starting from
the measurement points (K0 to K3) and measuring toward the lead measure-
ment limit line.
4
Calculate the maximum and minimum lead widths (W0 to W3) from the meas-
urement points.
- Number of leads K
- D0 to D2: Distance
between leads
- W0 to W3: Lead width
- L0 to L3: Lead length


