background image

SCANNING SETTINGS (ORIGINAL SIZE, EXPOSURE, RESOLUTION, AND FILE FORMAT)

24

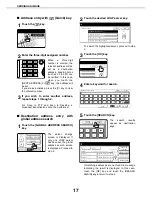
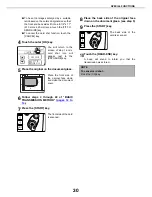
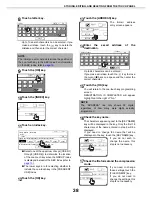
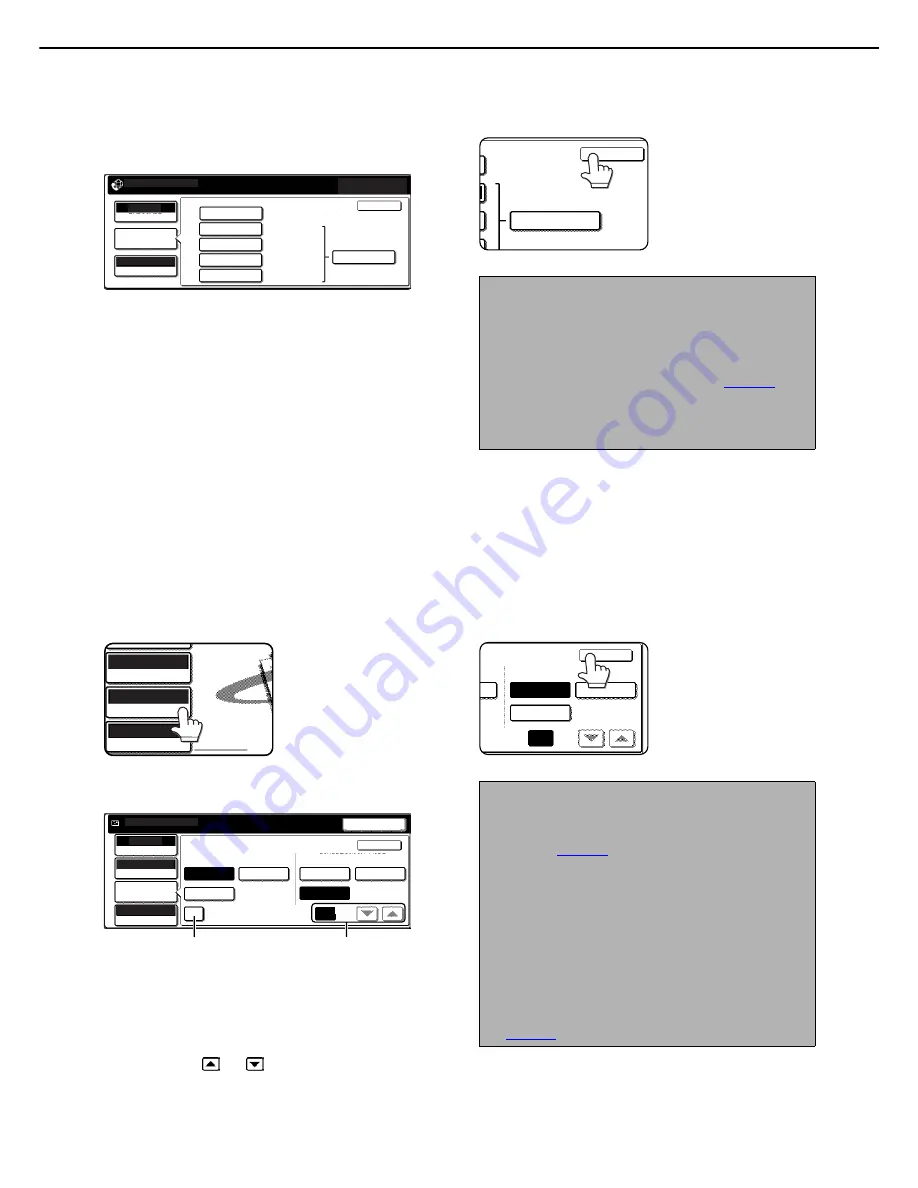
For resolution other than [200x200dpi], the [HALF
TONE] key can be selected.

Internet-Fax mode


Five selections are available for the resolution.
Touch the desired resolution key depending on
the original to be scanned.
For resolutions other than [STANDARD], the
[HALF TONE] key can be selected.

3

Touch the [OK] key.

You will return to the
initial screen.

SELECTING THE FILE FORMAT

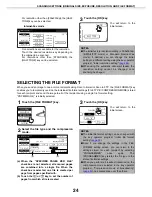
When you send an image to one or more recipients using Scan to E-mail or Scan to FTP, the [FILE FORMAT] key
enables you to temporarily override the individual file format settings (FILE TYPE / COMPRESSION MODE) stored
for each recipient and send the image to all of the recipients using a single file format setting.
"PDF MMR (G4)" is initially selected.

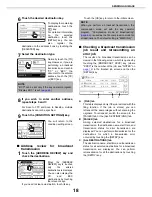
1

Touch the [FILE FORMAT] key.

2

Select the file type and the compression

mode.

(a) When the "SPECIFIED PAGES PER FILE"

checkbox is not selected, all scanned pages
are combined into a single file. When the
checkbox is selected, one file is created per
page from pages specified with.

(b) Touch the 

 or 

 key to set the number of

pages from which a file is created.

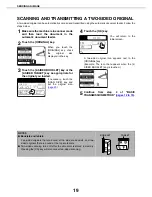
3

Touch the [OK] key.

You will return to the
initial screen.

AUTO

ORIGINAL

RESOLUTION

AUTO

EXPOSURE

STANDARD

FINE

SUPER FINE

ULTRA FINE

600x600dpi

READY TO SEND.

200x100

(

dpi

)

200x200

200x400

600x600

400x400

HALF TONE

OK

NOTES

O

The initial factory resolution setting is  300x300dpi
(E-MAIL/FTP mode) or Standard (Internet-Fax
mode). If desired, you can change the initial
setting to a different setting using the key operator
program, "Initial resolution setting" (

page 54

).

O

When using the automatic document feeder, the
resolution setting cannot be changed once
scanning has begun.

HALF TONE

OK

ORIGINAL

300x300dpi

RESOLUTION

PDF MMR(G4)

FILE FORMAT

EXPOSURE

AUTO   8½

X

11

TIFF

PDF

MH 

(

G3

)

MMR 

(

G4

)

NONE

FILE TYPE

PROGRAMMED

(

1-99

)

RESEND

OK

SPECIFIED PAGES PER FILE

COMPRESSION MODE

300x300dpi

ORIGINAL

RESOLUTION

AUTO

EXPOSURE

FILE FORMAT

(a)

(b)

AUTO   8½

X

11

READY TO SEND.

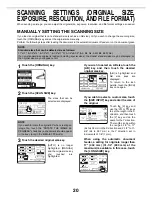
NOTES

O

The initial file format setting can be changed with
the key operator program "Initial file format
setting" (

page 55

). 

O

Even if you change the settings in the FILE
FORMAT setting screen, you can return to the
settings stored for each recipient by selecting
"PROGRAMMED" once again. The
[PROGRAMMED] key returns the file type to the
stored file format settings.

O

When you perform a broadcast transmission, the
compression mode selected in the key operator
program, "Compression mode at broadcasting"
(

page 55

), has precedence over the others.

MH 

(

G3

)

MMR 

(

G4

)

NONE

(

1-99

)

OK

PER FILE

COMPRESSION MODE

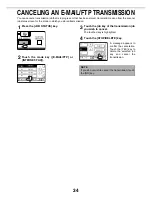
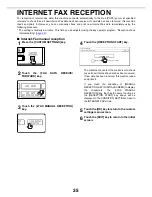
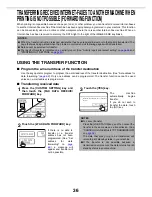
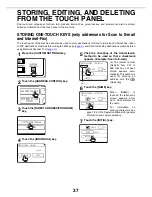
Summary of Contents for DIGITAL LASER COPIER/PRINTER

Page 1: ...DIGITAL LASER COPIER PRINTER DIGITAL MULTIFUNCTIONAL SYSTEM OPERATION MANUAL for network scanner ...

Page 2: ...Acknowledgments Sharpdesk is a trademark of Sharp Corporation Microsoft Windows operating system is a registered trademark or trademark of the Microsoft Corporation in the U S A and other countries Microsoft Windows Windows 95 Windows 98 Windows Me Windows NT 4 0 Windows 2000 Windows XP and Internet Explorer are registered trademarks or trademarks of Microsoft Corporation in the U S A and other co...

Page 3: ... TIMER TRANSMISSION 27 TRANSMITTING TWO ORIGINAL PAGES AS A SINGLE PAGE 2IN1 28 TRANSMITTING THE FRONT AND BACK SIDES OF A CARD ON ONE SHEET OF PAPER CARD SHOT 29 TRANSMITTING A LARGE NUMBER OF PAGES JOB BUILD 31 PROGRAMMING FREQUENTLY USED OPERATIONS PROGRAM 32 Page PRIORITY TRANSMISSION OF A STORED JOB 33 CANCELING AN E MAIL FTP TRANSMISSION 34 INTERNET FAX RECEPTION 35 TRANSFERRING RECEIVED INT...

Page 4: ...op referred to as Scan to Desktop The scanned informa tion can be sent to an e mail recipient referred to as Scan to E mail The scanned information can be sent with the Internet Fax feature Internet Fax Reception is also available Before Scan to Desktop can be performed the Network Scanner Tool software in the CD ROM that accompanied the Network Scanner Expansion Kit must be installed The scanned ...

Page 5: ... this product If you do not know the IP address see page 50 When the connection is completed the following Web page will appear in your Web browser ABOUT THE WEB PAGE When you access the Web page in the machine the following page will appear in your browser A menu frame appears on the left side of the page When you click an item in the menu a screen appears in the right frame that allows you to es...

Page 6: ...ng features to be used Enable Scanner Delivery to the advanced functions Advanced Setup the upper limit of the file size of the image to be transmitted Maximum Size of E mail Attachments the default file name File Naming and the default E mail subject Default Subject If you use the factory default settings you need not make settings on this screen Q Subject screen This screen is displayed when you...

Page 7: ...net Fax and Group destinations Among these a combined total of 200 Scan to FTP and Desktop destinations can be stored The stored destinations appear as one touch keys in the touch panel of the machine when you send an image allowing you to select the destination For detailed information on setting up editing and deleting destinations refer to General under Help Storing destinations for Scan to E m...

Page 8: ... wish to store in the group Up to 500 destinations can be stored in total Only destinations for E mail Fax and Internet Fax addresses searched with the global address search feature and manually entered address can be stored in a group Items common to all transmission methods when storing destinations Name Display Name Only alphabetical characters and symbols can be used to enter names in Name and...

Page 9: ... need to enter the settings for the DNS or WINS server Click Services in the Web page menu frame and enter the password to display the Services Setup screen Select the server for which settings must be entered and then enter required parameters If you use the global address search feature you also need to enter the settings for the LDAP server Click LDAP in the Web page menu frame and enter the pa...

Page 10: ...key the machine will automatically assign a shortened number in this manual this key is called the Quick key Use this key for a three digit shortened number to simplify the transmission procedure MODE SWITCH key Touch this key to switch between the E MAIL FTP mode and the INTERNET FAX mode If the machine is equipped with the facsimile feature this key can also be used for selecting the FAX mode RE...

Page 11: ... MAIL FTP mode or STANDARD INTERNET FAX mode EXPOSURE key page 23 Touch this key to change the exposure setting for the original to be scanned The selected exposure setting will be highlighted above the key The initial factory setting is AUTO Q Address book screen Touch the ADDRESS BOOK key in the Condition settings screen previous page to display the screen shown below at right If you have set th...

Page 12: ...ove through the screens CONDITION SETTINGS key This displays the Condition settings screen page 9 which is used to set various conditions GLOBAL ADDRESS SEARCH key page 17 This feature makes it possible to search for an e mail address in an Internet or intranet directory database To use this function the IP address or network name of the LDAP server must be set as well as an account name and passw...

Page 13: ...SEND SETTINGS key This step is not necessary for Scan to FTP or Scan to Desktop Go directly to step 18 page 14 NOTE You cannot load documents in both the automatic document feeder and on the document glass and send them in a single transmission NOTES O To scan a two sided original refer to page 19 O To rotate the document image 90 before transmission see page 20 ORIGINAL 300x300dpi RESOLUTION PDF ...

Page 14: ...file name will be the name of the file attached to the e mail 13Touch the OK key 14Touch the SENDER NAME key The sender name selection screen appears The list of sender names that were registered on the Web page is displayed 15Touch the desired sender name The selected sender name is highlighted If you made a mistake touch the correct key The highlighting will move to the new key To enter the send...

Page 15: ...asking you to confirm the save will appear Touch the OK key in the message screen and go to the next step If you wish to cancel the save touch the QUICK FILE key after touching the OK key so that the QUICK FILE key is no longer highlighted NOTE To send to the selected sender as CC touch the checkbox of ADD THE SENDER TO CC to display a checkmark CANCEL ADDRESS ENTRY OK RESEND 1 1 OK ADDRESS BOOK E...

Page 16: ...ortant points when using Scan to E mail Be very careful not to send image data files that are too large Your mail server s system administrator may have placed a limit on the amount of data that can be sent in one e mail transmission If this limit is exceeded the e mail will not be delivered to the recipient Even if there is no limit and your e mail is successfully delivered a large data file may ...

Page 17: ... CC or BCC the document to the entered e mail address touch the CC or BCC key After touching one of the keys you will return to the initial screen In the Internet Fax mode a screen for requesting a reception report is displayed in place of the destination type selection screen Touch the NO or YES key You will return to the initial screen 5 If you wish to enter another e mail address repeat steps 1...

Page 18: ...s displayed Proceed to step 4 2 Touch the desired LDAP server key To search the highlighted server proceed to step 3 3 Touch the OK key 4 Enter a keyword for search 5 Touch the SEARCH key The search results appear as destination keys If matching addresses are not found a message indicating the result is displayed In this case touch the OK key and touch the SEARCH AGAIN key to return to step 4 E MA...

Page 19: ...nd then the DETAIL key A FILE tab This tab is displayed only if the job is stored with the filing function If the job is stored you can retransmit the same images without scanning the originals To retransmit switch the screen to the FAILED tab or the ALL DESTINATIONS tab B FAILED tab Among selected destinations for a broadcast transmission the destination name start time and transmission status fo...

Page 20: ...20 4 Touch the OK key You will return to the initial screen A two sided original icon appears next to the ORIGINAL key Example The icon that appears when the 2 SIDED BOOKLET key is touched 5 Continue from step 4 of BASIC TRANSMISSION METHOD pages 12 to 15 ORIGINAL 300x300dpi RESOLUTION PDF MMR G4 FILE FORMAT AUTO 8 X11 100 AUTO 2 SIDED BOOKLET 2 SIDED TABLET SCAN SIZE SEND SIZE AUTO 8 X11 AUTO RES...

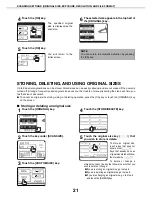
Page 21: ...direction The length can be within the range 2 1 2 to 17 64 to 432 mm in the X direction and 2 1 2 to 11 5 8 64 to 297 mm in the Y direction set in increments of 1 8 1 mm When using the automatic document feeder a setting for originals longer than 17 432 mm 31 1 2 800 mm at the maximum is available In this case touch the LONG SIZE key NOTE Standard sizes that can be detected are as follows 11 x17 ...

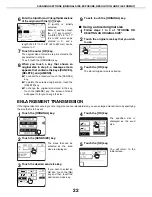
Page 22: ...ZE 3 Touch the CUSTOM SIZE key 4 Touch the STORE DELETE key 5 Touch the original size key that you wish to store or delete To store an original size touch a key that does not show a size Keys that already have an original size stored will show the stored size To delete or change a stored size touch the key that shows the size that you wish to delete or change OIf you are storing an original size g...

Page 23: ...stored original size 1 Follow steps 1 to 3 of STORING OR DELETING AN ORIGINAL SIZE 2 Touch the original size key that you wish to use 3 Touch the OK key The stored original size is called up ENLARGEMENT TRANSMISSION If the original size for scanning is not a long size or a non standard size you can enlarge a transmission by specifying the size that is to be sent 1 Touch the ORIGINAL key 2 Touch th...

Page 24: ...low the steps below The default setting for the resolution is 300x300dpi E MAIL FTP mode or STANDARD Internet Fax mode Q Change the resolution 1 Touch the RESOLUTION key 2 Touch the desired resolution key E MAIL FTP mode Four selections are available for the resolution Touch the desired resolution key depending on the original to be scanned The selected key is highlighted 300x300dpi RESOLUTION PDF...

Page 25: ... screen AUTO ORIGINAL RESOLUTION AUTO EXPOSURE STANDARD FINE SUPER FINE ULTRA FINE 600x600dpi READY TO SEND 200x100 dpi 200x200 200x400 600x600 400x400 HALF TONE OK NOTES O The initial factory resolution setting is 300x300dpi E MAIL FTP mode or Standard Internet Fax mode If desired you can change the initial setting to a different setting using the key operator program Initial resolution setting p...

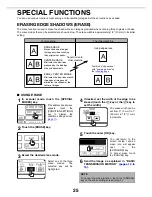
Page 26: ... erase width can be set from 0 0 mm to 1 20 mm in 1 8 1 mm increments 5 Touch the outer OK key You will return to the screen of step 1 and an erase icon will appear next to the EXPOSURE key To cancel erase touch the CANCEL key 6 Send the image as explained in BASIC TRANSMISSION METHOD pages 12 to 15 EDGE ERASE Erases shadows at edges that appear when scanning thick originals or books CENTER ERASE ...

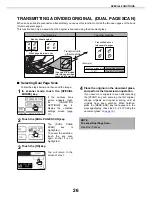
Page 27: ... key You will return to the screen of step 1 4 Place the original on the document glass and perform the transmission operation If you have more originals to scan after pressing the START key and scanning the first original change originals and repeat scanning until all originals have been scanned When finished press the READ END key that appears in the message display See step 23 25 of Using the d...

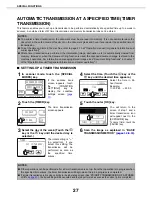
Page 28: ...THOD pages 12 to 15 NOTES To perform a timer transmission the document must be scanned into memory It is not possible to leave the document in the auto document feeder or on the document glass and have it scanned at the specified time of transmission To set the date and time in the machine refer to page 2 13 of Operation manual for general information and copier operation After a timer transmissio...

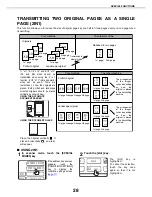
Page 29: ...epending on how the original is placed in the transmitting machine Landscape original 1st page 2nd page 3rd page 4th page 1st page 2nd page 3rd page 4th page 1st page 2nd page 3rd page 4th page 1st page 2nd page 3rd page 4th page Your machine Your machine The other machine The other machine Transmission to other machine 1st page 2nd page 1st page 2nd page 1st page 2nd page 1st page 2nd page 1st pa...

Page 30: ...nsion width and Y dimension length of the original with the keys OX width is initially selected Enter X and then touch the Y key to enter Y OTo return the X and Y values to the initial settings configured in the key operator programs touch the SIZE RESET key key operator s guide CARD SHOT SETTINGS on page 14 DUAL PAGE SCAN SPEAKER RESEND OK NOTE To cancel 2in1 Press the CA key NOTE Only 8 1 2 A4 w...

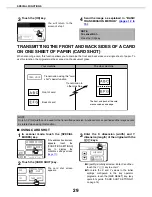
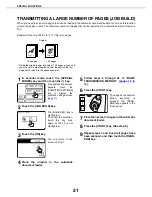
Page 31: ...EXPOSURE key 5 Place the original on the document glass Place the front side of the original face down and close the document cover 6 Follow steps 4 through 22 of BASIC TRANSMISSION METHOD pages 12 to 14 7 Press the START key The front side of the card is scanned 8 Place the back side of the original face down on the document glass see step 5 9 Press the START key The back side of the card is scan...

Page 32: ...it is not highlighted 3 Touch the OK key You will return to the screen of step 1 4 Place the original in the automatic document feeder 5 Follow steps 4 through 22 of BASIC TRANSMISSION METHOD pages 12 to 14 6 Press the START key The pages are scanned When scanning is finished the READ END key appears in the touch panel 7 Place the next set of pages in the automatic document feeder 8 Press the STAR...

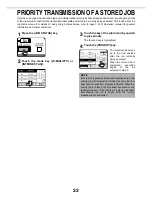
Page 33: ...CIAL MODES key and then the PROGRAM key If the address book screen appears touch the CONDITION SETTINGS key to display the condition settings screen page 11 3 Touch the program key you wish to execute Make sure the key is highlighted and then touch the OK key The program key you touched is selected and you return to the screen of step 2 The PROGRAM key is highlighted 4 Touch the OK key You will re...

Page 34: ...TY key The selected job moves up to the next position after the job currently being executed When the current job is completed execution begins of the job selected in step 3 WAITING CO D STOP INTE FAX JOB E MAIL FTP PR STATUS 1 1 PAGES WAITING WAITING 002 000 020 000 020 000 COPYING 020 001 NOTE If the job in progress is a broadcast transmission job the priority job will temporarily interrupt the ...

Page 35: ...AX 3 Touch the job key of the transmission job you wish to cancel The touched key is highlighted 4 Touch the STOP DELETE key A message appears to confirm the cancelation Touch the YES key to delete the selected job key and cancel the transmission WAITING CO D STOP INTE FAX JOB E MAIL FTP PR STATUS 1 1 PAGES WAITING WAITING 002 000 020 000 020 000 COPYING 020 001 NOTE If you do not wish to cancel t...

Page 36: ...EIVE FORWARD key 3 Touch the I FAX MANUAL RECEPTION key 4 Touch the RECEPTION START key The machine connects to the mail server to check to see if new Internet Fax data has been received If new data has been received this machine reads and prints it If you touch the checkbox of MANUAL RECEPTION KEY IN INITIAL SCREEN to display the checkmark the I FAX MANUAL RECEPTION key that has the same function...

Page 37: ...fer or a transfer address has not been programmed See Set address for data forwarding on page 59 a message will appear and transfer will not be possible 3 Touch the YES key The machine automatically begins transfer If you do not wish to transfer the data touch the NO key NOTES When the transfer instruction is issued all data that has been received in memory to that point is transferred The page th...

Page 38: ...M key 4 Touch the INDIVIDUAL key 5 Click the checkbox of the transmission method to be used so that a checkmark appears Example Scan to E mail a The lowest number No 048 from 001 to 999 that has not been stored appears auto matically This number is used for entering an address with the Quick key 6 Touch the NAME key When NAME is touched the letter entry screen appears Enter up to 36 characters for...

Page 39: ...n the key Only the first 18 characters of the name entered in step 6 will be displayed If you need to change the name that will be displayed in the key touch the KEY NAME key If you do not wish to change the name this step is not necessary 17Check the file format and the compression mode If you need to change these settings touch the FILE FORMAT key If you do not need to change the settings this s...

Page 40: ...GS key touch the ADDRESS CONTROL key and then touch the DIRECT ADDRESS PROGRAM key refer to steps 1 to 3 on page 37 2 Touch the AMEND DELETE key 3 Touch the one touch key you wish to edit or delete To edit a one touch key follow steps 4 and 5 To delete a one touch key follow steps 6 and 7 When you have finished editing or deleting touch the EXIT key 4 Touch the key corresponding to the information...

Page 41: ...TION NO YES NOTES If you cannot edit or delete a one touch key If you attempt to edit or delete a one touch key in the following situations a warning message will appear and editing deletion will not be possible At this time cancel the transmission or wait until it is completed delete the key from the group or the program or cancel or change the hyperlink e mail address The one touch key you wish ...

Page 42: ...roup key If you wish to program another group key touch the NEXT key When you touch the EXIT key you will return to the screen of step 2 EDITING AND DELETING GROUP KEYS If you need to delete group key or change its name or one of its stored destinations perform the following procedure 1 Press the CUSTOM SETTINGS key touch the ADDRESS CONTROL key and then touch the DIRECT ADDRESS PROGRAM key refer ...

Page 43: ... column of the recipient s e mail software program If you prefer to store sender information from the Web page refer to page 8 1 Press the CUSTOM SETTINGS key 2 Touch the SENDER CONTROL key 3 Touch the STORE key DIRECT ADDRESS GROUP SELECT ADDRESS A FREQUENT USE ABCD EFGHI JKLMN OPQRST UVWXYZ ABC GROUP OK 1 2 0 C GROUP SHARP CORPORATION CORPO TPS ADDRESS REVIEW DIRECT ENTRY DELETE EXIT DELETE EXIT...

Page 44: ...key when the GROUP index is displayed instead of the ABC index If you touch a wrong key simply touch the correct key 12Touch the OK key 13Touch the ADDRESS key INITIAL No 001 SENDER NAME AB ab SPACE a s d f g h j k l z x c v b n m q w e r t y u i o p _ CANCEL OK SENDER NAME 12 ABC abc ÀÄÂ àäâ k l m u i o p _ CANCEL OK ABC abc LOGIN NAME SENDER NAME document INITIAL INDEX No 001 ADDRESS KEY NAME SP...

Page 45: ...uch the OK key 20If you have finished storing senders touch the EXIT key If you wish to store another sender touch the NEXT key EDITING AND DELETING SENDER INFORMATION Use this procedure when you need to edit sender information or delete a sender 1 Perform steps 1 and 2 of STORING SENDER INFORMATION on page 42 2 Touch the AMEND DELETE key The stored senders appear 3 Touch the one touch key of the ...

Page 46: ...selected index When touched the letter entry screen appears 4 Enter a maximum of 6 characters for the index name Use the key to clear the displayed name and then enter the desired name When finished touch the OK key The new name appears in the screen of step 3 5 If you wish to program another index name repeat steps 3 and 4 When finished touch the OK key To edit a user index name re enter the name...

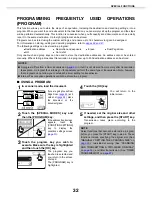
Page 47: ... characters for the name Refer to page 7 26 of Operation manual for general information and copier operation for the procedure for entering letters 4 Touch the SETTINGS key 5 Touch the keys for the settings you wish to store For the detailed procedures for each of the settings refer to the explanations of those features on the following pages RESOLUTION page 23 EXPOSURE page 23 ADDRESS BOOK page 1...

Page 48: ...e program name the edit delete screen for the selected program appears OTouching the ADDRESS BOOK key returns you to the screen of step 1 3 To edit the program follow the same procedure as for storing the program To delete the program touch the DELETE key and then touch the YES key in the confirmation screen that appears NOTE Up to 500 destinations can be stored in a program Destinations can be en...

Page 49: ... account the guides for the set original size For example when scanning an 8 1 2 x 11 A4 original using a 5 1 2 x 8 1 2 B5 setting align the original using the scale at the left edge to fit the area you wish to scan into the 5 1 2 x 8 1 2 B5 scanning area The scanned image is upside down or on its side Cause The original was not placed in the correct orientation Solution Place the original in the ...

Page 50: ...he amount of data sent in the e mail transmission reduce the number of pages scanned Ask your mail server administrator what the data limit is for one e mail transmission Refer to page 51 Transmission takes a long time Cause When there is a large amount of image information the data file is also large and transmission takes a long time Solution In order to select resolution and data compression se...

Page 51: ... 3 Touch the PRINTER TEST PAGE key 4 Touch the NIC PAGE key PROCESSING PRINT DATA appears in the message screen and printing begins To cancel printing touch the CANCEL key Error Code Description of the Error CE 01 The network interface card is out of order CE 02 Cannot find the specified mail server or FTP server CE 03 The server was down during the scanning of the original CE 04 An invalid accoun...

Page 52: ...own The images shown below will produce the file sizes shown below when scanned as 8 1 2 x 11 A4 size originals If multiple images are scanned the file size will be approximately Size of each image as indicated above x Number of images scanned Although the actual limitation depends on your network environment a general guideline for the maximum file size for Scan to E mail is 2000 KB In cases wher...

Page 53: ...ction report print select setting 56 Activity report print select setting 56 Body text print select setting 57 I Fax send settings I Fax reception report on off setting 57 I Fax reception report request timeout setting 57 Rotation sending setting 57 Printing page number at receiver 57 Maximum size of e mail attachments 57 Number of resend times at reception error 58 I Fax receive settings Auto rec...

Page 54: ... touch keys that show the status of selections A box with a check mark means the function is on enabled and an unchecked box means the function is off disabled The on off status changes each time the box is touched C If the settings continue on the following screen s touch the and keys to move back and forth through the screens To return to the category selection screen touch the OK key D The curr...

Page 55: ...EXT ADDRESS key must be touched before entering the next destination when performing a broadcast transmission page 16 Normally the machine is set so that touching the NEXT ADDRESS key can be omitted except when the numeric keys are used to enter one full fax number after another full fax number in the fax mode Example Normal setting factory setting If the box is checked it will no longer be possib...

Page 56: ...nge the default file format file type compression mode and file creation method used when the e mail address is entered manually for a Scan to E mail transmission The initial settings are as follows File type PDF Compression mode MMR G4 SPECIFIED PAGES PER FILE checkbox Not selected Maximum size of e mail attachments To prevent the size of image files transmitted by Scan to E mail from becoming to...

Page 57: ... is not effective when printing of the transaction report is disabled This program is normally configured so that part of the fax is printed on the transaction report when a transmission is not successful Transaction report print select setting This setting is used to select the conditions for printing out Transaction Reports Conditions can be selected for normal transmissions broadcast transmissi...

Page 58: ...then set the hour by touching the and keys Set the minute in the same way When finished touch the OK key Rotation sending setting When transmitting a document this setting allows you to rotate a vertically oriented 8 1 2 x11 A4 document to a horizontal orientation 8 1 2 x11 R A4R or rotate a 5 1 2 x8 1 2 R B5R or A5R document to 5 1 2 x8 1 2 B5 or A5 The setting is normally turned on and documents...

Page 59: ...hour by touching the and keys Set the minute in the same way When finished touch the OK key Duplex reception setting You can use this setting to select whether received documents are printed on both sides of the paper Normally this setting is turned off If turned on received documents will be printed on both sides of the paper whenever the received document consists of two or more pages of the sam...

Page 60: ...tion Up to 50 addresses can be entered This program is normally disabled To block reception from the entered addresses touch the REJECT RECEPTION key To allow reception from the entered addresses touch the ALLOW RECEPTION key To ignore entered addresses and allow reception from any addresses touch the ALL INVALID key 1 Touch the ENTER key The address entry screen appears 2 Enter the the e mail add...

Page 61: ...INGS KEY OPERATOR CODE ING NGS NGS OL NETWORK SETTINGS KEY O CODE PRI SET SET LIST PRINT ENERGY SAVE NOTES The list is printed before other jobs waiting In the screen of step 5 you can touch the ANTI JUNK MAIL DOMAIN NAME LIST key to print the anti junk mail domain name list Print this list when you wish to check the entered addresses and domains See page 59 Anti junk mail domain name setting Also...

Page 62: ... File format E mail FTP File type PDF TIFF Compression mode NONE MH G3 MMR G4 Internet Fax File type TIFF F Compression mode MH G3 MMR G4 File creation method Specified pages per file One file for all pages Scan destinations Scan to FTP Scan to Desktop Scan to E mail Internet Fax Supported client PC operating systems Windows 95 Windows 98 Windows Me Windows NT Workstation 4 0 Service Pack 6 or lat...

Page 63: ...UAL for network scanner SHARP ELECTRONICS CORPORATION Sharp Plaza Mahwah New Jersey 07430 1163 www sharpusa com SHARP ELECTRONICS OF CANADA LTD 335 Britannia Road East Mississauga Ontario L4Z 1W9 ARM550N US1 SCANNER ...

Reviews: