


CONDITION SETTINGS SCREEN OF SCANNER MODE
10
[FILE] key (
page 14
)
Touch this key to store a document image that you
are transmitting in the hard disk (this includes
selecting a user name, file name, and location).
[QUICK FILE] key (
page 14
)
Touch this key to store a document image that you
are transmitting in the temporary storage folder.
[SEND SETTINGS] (
page 12
)
Touch this key to set the subject, file name, and
sender name.
Memory and reception mode display
This shows the amount of fax memory that is free
when an optional facsimile feature is installed.
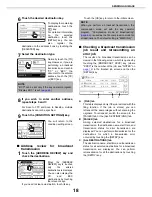
[ADDRESS ENTRY] key (
page 16
)
When performing Scan to E-mail, touch this key if
you wish to enter the e-mail address of the
recipient manually instead of using an one-touch
key.
Two-sided scanning icon display (
page 19
)
Icons appear here when you touch the [ORIGINAL]
key and select two-sided scanning. The icons can
be touched to open function selection screens.
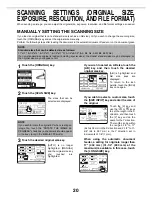
[ORIGINAL] key (
pages 19 - 22
)
Touch this key when you wish to manually set the
size of the original to be scanned or scan both
sides of the original.
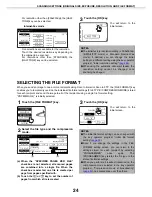
[FILE FORMAT] key (
page 24
)
Touch this key to set the file format of scan images
that you transmit. The selected file format setting
will be highlighted above the key. The initial factory
setting is "PDF MMR(G4)".
[RESOLUTION] key (
page 23
)
Touch this key to change the resolution setting for
the original to be scanned. The selected resolution
setting will be highlighted above the key. The initial
factory setting is "300x300dpi" (E-MAIL/FTP
mode) or "STANDARD" (INTERNET-FAX mode).
[EXPOSURE] key (
page 23
)
Touch this key to change the exposure setting for
the original to be scanned. The selected exposure
setting will be highlighted above the key. The initial
factory setting is "AUTO".
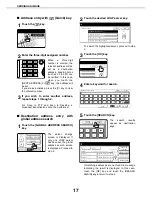
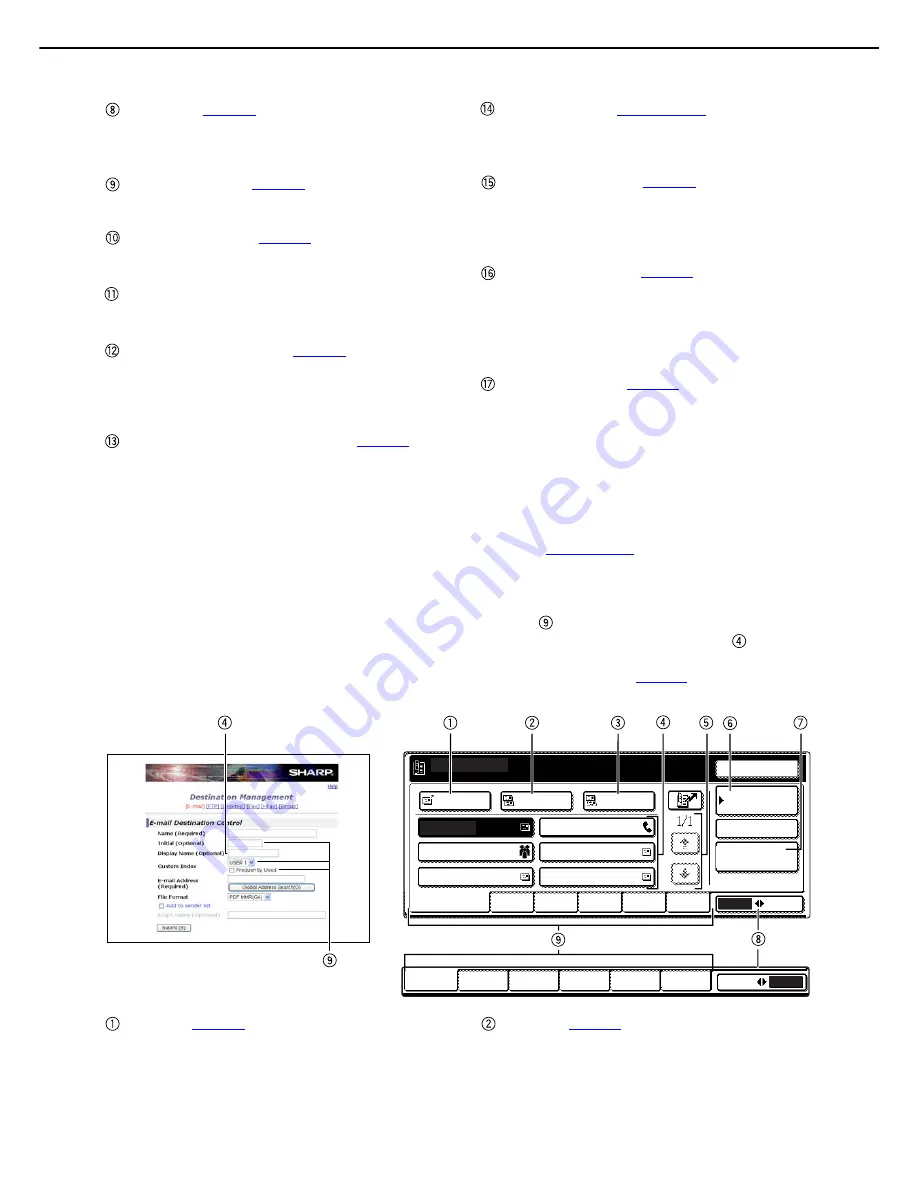
Q
Address book screen
Touch the [ADDRESS BOOK] key in the Condition settings screen (
previous page
) to display the screen shown
below at right.
If you have set the initial screen to the address book screen using the key operator program, the initial screen
will appear as follows.
Destinations stored using the Web page are grouped in indexes ( ) according to the letter entered in "Initial"
for each destination, and the name entered in "Display Name" is displayed in the one-touch key (
).
The screen shown below is the address book screen with an alphabetical index. The address book screen can
be set with the group index as the initial screen (See "Default display settings" on
page 54
).
[TO] key (
page 14
)
After selecting a destination using a one-touch key
or the global address search function, touch this
key. For Scan to E-mail or Internet-Fax
transmission, you can select multiple destinations
before touching this key.
[CC] key (
page 14
)
If you wish to a send "CC" ("Carbon Copy") of a
Scan to E-mail transmission to other recipients in
addition to the main recipient, after selecting
destinations using one-touch keys or the global
address search function, touch this key. You can
USER 1
USER 2
USER 3
USER 4
USER 5
USER 6
GROUP
ABC
ABC
GROUP
TO
FREQUENT USE
ABCD
EFGHI
JKLMN
OPQRST UVWXYZ
CC
BCC
TEST5
TEST6
TEST3
TEST1
TEST2
GLOBAL
ADDRESS SEARCH
CONDITION
SETTINGS
READY TO SEND.
ADDRESS REVIEW
RESEND
TEST4
E-mail Destination Management page