background image

CD-DV999W

E-57

ENGLISH

T

ape Recording

CD-DV999W (

Z

)

TINSZA017AWZZ

H

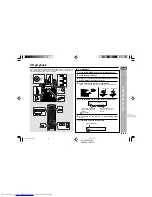
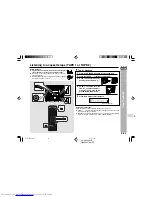
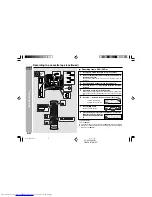
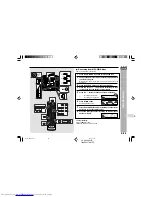
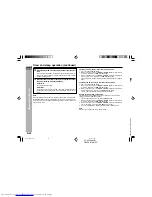
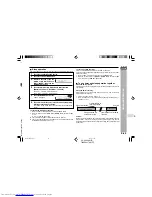
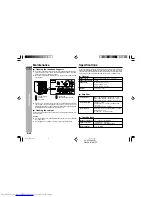
Recording from a DVD (DVDs)

1

Press the ON/STAND-BY button to turn the power on.

2

Load a cassette into the TAPE 2 cassette compartment with
the side A facing you.

Wind past the leader of the tape, on which recording cannot be
performed.

3

Press the DVD/CD button and load the desired disc.

4

Press one of the 

1 -

  s 

5 buttons to select the disc to be

recorded.

5

Press the 

0

 button to start DVD playback.

If the disc you are using supports auto start, it starts to play automatically
(even if you do not press the 

0

 button), as soon as you close the disc

tray.

6

Press the 

 button to choose one side or both sides.

… To record on both sides.
… To record on only one side.

7

Press the 

I6

 button.

Recording will be paused.

8

When DVD playback reaches the desired point, press the

0

 button to start recording on

side A or the 

1

 button for side

B.

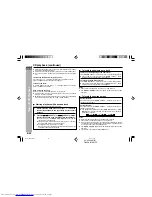
To stop recording:

Press the 

 button.

I

It will stop the tape only. Another press of the 

 button will stop DVD playback.

I

Even when the DVD playback is finished, the tape will not stop. To stop the
tape, press the 

 button.

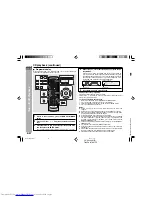
Recording to a cassette tape (continued)

*DV999W_EP56-60

04.3.4, 17:49

57

Summary of Contents for CD-DV999W

Page 1: ... MODEL MODÈLE MODELO CD DV999W OPERATION MANUAL MODE D EMPLOI MANUAL DE MANEJO NTSC PAL SHARP CORPORATION Please refer to pages i and E 1 to E 70 Se reporter aux pages i et F 1 à F 70 Consulte las páginas ii y S 1 a S 70 ENGLISH FRANÇAIS ESPAÑOL DV999W EN _FRONT 04 3 8 8 01 PM 1 ...

Page 2: ...La copie la diffusion l affichage public la transmission la représentation publique ou la location non autorisés que ces activités soient à but lucratif ou non du contenu d un disque sont interdits par la loi I Ce système est équipé d une technologie de protection contre les copies qui cause une importante dégradation de l image quand le contenu d un disque est copié sur une vidéocassette Protecti...

Page 3: ...ideocinta puedan reproducirse con normalidad Derechos sobre aparatos de los N de patente de EE UU 4 631 603 4 577 216 4 819 098 y 4 907 093 con licencia otorgada sólo para usuarios de visión limitada Este producto incorpora tecnología de protección de los derechos de autor que se protege con derechos de métodos de ciertas patentes de EE UU y otros derechos de propiedad intelectual propiedad de Mac...

Page 4: ...o qualified personnel Note for users in Australia Copyright may exist in material you wish to record Copying or broadcasting such material without permission of the relevant licensees or owners of the copyright is prohibited by law SHARP is not in a position to authorise the copying or broadcasting of copyright materials and nothing in this OPERATION MANUAL should be implied as giving that authori...

Page 5: ...ce 69 Specifications 69 70 H General Information Page Precautions 3 Controls and indicators 4 8 H Preparation for Use System connections 9 13 Remote control 14 H Basic Operation General control 15 Setting the clock 16 H DVD Explanation Types of playable discs 17 18 Preparing to watch a DVD DVDs 19 H DVD Setting Setting up for playback of an NTSC disc 20 TV mode setup 21 Parental setting 22 23 Audi...

Page 6: ... drawn to the environmental aspects of battery disposal I This unit should only be used within the range of 5 C 35 C 41 F 95 F 10 cm 4 10 cm 4 10 cm 4 10 cm 4 Warning The voltage used must be the same as that specified on this unit Using this product with a higher voltage other than that which is specified is dangerous and may result in a fire or other type of accident causing damage SHARP will no...

Page 7: ...de Select Button 15 11 Tape 1 Cassette Compartment 54 12 Game Video Input Sockets 65 13 Headphone Socket 65 14 Disc Number Select Buttons 19 29 15 DVD Video CD CD MP3 WMA Direct Play Button 29 16 Disc Tray Open Close Button 19 17 DVD Video CD CD MP3 WMA Play Tape 1 Play Tape 2 Forward Play Button 29 54 55 18 Memory Set Button 16 39 47 53 61 64 19 Tape 2 Record Pause Button 51 57 58 59 60 20 Tape 2...

Page 8: ...VD Angle Indicator 12 DVD Chapter Indicator 13 DVD Title Indicator 14 WMA Indicator 15 Virtual Surround Indicator 16 Tape 2 Record Indicator 17 Timer Recording Indicator 18 Timer Play Indicator 19 Sleep Indicator 20 Tape 2 Reverse Play Indicator 21 Tape 1 Play or Tape 2 Forward Play Indicator 22 Tape Reverse Mode Indicator 23 FM Stereo Mode Indicator 24 FM Stereo Receiving Indicator 25 Daily Timer...

Page 9: ... FM 75 Ohm Aerial Terminal 9 10 7 FM Aerial Earth Terminal 9 10 8 AM Loop Aerial Socket 9 10 9 Span Selector Switch 13 10 Video Output Socket 11 19 11 Speaker Terminals 9 10 Cooling fan This product is equipped with a cooling fan inside which begins to run once the power is on for better heat radiation H Speaker system 1 Tweeter 2 Passive Radiator 3 Woofer 4 Super Tweeters 5 Speaker Wire DV999W_EP...

Page 10: ...P3 WMA Fast Forward Video CD CD MP3 WMA Track Up Tape 2 Fast Wind and Tuner Preset Up Time Up Button 30 31 43 45 53 56 15 Tape 2 Reverse Play Button 55 56 57 58 59 60 16 DVD Video CD CD MP3 WMA Tape Stop Button 29 56 17 DVD Video CD CD MP3 WMA Tape 1 Play Tape 2 Forward Play Button 29 54 55 18 Shift Button 20 51 19 Volume Up Down Buttons 15 20 On Stand by Button 14 19 21 Echo Level Up Down Buttons...

Page 11: ...Z 1 2 3 4 5 6 H Remote control with shift button Reference page 1 Karaoke Audio Mode Button 51 2 DVD Setup Button 20 24 3 DVD Sound Button 35 4 DVD Super Picture Button 37 5 DVD Video CD CD A B Repeat Button 38 6 DVD Digital Gamma Button 36 DV999W_EP06 08 04 3 4 17 42 8 ...

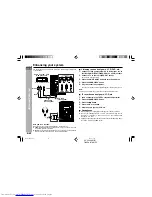
Page 12: ...DV999W E 9 ENGLISH Preparation for Use CD DV999W Z TINSZA017AWZZ System connections Right speaker FM aerial AM loop aerial Left speaker To a wall socket See page 12 Red Black DV999W_EP09 14 04 3 4 17 43 9 ...

Page 13: ...r better reception Installing the AM loop aerial Assembling Attaching to the wall External FM aerial Use an external FM aerial if you require better reception Consult your dealer External FM aerial 75 ohm coaxial cable Screws not supplied Wall H Speaker connection Connect the black wire to the minus terminal and the red wire to the plus terminal Caution I Use speakers with an impedance of 6 ohms o...

Page 14: ...f colour variation occurs Turn off the TV from the power switch After 15 30 minutes turn the TV on again If the colour variation is still present Move the speakers further away from the TV I If any kind of magnet or an electromagnet is placed too close to the TV and the system irregular colours may appear on the TV screen Note The speaker grilles are not removable Left speaker Right speaker H TV m...

Page 15: ...ill enter the demonstration mode see page 13 Notes I The unit will start the tape initialisation when plugged in to the AC socket During this process initialising sound will be heard and the unit cannot be turned on Wait until the process is finished I Unplug the AC power lead from the wall socket if the unit will not be in use for a prolonged period of time AC plug adaptor In areas or countries w...

Page 16: ...lows I For 50 kHz FM interval 9 kHz in AM 50 9 I For 100 kHz FM interval 10 kHz in AM 100 10 3 Whilst pressing down the I6 button and the X BASS DEMO button press the 5 3 PRESET X button until CLEAR AL appears Caution This operation will erase all data stored in memory including clock timer settings tuner preset and CD programmes H Demonstration mode The first time the unit is plugged in the unit ...

Page 17: ...se the unit to malfunction Notes concerning use I Replace the batteries if the operating distance is reduced or if the operation becomes erratic Purchase 2 AA size batteries UM SUM 3 R6 HP 7 or similar I Periodically clean the transmitter on the remote control and the sensor on the unit with a soft cloth I Exposing the sensor on the unit to strong light may interfere with operation Change the ligh...

Page 18: ...rn the power on Press the ON STAND BY button to turn the power on H Illumination light control When the power is turned on light illuminates around the display To turn on off the light hold down the MEMORY DIMMER button on the remote control for 2 seconds or more After Use Press the ON STAND BY button to enter the power stand by mode In CD MP3 WMA TUNER TAPE mode In GAME VIDEO mode In DVD Video CD...

Page 19: ...pply is restored after a power failure or unplugging the unit If incorrect readjust the clock as follows To readjust the clock Perform Setting the clock from step 1 If the CLOCK is not appear in step 3 step 4 for selecting the 24 hour or 12 hour display will be skipped To change the 24 hour or 12 hour display 1 Clear all the programmed contents Refer to Clearing all the memory reset on page 68 for...

Page 20: ... data in accordance with the disc manufacturer s guidelines some functions may not be available on some discs Be sure to read the instructions provided with the disc The Prohibited indicator or displayed during operation indicates that such manufacturer imposed restrictions apply Note 3 This product supports the following modes I 2 channel L R PCM audio I Dolby Digital I 2 channel MPEG audio I 5 1...

Page 21: ... used on DVD discs Sample icons H Disc that cannot be played I This unit does not support below disc types I DVDs without the region number on I DVD Audio the back of the unit or ALL I CDG I SECAM system DVD I Photo CD I DVD ROM I CD ROM I DVD RAM I SACD I The above discs sometimes cannot be played sometimes only pictures without sound will appear or only sound can be heard Playing such a disc may...

Page 22: ...Do not place two discs in one disc tray I Do not play discs with special shapes heart or octagon shaped It may cause malfunctions I Do not push the disc tray whilst it is moving I If the power fails whilst the tray is open wait until the power is restored I If the disc tray is stopped with force ER CD20 will appear on the display for 3 seconds and the unit will not function If this occurs press th...

Page 23: ...hen you have an NTSC TV or an NTSC compatible multi system TV connected to the unit NTSC PAL Select this setting when you have a PAL TV connected to the unit This setting converts the NTSC signal to a modified PAL signal 6 Press the ENTER button to confirm the setting To exit the setup screen and return to the startup screen press the SET UP button whilst pressing down the SHIFT button or the RETU...

Page 24: ...aying a wide image disc black bands are inserted at the top and bottom to make a 4 3 size image A 4 3 disc is played in 4 3 1 Whilst a disc is stopped press the SET UP button whilst pressing down the SHIFT button to display the setup screen 2 Use the cursor or button to select the TV MODE 3 Press the ENTER button and then use the cursor or button to select TV MODE 4 Press the ENTER button to displ...

Page 25: ...unction are rated according to their content The rated content allowed by a parental lock level and the way a DVD can be controlled may vary from disc to disc Some discs for example may let you edit out violent scenes and replace them with scenes more suitable for viewing by children You can also use the parental lock to disable playback of the DVD entirely This system supports the following paren...

Page 26: ...re for later reference I Some DVDs allow the viewer to temporarily change the parental level setting to view the original scenes When this prompt appears enter the password to view the original scenes I You cannot open the setup screen whilst a playback operation is in progress If a disc is playing stop playback first H Changing the parental level 1 Whilst a disc is stopped press the SET UP button...

Page 27: ...or button to select the AUDIO SETUP 3 Press the ENTER button and then use the cursor or button to select MPEG 4 Press the ENTER button to display the settings you can select 5 Use the cursor or button to select BITSTREAM or PCM BITSTREAM Use this setting for a digital connection of a receiver amplifier equipped with an MPEG audio decoder PCM Use this setting for a digital connection to the PCM dig...

Page 28: ...r button to select the AUDIO SETUP 3 Press the ENTER button and then use the cursor or button to select COMPRESSION 4 Press the ENTER button to display the settings you can select 5 Use the cursor or button to select ON or OFF 6 Press the ENTER button to confirm the setting To exit the setup screen and return to the startup screen press the SET UP button whilst pressing down the SHIFT button or th...

Page 29: ... AF Afrikaans 1 In step 5 above select OTHER with the cursor 1 or 0 button then press the ENTER button to set the OTHER input item two letters O T H E R ENTER RETURN A U D I O 1 A A U D I O 2 F SELECT ENTER 2 Use the cursor 1 or 0 button to select A as the first letter the cursor or button to move to the second place and then the cursor 1 or 0 button to select F 3 Press the ENTER button to confirm...

Page 30: ...L Greenlandic KM Cambodian KN Kannada KO Korean KS Kashmiri KU Kurdish KY Kirghiz LA Latin LN Lingala LO Laotian LT Lithuanian LV Latvian Lettish Code Language name Code Language name MG Malagasy MI Maori MK Macedonian ML Malayalam MN Mongolian MO Moldavian MR Marathi MS Malay MT Maltese MY Burmese NA Nauruan NE Nepali NL Dutch NO Norwegian OC Occitan OM Afan Oromo OR Oriya PA Panjabi PL Polish PS...

Page 31: ...er numbers and elapsed playing time may not appear on off auto 0 1 2 3 4 0 3 2 1 0 5 0 0 0 CD 0 1 8 3 2 5 0 2 3 4 0 DVD CD Title number Chapter number Elapsed playing time Operation indicator Track number Elapsed playing time Operation indicator DVD Without a disc A non compatible disc Loading data being read from disc Stop Play Appears when display mode is on Pause Appears when display mode is on...

Page 32: ... is damaged if you load the disc upside down or if the region number of the disc is not supported by this unit If the above indicator appears reload the disc or replace it with another one I A safety feature automatically sets the unit to the power stand by mode if you set the volume level too high whilst playing certain types of discs If this happens lower the volume level and restart playback I ...

Page 33: ...The unit stores the point 2 To restart play press the 0 button I Playback resumes from a point slightly before the point it was stopped This resume operation does not work in the following cases I If you press the button twice I If you press the button during auto playback I If you remove a disc and then load another one Notes I After you press the button to stop playback you can press the button ...

Page 34: ... is playing I The disc begins fast scan at x 2 speed 1 I Three speeds are available Each time the 5 3 PRESET X or 2 4 PRESET W button is pressed the speed of fast scan changes in the sequence shown on the right I You can also press the 5 3 or 2 4 button on the remote control for the same operation 2 Press the 0 button to return to normal playback Notes I On some discs the fast scan function is dis...

Page 35: ...om the beginning of the disc is displayed I You can skip directly to the point from which you want to start playback 4 Subtitle language setting page 34 I The subtitle number and language currently selected are displayed When a disc with only one subtitle is played back xx is displayed I You can select the desired subtitle language 5 Angle setting page 34 I The current angle is displayed When a di...

Page 36: ...mber of the chapters recorded on the disc 2 Use the 0 9 buttons to select the title number to which you want to skip I You can also select the title number by pressing the cursor or button 3 Press the ENTER button The beginning of the specified title appears Notes I The title number you can enter depends on number of the titles recorded on a disc you play I The direct title skip function is not po...

Page 37: ...UB TITLE button on the remote control for the same operation in step 3 You do not need to do the steps 1 and 2 I This function can only be used for discs on which subtitles have been recorded with multiple subtitles I Some DVD discs are marked Forced Display With such discs the subtitles will be displayed even if you select OFF This does not indicate a fault with your unit I If no subtitles are re...

Page 38: ...r the same operation in step 3 You can skip steps 1 and 2 h c 1 5 N 2 I SH 0 6 1 0 2 0 0 10 5 D D V 3 0 0 1 2 CM P L Using the function control continued H 3 D Virtual Surround setting I You can enjoy 3 D surround on DVD with Dolby Digital Sound I You can also enjoy 3 D surround using 3 speakers 1 Press the SET UP button whilst pressing down the SHIFT button during playback The function control sc...

Page 39: ...playback The function control screen appears 2 Use the cursor or button to select G and then press the ENTER button 3 Press the cursor or button to select ON or OFF 4 Whilst ON is selected use the cursor 1 or 0 button to change the level setting 5 Press the ENTER button to confirm the setting You can exit the function control screen by pressing the SET UP button whilst pressing down the SHIFT butt...

Page 40: ...n whilst pressing down the SHIFT button on the remote control for the same operation in step 3 You do not need to do the steps 1 and 2 SELECT BITRATE Mbps 0 0 10 ENTER D D V ENTER RETURN S G ON SELECT BITRATE Mbps 0 0 10 ENTER D D V ENTER RETURN S G ON H To zoom an image Whilst a disc is playing press the ZOOM button I Each press of the ZOOM button cycles through the zoom settings as follows ZOOM ...

Page 41: ...e able to use this function with some discs H A B repeat 1 When playback reaches the start point of the scene press the button whilst pressing down the SHIFT button I This displays A repeat indicator I This registers the start point A 2 When playback reaches the end point of the scene press the button whilst pressing down the SHIFT button again I This starts A B repeat from the start point A to th...

Page 42: ...to the selection area I To clear all programmes press and hold down the CLEAR DISPLAY button for more than 3 seconds in the confirmation area 4 Press the 0 button to start playback Adding chapters into the programme Follow steps 1 3 The new chapter number will be added after the last number of the original programme Notes I Direct search buttons can be used to select the title and chapter I Disc w...

Page 43: ... the disc has been played once totally or partially Some DVDs include a disc menu that you can use to select a subtitle language audio channel and DTS or MPEG audio You can also turn disc menu on and off H To display subtitles This function can be performed with only discs that have been played once totally or partially 1 Whilst the disc is stopped press the MENU button to display the disc menu 2 ...

Page 44: ... 5 Label sides 1 side 1 side Audio recording format Digital Digital max 20 min max 74 min Video recording format MPEG 1 H Types of discs This unit handles video CDs that support P B C version 2 0 P B C is an abbreviation of playback control You can enjoy the following two types of playback depending on the disc Disc type Features Video CDs without P B C Sound and motion pictures can be played vers...

Page 45: ...CLOSE button to open the disc tray 1 4 Place a disc on the disc tray label side up I Be sure to place 8 cm 3 discs in the middle of the disc trays 5 Press the OPEN CLOSE button to close the disc tray 1 6 Place discs on the trays 2 5 by following steps 3 5 7 To select the disc you want to listen to first press one of the s 1 s 5 buttons and within 5 seconds press 0 button to start playback I Playba...

Page 46: ...ith special shapes heart or octagon shaped It may cause malfunctions I Do not push the disc tray whilst it is moving I Do not move the disc tray by hand This may cause malfunctions I If the power fails whilst the tray is open wait until the power is restored I If the disc tray is stopped with force ER CD20 will appear on the display for 3 seconds and the unit will not function If this occurs press...

Page 47: ...VD CD button 3 Press the s 1 button and within 5 seconds press the OPEN CLOSE button to open the disc tray 1 4 Place a disc on the disc tray 1 label side up I Be sure to place 8 cm 3 discs in the middle of the disc trays 5 Press the OPEN CLOSE button to close the disc tray 1 will appear 6 Place discs on the trays 2 5 by following steps 3 5 7 Press the 0 button to start playback 12 cm 5 8 cm 3 CD p...

Page 48: ...ack mode I The 5 3 or 2 4 button on the remote control allows you the same operation I This function is not available for MP3 WMA discs 1 Whilst in the stop mode press one of the s 1 s 5 buttons to select the desired disc and press the 0 button to start playback 2 Press the 5 5 5 5 5 3 3 3 3 3 PRESET X X X X X or 2 2 2 2 2 4 4 4 4 4 PRESET W W W W W button to select the desired track Playback star...

Page 49: ... DVD MP3 and WMA disc will be skipped and random playback will be disabled I This function is not available for WMA MP3 and DVD discs I Repeat play cannot function during random play Caution After using repeat or random play be sure to press the button Otherwise the disc s will play continuously H Repeat play CD playback can be changed as follows Press the button repeatedly on the remote control T...

Page 50: ...button to enter the stand by mode the programmed selections will not be cleared I During programmed play random play is not possible I Once programmed the contents will be memorised When the unit is stopped and then the 0 button is pressed however normal CD playback will be resumed To play back the programme press the 0 button after the MEMORY DIMMER button I To exit the programming procedure half...

Page 51: ...R button is not pressed after the direct search buttons the track will not be selected H MP3 WMA disc playback 1 Select the desired folder by pressing the cursor 1 0 or button and press the ENTER button 2 Select the desired track by pressing the cursor 1 0 or button 3 Press the ENTER button to begin playback To interrupt playback Press the 6 STILL button on the remote control To resume playback fr...

Page 52: ...ing playback of an MP3 disc with tracks recorded at a very high speed I A disc containing both MP3 and WMA format files will not be properly played The unit will support one type of format only depending on the recording condition Please use disc containing files of the same format I Elapsed time for WMA discs may not display correctly during the speed search x8 or x32 H To skip during playback 1 ...

Page 53: ...se the microphone echo Notes I When you sing too loud through the microphone your voice may be distorted depending on the devices connected If this happens lower the microphone volume I If an extremely sensitive microphone is used howling may be generated I Unidirectional microphone is more appropriate for vocal use I The volume of both microphones is set simultaneously It is recommended to use mi...

Page 54: ...pressing down the SHIFT button on the remote control until V CANCEL appears on the display will appear Notes I Use discs recorded in stereo The function will not work with mono sources I With some discs and tapes the original vocals may still be heard Notes on sound multiplexed karaoke discs Sound multiplexed karaoke discs are discs on which the main vocal and the BGM background music have been re...

Page 55: ...stop the auto tuning press the TUNING button again To receive an FM stereo transmission Press the TUNER BAND button to display the ST indicator I j will appear when an FM broadcast is in stereo I If the FM reception is weak press the TUNER BAND button to extinguish the ST indicator The reception changes to monaural and the sound becomes clearer FM stereo mode indicator FM stereo receiving indicato...

Page 56: ...change a preset station When a new station is stored in memory the station previously memorised will be erased Note The backup function protects the memorised stations for a few hours should there be a power failure or if the AC lead is disconnected H To recall a preset station Press the PRESET X or W button for less than 0 5 seconds to select the desired station H To scan the preset stations The ...

Page 57: ...o turn the power on 2 Press the TAPE 1 2 button to select TAPE 1 3 Open the cassette door by pushing the area marked 7 4 Load a cassette into the TAPE 1 cassette compart ment with the side to be played facing toward you 5 Press the 0 button to start playback Tape 1 playback Auto power on function When you press any of the following buttons the unit turns on I TAPE 1 2 button main unit and remote c...

Page 58: ... marked 7 4 Load a cassette into the TAPE 2 cassette compart ment with side A facing you 5 Press the button to choose one side or both sides To listen to both sides To play both sides start from side A When playback starts from side B side A will not be played For endless repeat play of both sides To listen to one side 6 Press the 0 button to listen to side A or the 1 button for side B Tape 2 play...

Page 59: ...the playback or stop mode Before recording I When recording important selections make a preliminary test to ensure that the desired material is properly recorded I SHARP is not liable for damage or loss of your recording arising from malfunction of this unit I The volume and sound controls can be adjusted with no effect on the recorded signal Variable Sound Monitor I For recording use only normal ...

Page 60: ...using supports auto start it starts to play automatically even if you do not press the 0 button as soon as you close the disc tray 6 Press the button to choose one side or both sides To record on both sides To record on only one side 7 Press the I6 button Recording will be paused 8 When DVD playback reaches the desired point press the 0 button to start recording on side A or the 1 button for side ...

Page 61: ...and load the desired disc 4 Press one of the s 1 s 5 buttons to select the disc to be recorded and press 0 button to start playback 5 Press the button to choose one side or both sides To record on both sides To record on only one side 6 Press the I6 button Recording will be paused 7 Select the desired track number by pressing the direct search buttons 0 9 on the remote control 8 Press the 0 button...

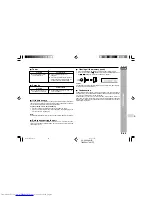
Page 62: ... the cassette will stop automatically I CD playback will start approximately 7 seconds after the tape starts To stop recording Press the button The CD and tape will stop Disappears after a while Recording to a cassette tape continued Recording from several CDs continuously 1 Perform steps 1 6 in Recording from a CD CDs 2 Within 5 seconds press the 0 button to record on side A or the 1 button for s...

Page 63: ...m tape to tape You can record from TAPE 1 to TAPE 2 1 Press the ON STAND BY button to turn the power on 2 Load a prerecorded cassette into the TAPE 1 cassette com partment Insert a blank tape into the TAPE 2 cassette com partment It is recommended that the recording tape is the same length as the master tape 3 Press the TAPE 1 2 button until TAPE 1 appears on the display The reverse mode will be s...

Page 64: ...timer to record a radio programme and use the daily timer to wake up 1 Set the daily timer pages 61 63 2 Set the once timer pages 61 63 Note When set times for the daily timer and once timer overlap the once timer takes priority Allow an interval of at least 1 minute between operations Timer playback or timer recording Before setting timer 1 Check that the clock is set to the correct time refer to...

Page 65: ...the time to finish as in steps 6 and 7 above 9 Switch input with the 5 3 or 2 4 button and then press the MEMORY SET button To select the timer playback source DVD CD TUNER TAPE 1 or TAPE 2 To select the timer recording source TUNER I When you select the tuner select a station by pressing the 5 3 or 2 4 button and then press the MEMORY SET button I If a station has not been programmed NO P SET wil...

Page 66: ...EMORY SET button 3 Within 10 seconds press the 5 3 or 2 4 button to select ONCE CAL or DAILY CAL and press the MEMORY SET button The unit returns to the timer stand by mode after displaying the settings in order Cancelling the timer setting in the timer stand by mode 1 Press the CLOCK TIMER button 2 Within 10 seconds press the 5 3 or 2 4 button to select ONCE or DAILY and press the MEMORY SET butt...

Page 67: ...s 4 5 To cancel the sleep operation Press the ON STAND BY button whilst SLEEP is indicated To cancel the sleep operation without setting the system to the stand by mode proceed as follows 1 Whilst SLEEP is indicated press the CLOCK TIMER button 2 Within 10 seconds press the 5 3 or 2 4 button to select SLEEP OFF and press the MEMORY SET button H To use timer and sleep operation together Sleep and t...

Page 68: ...ME VIDEO button 3 Press the I6 button 4 Press the 0 or 1 button 5 Start the game system VCR etc H Headphones I Before plugging in or unplugging the headphones reduce the volume I Be sure your headphones have a 3 5 mm 1 8 diameter plug and the impedance is between 16 ohms and 50 ohms The recommended impedance is 32 ohms I Plugging in the headphones disconnects the speakers automatically Adjust the ...

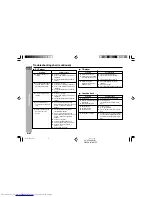
Page 69: ...uthorised SHARP dealer or service centre H General Symptom The clock is not set to the correct time When a button is pressed the unit does not respond No sound is heard Possible cause Did a power failure occur Reset the clock Refer to page 16 Set this unit to the power stand by mode and then turn it back on If the unit still malfunctions reset it Refer to page 68 Is the volume level set to 0 Are t...

Page 70: ...nside the unit Troubleshooting chart continued H DVD player Symptom Playback sounds are skipped The control buttons do not function Music or video playback is interrupted Pictures and sound are skipped The system does not operate even if the power is on Image cannot be played back Sound is not heard Possible cause Is the disc very dirty Is the system located near excessive vibrations Has condensat...

Page 71: ...the disc tray Then set the unit to the power stand by mode Carrying the unit with discs left inside can damage the unit H Clearing all the memory reset 1 Press the ON STAND BY button to enter the power stand by mode 2 Whilst pressing down the I6 I6 I6 I6 I6 button and the X BASS DEMO button press the 5 3 5 3 5 3 5 3 5 3 PRESET X X X X X button until CLEAR AL appears Caution This operation will era...

Page 72: ...y damage the cabinet finish I Do not apply oil to the inside of the unit It may cause malfunctions Specifications As part of our policy of continuous improvement SHARP reserves the right to make design and specification changes for product improvement without prior notice The performance specification figures indicated are nominal values of production units There may be some deviations from these ...

Page 73: ...ency characteristics Linear PCM DVD 4 Hz to 22 kHz 48 kHz sampling 4 Hz to 44 kHz 96 kHz sampling CD 4 Hz to 20 kHz S N ratio 96 dB 1 kHz CD Dynamic range 96 dB Linear PCM DVD 96 dB CD Total harmonic distortion ratio 0 006 maximum H Tuner Frequency range FM 88 0 108 0 MHz AM 531 1 602 kHz H Speaker Type 3 way type speaker system with passive radiator Super tweeter x 2 5 cm 2 tweeter x 1 16 cm 6 1 ...

Page 74: ...CD DV999W Z TINSZA017AWZZ MEMO MÉMORANDUM MEMORÁNDUM DV999W EN _MEMO 04 3 4 17 50 1 ...

Page 75: ...CD DV999W Z TINSZA017AWZZ MEMO MÉMORANDUM MEMORÁNDUM DV999W EN _MEMO 04 3 4 17 50 2 ...

Page 76: ...CD DV999W DVD MINI SYSTEM U P DOWN ...

Reviews: