background image

AR-M207 M165 M162 SIMULATIONS 7-19

25

10

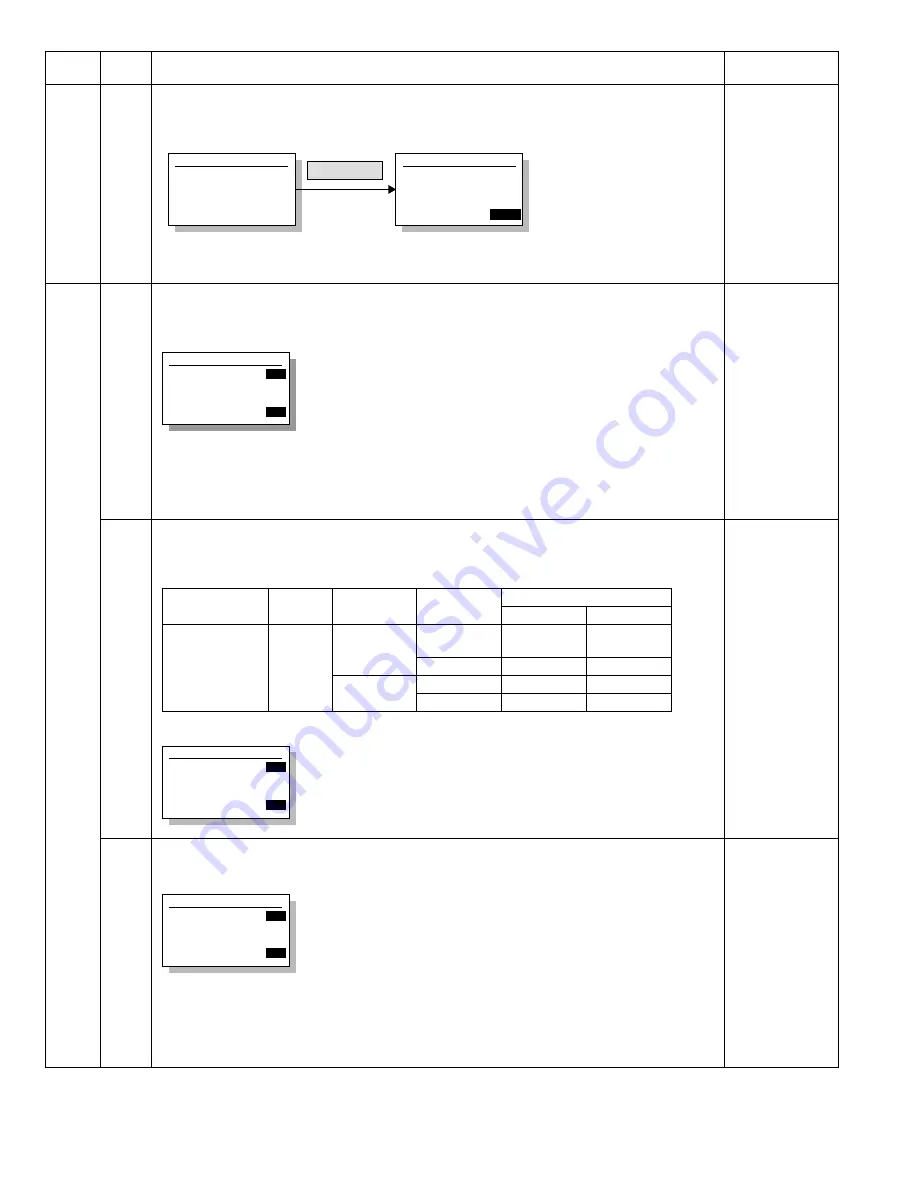
Polygon motor operation check

When [OK] or [START] is pressed, the polygon motor is rotated for 30sec.

After completion of the process, the machine shifts to the sub code input window.
[CA] key: Exits the simulation mode.
[Interruption] key: Interrupts the output operation, and shifts to the sub code input window. 

26

01

Job separator setting

Used to set YES/NO of installation of the hob separator.
After installation of the job separator, setting must be manually set to YES. 

[CA] key: Exits the simulation mode. (When setting is changed, the machine exits the simulation mode and 
performs the hard reset.)
[Interruption] key: Shifts to the sub code input window. (When setting is changed, it is invalid.)
[START] key:  Setting contents are saved in the EEPROM and the machine shifts to the code input window.   

(When setting is changed, the machine does not shift to the code input window.)

02

Size setting

Used to set Enable/Disable of FC (8.5" x 13") size detection.
Detection size when FC (8.5" x 13") size document is used.

* For destinations other than the above, this setting is invalid.

Default:
00

03

Auditor setting

Used to set the auditor.

* When the coin vendor mode is selected:

1. Sort auto select is OFF.
2. For Japan, the duplex copy use inhibition setting is ON (inhibited).

3. When the auditor mode exclusive-setting is ON (manual paper feed inhibited) and the standard tray is set

to the manual feed tray, the standard tray setting is set to the main tray. 

Default:
0 (P10)

Main 
code

Sub 

code

Contents

Remark

Sim25-10 LSU CHECK

PRESS OK KEY

EXEC

Sim25-10 LSU CHECK

EXEC

OK/START Key

(Execution start window)

(Execution window)

Sim26-1 JBS SET

1:JOB SEPARATOR
 0=NONE
 1=SEPARATOR
                 [   0-1]

0 : No job separator
1 : Job separator provided 

0

0

Unit to be 

used

Destination

Document size

Set value

0(Disable)

1(Enable)

Document

SPF

EX Japan AB 
series(FC)

FC(8.5"x13")

B4

FC(8.5"x13")

B4

B4

FC(8.5"x13")

Inch 
series(FC)

FC(8.5"x13")

LG(8.5"x14")

FC(8.5"x13")

LG(8.5"x14")

LG(8.5"x14")

FC(8.5"x13")

Sim26-2 SIZE SET

1:B4/LG,FC
 0=B4/LG
 1=FC
                 [   0-1]

Code: Setting
0 : Detection disabled
     (Default for destinations other than below)
1 : FC detection enabled
     (Default for SCA/Philippines)

0

0

Sim26-3 AUDITOR SET

1:AUDITOR
 0=P10

1=VENDOR

 2=OTHER
                 [   0-2]

Code: Mode
0 : Built-in auditor mode
1 : Coin vendor
2 : Other

0

0

[07]SIMULATIONS.fm  19 

ページ


2004年11月17日 水曜日 午後12時11分

Summary of Contents for AR-M162

Page 1: ...f the set SHARP CORPORATION DIGITAL COPIER AR M207 AR M165 MODEL AR M162 CODE 00ZARM207 A1E 1 GENERAL 1 1 2 SPECIFICATIONS 2 1 3 CONSUMABLE PARTS 3 1 4 EXTERNAL VIEWS AND INTERNAL STRUCTURES 4 1 5 UNPACKING AND INSTALLATION 5 1 6 ADJUSTMENTS 6 1 7 SIMULATIONS 7 1 8 TROUBLE CODE LIST 8 1 9 MAINTENANCE 9 1 10 DISASSEMBLY AND ASSEMBLY 10 1 11 KEY OPERATOR PROGRAM 11 1 12 FRASH ROM VERSION UP PROCEDUR...

Page 2: ......

Page 3: ... mode 7 1 2 Canceling the simulation mode 7 1 3 List of simulations 7 1 4 Contents of simulations 7 3 8 TROUBLE CODE LIST 1 Trouble code list 8 1 2 Details of trouble codes 8 2 9 MAINTENANCE 1 Maintenance table 9 1 2 Maintenance display system 9 2 3 Note for replacement of consumable parts 9 2 10 DISASSEMBLY AND ASSEMBLY 1 High voltage section Duplex transport section 10 1 2 Optical section 10 2 3...

Page 4: ...s Bank drafts Checks Passports Driver s licenses Do not touch the photoconductive drum Scratches or smudges on the drum will cause dirty prints Store spare toner cartridges in a cool dry place without removing from the package before use If they are exposed to direct sunlight or excessive heat poor copies may result 2 Installation requirements Improper installation may damage this product Please n...

Page 5: ...FUNCTION BOARD STD 1 STD STD 1 1 Option for USA CANADA AR NB3 NETWORK PRINTING SCANNING EXPANSION KIT OPT OPT OPT AR FX11 FACSIMILE EXPANSION KIT OPT OPT OPT AR SM5 EXPANSION MEMORY OPT OPT OPT AR MM9 FAX EXPANSION MEMORY OPT OPT OPT AR PF1 BARCODE FONT KIT OPT OPT OPT The AR NB3 is required AR PK1N PS3 KIT OPT OPT OPT The AR NB3 is required AR PF2 FLASH MEMORY KIT OPT OPT OPT The AR NB3 is requir...

Page 6: ...I Print 12ppm 12ppm SPLC Print 20ppm ROPM 16ppm ROPM AR M207 AR M162 M165 Normal Reduction Enlargement Normal Reduction Enlargement A4 8 5 x11 20 20 20 16 16 16 A4R 8 5 x11 R 14 15 14 15 14 15 12 12 12 A5 5 5 x8 5 20 20 20 16 16 16 B5 16K 20 20 20 16 16 16 B5R 16KR 16 15 16 15 16 15 14 14 14 8 5x13 12 12 12 10 10 10 B4 8 5 x14 12 12 12 10 10 10 A3 11 x17 8K 11 10 11 11 10 11 11 10 11 9 9 10 9 9 10...

Page 7: ...aiable Detection size Automatic detection A kind of detection unit is used by switching the software destination AB system A3 B4 A4 A4R B5 B5R A5 Inch system 11 x 17 8 5 x 14 8 5 x 11 8 5 x 11 R 5 5 x 8 5 Document tray guide display Tray center Marked Document insertion direction document face up set command Document guide Marked From the center A3 A4 11 B4 B5 8 5 A4R A5 B5R A5R 5 5 Type LCD displ...

Page 8: ...gle paper feed Transparency film Labels Postal card Paper kind AB system Standard paper Recycled paper Transparency film Labels Postal card Envelope Thick paper 200g m Inch system Standard paper Recycled paper Transparency film Labels Postal card Envelope Thick paper 200g m Paper size detection None Paper empty detection Available Standard 20 sheet model Standard provision 16 sheet model Not avail...

Page 9: ...t model Electronic sort Standard 30 0 Kg 16 sheet model Electronic sort Option 29 7 Kg Print speed GDI 12PPM GDI Print USB2 0 Full speed A4 Letter Measurement conditions Host PC CPU 500 700MHz RAM 256MB or above Windows98SE Data Testchart B1 dot SPLC According to the main machine speed First Print 7 2sec or less Resolution 600dpi Duplex print Available Paper feed system Paper feed tray and multi p...

Page 10: ...lay From the center A3 A4 11 B4 B5 8 5 A4R A5 B5R A5R 5 5 Documents out of specifications Transparency film Perforated document photo catalogue Multi copy S S S D Duplex model Document mixture Not available Random paper feed Not available Document reversion Not available Display section LED None Reliability MCBJ MCBF Conforms to the main unit Document replacement speed Standard copy S S 16 sheet m...

Page 11: ...rnal dimensions 590 mm W x 471 mm D x 174 mm H Weight 10 0Kg Reliability MCBJ MCBF Conforms to the main unit Item included Installation manual Paper size label Case color Frosty white Expansion function Electronic sort function 2In1 4In1 Rotation copy Edge erase Center erase Margin shift Card shot USB2 0 High speed support SPLC print JBIG GDI ROPM function Electronic sort compress function JBIG Me...

Page 12: ...r 50 Dept Fax 50 dept Platform IBM PC AT Include compatible machine Supported OS IEEE1284 Windows95 98 Me NT4 0 Workstation SP5 2000 Professional XP Home Professional USB1 1 Windows98 Me 2000 Professional XP Home Professional USB2 0 Windows2000 Professional XP Home Professional Emulation GDI JBIG GDI Memory Environments for full operations of the above OS Function Content Main Copies 1 999 Makes p...

Page 13: ...rst Page only Yes No Function Content Supported OS Win98 Me 2000 XP Hardware environment System Must meet the operating conditions of each OS HDD 8MB or above 100MB or above recommendable Monitor 800 x 600 dots or above 256 colors or more must be displayed Other USB port 1 1 or 2 0 Selectable destination SharpDesk E mail software Fax software OCR software MS Word USB TWAIN Supported OS Win98 Me 20...

Page 14: ...160K AR 202MT Life setting by A4 6 document 2 Developer Developer Developer Net Weight 400g x10 500K AR 202MD 3 Drum kit Drum Drum fixing plate x1 x1 50K AR 202DR NO Name Content Life Product name Remark 1 Toner cartridge Black With IC Toner Toner Net Weight 537g Vinyl bag x10 x10 160K AR 202LT Life setting by A4 6 document 2 Developer Developer Developer Net Weight 400g x10 500K AR 202LD 3 Drum k...

Page 15: ...e The lot number printed on the front side flange is composed of 6 digits each digit showing the following content Temperature Humidity Temperature Humidity Humidity Temperature Use envi ronment conditions 1 2 3 4 5 6 1 Alphabet Indicates the model conformity code A for this model 2 Number Indicates the end digit of the production year 3 Number or X Y Z Indicates the month of packing X stands for ...

Page 16: ...are output to this tray 10 Upper tray when the job separator tray kit is installed Received faxes when the fax option is installed and print jobs are delivered to this tray 11 Operation panel Contains operation keys and indicator lights 12 Front cover Open to remove paper misfeeds or replace the toner cartridge 13 Tray 1 Tray 1 can hold approximately 250 sheets of copy paper 64 g m 14 Tray 2 Tray ...

Page 17: ...t you wish to scan face up here Up to 40 sheets can be placed 24 Original guides when the SPF is installed Adjust to the size of the originals 25 Feeding roller cover when the SPF is installed Open to remove misfed originals 26 Right side cover when the SPF is installed Open to remove misfed originals 27 Fusing unit release levers To remove the paper misfed in the fusing unit push down on these le...

Page 18: ...ous screen 7 FAX STATUS key This key is used in fax mode 8 OK key Press to enter the selected setting 9 Copy number display The selected number of copies appears During copying this shows the remaining number of copies 10 Numeric keys Use to select the number of copies 11 INTERRUPT key INTERRUPT indicator Interrupts a copy run to allow an interrupt copy job to be performed 12 C key Press to clear ...

Page 19: ...try screen 24 0 key Press during a continuous copy run to display the number of copies completed 25 READ END key When copying in sort mode from the document glass press this key when you have finished scanning the original pages and are ready to start copying 26 START key indicator Copying is possible when this indicator is on Press the key to start copying 27 CA key Clears all selected settings a...

Page 20: ...splay Displays the copy ratio for reduction or enlargement 6 Paper size display Displays the selected paper size When AUTO appears the most suitable size of paper is automatically selected 7 Paper tray display The selected paper tray is highlighted Example Copy mode The display shown is the AR M207 when the optional RSPF is installed display Icons appearing in the special function icon display The...

Page 21: ... Solenoid for paper feed from cassette 10 Resist roller solenoid RRS Resist roller rotation control solenoid 11 Manual paper transport clutch MPTC Drives the manual paper transport roller 12 Manual paper feed clutch MPFC Drives the manual paper feed roller 13 Manual paper feed solenoid MPFS Manual paper feed solenoid 14 2nd tray transport clutch CPFC2 Drives the 2nd tray transport roller 15 2nd tr...

Page 22: ...or DRS2 2nd tray door open close detection 12 2nd tray door paper pass sensor PPD2 2nd tray paper entry detection 13 2nd tray paper empty sensor CSS2 2nd tray paper empty detection 14 Paper in sensor PIN Paper transport detection 15 Cassette empty Tray paper entry detection 16 Front cover SW Front cover open detection 17 Power switch MAIN SW Turns ON OFF the main power source 18 Tray full sensor T...

Page 23: ...otor control 6 IMC2 PWB Electronic sort USB2 0 Option AR EB9 7 2nd cassette PWB 2nd cassette control 8 High voltage PWB High voltage control 9 Power PWB AC power input DC power control 10 Operation main PWB Operation panel input Display operation panel section control 11 LCD OPE PWB Display and operation panel control 12 FAX KEY PWB FAX operation input key operation input Option AR FX11 13 FAX mai...

Page 24: ... toner to the waste toner box 11 Drum unit Forms images 12 Transfer charger unit Transfer images on the drum onto paper 13 DUP follower roller 14 Duplex transport roller Transports paper for duplex 15 Resist roller Takes synchronization between the paper lead edge and the image lead edge 16 Manual paper feed tray Manual paper feed tray 17 Manual paper pick up roller Picks up paper in manual paper ...

Page 25: ... tapes and protective material Remove all tapes then open the document cover and remove the protective material of sheet shape 2 Remove the fixing screw Use a coin to remove the fixing screw The fixing screw is required when transporting the machine Keep it in the tray Refer to the later description 3 Installing procedure A Developer cartridge installation 1 Open the manual tray and open the side ...

Page 26: ...he side cover hold the knob When closing the covers be sure to close the front cover first then close the side cover If closed in a wrong sequence the covers may be broken 4 Removal and storage of fixing screw 1 Lift the knob and gently pull out the tray 2 Hold the paper pressure plate and turn the fixing screw in the arrow direction 3 Store the fixing pin and the fixing screw in the tray Store th...

Page 27: ... the right 6 Press the or key to select the paper size To change the size of another paper tray press the key and then repeat steps 4 to 6 7 Press the OK key A message asking you to confirm the new paper size setting will appear 8 Press the OK key The selected paper size will be stored and the display will return to the base screen Note Affix the paper size label for the paper size selected in ste...

Page 28: ... the extension line from the needle tip 5 Measure the distance from the marking position to the top of the doctor plate of the developing unit to insure that it is 18mm If the distance is not within the specified range loosen the fixing screw A of the main pole adjustment plate and move the adjustment plate in the arrow direction to adjust Section Adjustment item Adjustment procedure SIM No A Proc...

Page 29: ... following adjustment procedures 4 Execute SIM 50 01 Select a desired mode with the arrow keys enter the adjustment value with 10 key and press OK key When START key is pressed a sheet is printed When RETURN key is pressed the process returns to the mode selection window Adjustment specification 5 Set the OC lead edge position set value RRC A to 1 The OC image scanning start position is shifted in...

Page 30: ... step of the set value corresponds to about 0 1mm shift Calculate the set value from the formula below B 0 05 mm Lead edge void adjustment value B Lead edge void mm Example When setting the lead edge void to 2 5mm 2 5 0 05 about 50 Note If the set value is not obtained from the above formula perform the fine adjustment b SPF image lead edge position adjustment SIM50 6 1 Set a scale on the OC table...

Page 31: ...elect a paper feed port and make a copy Compare the copy and the test chart If necessary perform the following adjustment procedure 3 Execute SIM 26 43 and set the density mode to SIDE VOID L SIDE VOID R The currently set adjustment value is displayed 4 Enter the set value and press the start key The correction value is stored Adjustment specification Adjustment mode SIM Display text array Set val...

Page 32: ...or base unit parallelism is proper If one of them is in contact with the positioning plate perform the adjustment of 4 4 Loosen the set screw of the scanner drive pulley which is not in contact with No 2 3 mirror base unit positioning plate 5 Without moving the scanner drive pulley shaft manually turn the scanner drive pulley until the positioning plate is brought into contact with No 2 3 mirror b...

Page 33: ...ain scanning direction FR direction magnification ratio adjustment SIM 48 1 Note Before performing this adjustment be sure to check that the CCD unit is properly installed 1 Put a scale on the original table as shown below 2 Execute SIM 48 1 3 After completion of warming up shading is operated and the current correction value of the main scanning direction magnification ratio is displayed on the s...

Page 34: ... scale image and the actual image If necessary perform the following adjustment procedures 4 Execute SIM 48 5 5 After warm up shading is performed 6 Check to confirm that the RSPF SIDE1 mode is selected with the cross cursor 7 Enter the set value and press the start key The set value is stored and a copy is made Adjustment specification RSPF SIDE2 is displayed only when the RSPF is installed 6 Off...

Page 35: ...on the OC table as shown below 2 Put several sheets of A3 or 11 x 17 white paper on the test chart 3 Execute SIM 46 1 4 After completion of warming up shading is performed and the current density level is displayed on the LCD Use the cross cursor to select a mode 5 Change the set value with the 10 key to adjust the copy image density 6 Make a copy and check that the specification below is satisfie...

Page 36: ...3 Shifter operation check 04 Job separator operation check 4 11 Shifter home position check 05 01 Operation panel display check 02 Fusing lamp and cooling fan operation check 03 Copy lamp lighting check 06 01 Paper feed transport solenoid operation check 02 Resist roller solenoid RRS operation check 10 Main cassette semicircular roller cleaning 07 01 Warm up display and aging with jam 06 Intermitt...

Page 37: ...tion level adjustment when the document size is settled 15degrees 20degrees 42 01 Developing counter clear 43 01 Fusing temperature setting Normal copy 12 Standby mode fusing fan rotation setting 13 Fusing paper interval control allow inhibit setting 44 34 Transfer current setting 40 Setting of rotation time before toner supply 46 01 Copy density adjustment 300dpi 02 Copy density adjustment 600dpi...

Page 38: ...ed up even in simulation The copy lamp is lighted during scanning CA key Exits the simulation mode Interruption key Returns to the sub code input window C key Input value clear 10 key Input of the number of scanning 02 Mirror home positions sensor MHPS status display Used to monitor the mirror home position sensor and display the ON OF status of the sensor on the LCD CA key Exits the simulation mo...

Page 39: ... returns to the sub code input window Main code Sub code Contents Remark Sim2 1 SPF AGING 115 100 86 1SIDE 2SIDE OK START Key Magnification ratio selection window ZOOM 100 EXEC Sim2 1 SPF AGING 115 100 86 1SIDE 2SIDE Execution window ZOOM 100 EXEC Select the scan magnification ratio drive speed This also accords with the magnification ratio and the speed in copying similarly to the OC The setting ...

Page 40: ... exits the simulation mode 11 SPF PS release solenoid operation check Used to drive the SPF PS release solenoid CLH 20 times in the cycle of 500msec of ON and 500msec of OFF After completion of the process the machine returns to the sub code input window When Interruption key is pressed the machine returns to the sub code input window When CA key is pressed the machine exits the simulation mode 03...

Page 41: ...shifted to the home position before terminating the simulation similarly to the shifter 11 Shifter home position check Used to check the operations of the shifter HP sensor and the shifter When this simulation is executed the initial menu is displayed By the following key operations the left operation and the right operation of the home position sensor and the shifter can be executed separately ke...

Page 42: ...eration panel are properly detected When the machine enters the key input check mode the initial menu is displayed When any key is pressed the value on the right lower side is counted up If a key is pressed once it is not counted again When CA key is pressed for the first time it is counted When it is pressed for the second time the simulation mode is terminated When Interrupt key is pressed for t...

Page 43: ...enoid RRS repeats ON of 500ms and OFF of 500ms 20 times When the operation is completed the machine returns to the sub code input window When Interruption key is pressed the machine returns to the sub code input window When CA key is pressed the machine exits the simulation mode Main code Sub code Contents Remark Sim5 2 HT LAMP PRESS OK KEY EXEC Sim5 2 HT LAMP EXEC OK START Key Initial window Exec...

Page 44: ...and by state is displayed After completion of warm up press CA key to exit the simulation mode allowing normal copy operations The copy mode at that time is the aging mode with 0sec of intermittent aging Canceled by turning off the power or executing a simulation which makes the hardware reset When the interruption is pressed to shift to the input standby window the machine does not enter the agin...

Page 45: ...ecuted the following execution start window is displayed When OK key or START key is pressed the main charger is turned on for 30 sec in the grid voltage HIGH mode After completion of the process the machine returns to the sub code input window CA key Exits the simulation mode Interruption key Interrupts output operation and shifts to the sub code input window 03 Main charger output Grid LOW Used ...

Page 46: ...e input window CA key Exits the simulation mode Interruption key Interrupts the output operation and shifts to the sub code input window 02 Duplex motor reverse rotation check Used to check the duplex motor reverse rotation The duplex motor is rotated in the reverse direction for 30sec After completion of the process the machine shifts to the sub code input window CA key Exits the simulation mode ...

Page 47: ...to the sub code input window Default 50 10 Toner motor operation Used to check the operation of the toner motor When this simulation is executed the following execution start window is displayed Press OK key or START key and the toner motor is rotated for about 30sec After completion of the process the machine shifts to the sub code input window CA key Exits the simulation mode Interruption key In...

Page 48: ... the maintenance cycle When this simulation is executed the current set value is displayed Enter a desired code with 10 key and press START key The set value is saved in the EEPROM and the machine returns to the sub code input window CA key Exits the simulation mode Interruption key Returns to the sub code input window Default 4 50k Main code Sub code Contents Remark Sim16 TROUBLE CLEAR AER YOU SU...

Page 49: ...r of the following two is displayed depending on the model DEV Development counter EX Japan MIN_MNT Mini maintenance counter Japan Counter display TOTAL Total counter MAINTE Maintenance counter AR model DEV Development counter AR EX Japan model MIN MNT Mini maintenance counter AR Japan model DRUM Drum counter CPY JOB Copy job counter PRT JOB Print job counter SCN JOB Scan job counter OC SCN OC sca...

Page 50: ...PROM If the display does not match the destination code saved in the CRUM chip it is judged as an error This simulation is valid only for the model with the CRUM chip 14 P ROM version display The version of the option board which is not installed is not displayed Main code Sub code Contents Remark Sim22 4 COUNTER JAM nnnnnn Sim22 7 KEY OPE KEY CODE nnnnn Sim22 9 COUNTER 1 2 BYPASS nnnnnnn TRAY1 nn...

Page 51: ...unt and the jam memory are cleared and the machine shifts to the sub code input window 02 Trouble memory clear Used to clear the trouble memory and the trouble history data in the EEPROM When Interruption key is pressed the machine shifts to the sub code input window When CA key is pressed the machine exits the simulation mode 04 SPF counter clear Used to clear the SPF paper feed counter CA key Ex...

Page 52: ...inter counter clear Used to clear the printer counter and other counters Select a counter to be cleared and press OK key or START key The confirmation window is displayed Press OK key or START key again and the specified counter is cleared and the machine returns to the initial window CA key Exits the simulation mode Interruption key Shifts to the sub code input window Main code Sub code Contents ...

Page 53: ...del is rotated for 30 sec If the developing unit is installed to save toner consumption at that time the developing bias the main charger and the grid are also outputted In addition since laser discharge is required when the motor is stopped the polygon motor is also operated Check if the developing unit is installed or not If it is not installed the previous high voltage is not outputted and only...

Page 54: ...d For destinations other than the above this setting is invalid Default 00 03 Auditor setting Used to set the auditor When the coin vendor mode is selected 1 Sort auto select is OFF 2 For Japan the duplex copy use inhibition setting is ON inhibited 3 When the auditor mode exclusive setting is ON manual paper feed inhibited and the standard tray is set to the manual feed tray the standard tray sett...

Page 55: ...de When setting is changed the machine exits the simulation mode and performs the hard reset Interruption key Shifts to the sub code input window When setting is changed it is invalid START key Setting contents are saved in the EEPROM and the machine shifts to the code input window When setting is changed the machine does not shift to the code input window When this setting is changed the followin...

Page 56: ... valid only during the adjustment simulation Without installing a printer or a FAX machine paper is discharged to the upper stage to check if there is no problem or not If SIM26 01 is set to Job separator not installed paper is discharged to the lower stage regardless of this setting CA key Exits the simulation mode Interruption key Shifts to the sub code input window Default 0 OFF 22 Language set...

Page 57: ...ut window Default 1 Stop cancel 37 Cancel of stop at developer life over Used to set YES NO of cancel of stop when the developer counter life is over CA key Exits the simulation mode Interruption key Shifts to the sub code input window 39 Memory capacity check Used to check the capacity of the image memory SDRAM installed to the MCU PWB and the capacity of the IMC compression memory There are two ...

Page 58: ...tem to be changed with the cross key and change the set value to a desired value The setting range is 0 10 When the value is increased by 1 the void amount is increased by 0 5mm The default is 5 2 5mm Display Set item 1 SIDE BOID L Left side void amount setting 2 SIDE VOID R Right side void amount setting CA key Exits the simulation mode Interruption key Shifts to the sub code input window Default...

Page 59: ...to set Enable Disable of the FAX mode key when the FAX PWB is not installed Though this setting is set to Enable if the FAX PWB is not installed a message of FAX PWB is not installed is displayed When the FAX PWB is installed the display shifts to the FAX window regardless of this setting CA key Exits the simulation mode Interruption key Shifts to the sub code input window Default 0 Enable 73 Tone...

Page 60: ...executed the status of the document sensor is displayed An active sensor display is highlighted For AB series PD1 PD5 for inch series PD1 PD4 Main code Sub code Contents Remark Sim26 74 ADD COUNT 1 ADD SCAN CNT 0 1 0 0 0 Scan counter not added 1 Scan counter added Display Corresponding sensor POUT Paper exit sensor DPX DUPLEX sensor PIN Paper entry sensor MBEMP Manual feed paper sensor C1EMP No 1 ...

Page 61: ...tection level adjustment when the document size is settled 15 degrees 20 degrees Set the OC cover to the document size settled state 15 degrees 20 degrees and press OK key The detection level under the document size settled state is saved in the EEPROM and the value is displayed in The document size settled state means the point when the open close sensor OCSW is switched from ON highlighted to OF...

Page 62: ...ed rotation HIGH 1 High speed rotation 13 Fusing paper interval control allow inhibit setting Used to change the paper feed timing of 21st sheet or later to A3 or WLT depending on the destination setting when in multi copy print of narrow width sheets When this simulation is executed the current set number is displayed Enter a code number and press START key The entered number is saved in the EEPR...

Page 63: ...efault 8sec 46 01 Copy density adjustment 300dpi Used to set the copy density foe each exposure mode When this simulation is executed the list of the setting items and the current set value are displayed Select an item to be changed with and keys and enter the adjustment value with 10 key The setting range is 1 99 When or key is pressed the page is changed Enter the adjustment value with 10 key an...

Page 64: ...y is pressed the page is changed Enter the adjustment value with 10 key and press OK key The entered value is saved in the EEPROM and the machine shifts to the copy window Sample copying can be performed during the simulation Main code Sub code Contents Remark Sim46 2 EXP LEVEL 1 AE 2 TEXT 3 PHOTO 1 1 2 1 99 50 50 50 50 Sim46 2 EXP LEVEL 4 PHOTO 2 5 TEXT TS 6 AE TS 2 2 1 99 50 50 50 50 Window disp...

Page 65: ...e value on the example 50 is not the default value Main code Sub code Contents Remark Sim46 9 TEXT 300 19 TS 5 0 SHIFT 20 TS 5 0 GAMMA 7 7 1 99 50 50 50 Sim46 9 TEXT 300 10 5 0 GAMMA 11 TS 1 0 SHIFT 12 TS 1 0 GAMMA 4 7 1 99 50 50 50 50 Sim46 9 TEXT 300 4 2 0 GAMMA 5 3 0 SHIFT 6 3 0 GAMMA 2 7 1 99 50 50 50 50 Sim46 9 TEXT 300 13 TS 2 0 SHIFT 14 TS 2 0 GAMMA 15 TS 3 0 SHIFT 5 7 1 99 50 50 50 50 Sim4...

Page 66: ...ue on the example 50 is not the default value Main code Sub code Contents Remark Sim46 10 TEXT 600 19 TS 5 0 SHIFT 20 TS 5 0 GAMMA 7 7 1 99 50 50 50 Sim46 10 TEXT 600 10 5 0 GAMMA 11 TS 1 0 SHIFT 12 TS 1 0 GAMMA 4 7 1 99 50 50 50 50 Sim46 10 TEXT 600 4 2 0 GAMMA 5 3 0 SHIFT 6 3 0 GAMMA 2 7 1 99 50 50 50 50 Sim46 10 TEXT 600 13 TS 2 0 SHIFT 14 TS 2 0 GAMMA 15 TS 3 0 SHIFT 5 7 1 99 50 50 50 50 Sim46...

Page 67: ...ty 1 shift amount 2 1 0 GAMMA PHOTO Error diffusion density 1 gamma value 3 ED 2 0 SHIFT PHOTO Error diffusion density 2 shift amount 4 ED 2 0 GAMMA PHOTO Error diffusion density 2 gamma value 5 ED 3 0 SHIFT PHOTO Error diffusion density 3 shift amount 6 ED 3 0 GAMMA PHOTO Error diffusion density 3 gamma value 7 ED 4 0 SHIFT PHOTO Error diffusion density 4 shift amount 8 ED 4 0 GAMMA PHOTO Error d...

Page 68: ... number of the above three modes are displayed 1 AE MODE table setting Used to set the priority operation mode of the AE mode When the image takes priority regardless of the toner consumption set to 1 When the toner consumption must be suppressed regardless of image quality set to 2 If this setting is changed SIM 46 30 returns to the default 2 AE STOP AE operation mode Used to set the area for aut...

Page 69: ...dpi Used to adjust the image contrast for each mode When this simulation is executed the current set value of each mode is displayed in two digits Default 50 Select an adjustment item mode with the cross key and enter a desired value with 10 key When OK key is pressed the entered value is saved to the EEPROM and the machine shifts to the copy execution window After completion of copying the machin...

Page 70: ...0 key When OK key is pressed the entered value is saved to the EEPROM and the machine shifts to the copy execution window After completion of copying the machine returns to the adjustment value input window When START key is pressed instead of OK key the machine shifts to the copy execution window and performs copying Main code Sub code Contents Remark Sim46 30 AE LIMIT 1 AE 2 AE TS 0 31 0 0 0 Adj...

Page 71: ... the entered value is saved to the EEPROM and the machine shifts to the copy execution window After completion of copying the machine returns to the adjustment value input window When START key is pressed instead of OK key the machine shifts to the copy execution window and performs copying Main code Sub code Contents Remark Sim48 1 COPY MAG 1 F R 2 SCAN 1 99 50 50 50 Adjustment item selection win...

Page 72: ...chine shifts to the copy execution window and performs copying To adjust the sub scanning magnification ratio on the back of the document shift the window to the copy start window and select Duplex Simplex or Duplex Duplex mode with the duplex mode key The exposure mode is fixed to TEXT with density 3 and cannot be changed For the model without RSPF the adjustment item of document back is not disp...

Page 73: ...in unit and the download PC with a USB cable and start downloading with the maintenance tool When downloading is started the display is changed as follows O Receiving download data O Processing download data O When downloading is completed O When an error occurs Used to display an error code at the error position in downloading of MCU IMC FAX PANEL The error codes to be displayed are shown below M...

Page 74: ...a 0x17 MCU receive error Overrun Fleming parity Sum check error Print window data 0x18 MCU receive time out Sum check error Fax window data 0x19 FAX communication error Panel MCU communication error 0x1A PANEL communication error 0x1B Download file error Download file error FAX 0xFF No process 0x44 FONT Flash write error 0x00 OK 0x45 FONT Flash sum check error 0x01 Download impossible 0x52 Registr...

Page 75: ...age loss amount Note 5 When the print start position TRAY1 is changed the print start positions TRAY2 TRAY4 and the print start position MULTI BYPASS are also changed accordingly The adjustment value is in the range of 1 99 Default 50 Select an adjustment item mode with the cross key and enter the set value with 10 key When OK key is pressed the entered value is saved to the EEPROM and the machine...

Page 76: ...s in the range of 1 99 Default 50 When the adjustment value of the document scanning start position is increased by 1 the scanning timing is advanced resulting in a smaller image loss Select an adjustment item mode with the cross key and enter a desired value with 10 key When OK key is pressed the entered value is saved to the EEPROM and the machine shifts to the copy execution window After comple...

Page 77: ... key and enter the set value with 10 key When OK key is pressed the entered value is saved to the EEPROM and the machine shifts to the copy execution window After completion of copying the machine returns to the adjustment value input window When START key is pressed instead of OK key the machine shifts to the copy execution window and performs copying Default 1 Main code Sub code Contents Remark ...

Page 78: ...item mode with the cross key and enter the set value with 10 key When OK key is pressed the entered value is saved to the EEPROM and the machine shifts to the copy execution window After completion of copying the machine returns to the adjustment value input window When START key is pressed instead of OK key the machine shifts to the copy execution window and performs copying Main code Sub code Co...

Page 79: ...o the head data the end data position saved in the memory is changed by changing the scanning end position with the simulation adjusting the image lead edge position Select an adjustment item mode with the cross key and enter the set value with 10 key When OK key is pressed the entered value is saved to the EEPROM and the machine shifts to the copy execution window After completion of copying the ...

Page 80: ...ts to the copy execution window After completion of copying the machine returns to the adjustment value input window When START key is pressed instead of OK key the machine shifts to the copy execution window and performs copying Main code Sub code Contents Remark Sim50 19 DUP R VOID 1 PRV SIDE1 2 PRV SIDE2 3 RRC D 1 99 50 50 50 50 Adjustment item selection window Display text array Adjustment mod...

Page 81: ...value input window When START key is pressed instead of OK key the machine shifts to the copy execution window and performs copying Main code Sub code Contents Remark Adjustment item selection window Sim51 2 RESIST ADJ Sim51 2 RESIST ADJ Sim51 2 RESIST ADJ 2 1 TRAY1 2 TRAY2 3 TRAY3 1 3 1 99 50 50 50 50 4 TRAY4 5 BYPASS 6 RSPF SIDE1 2 3 1 99 50 50 50 50 7 RSPF SIDE2 8 RSPF A5 9 DUPLEX 3 3 1 99 50 5...

Page 82: ...NC sensor detecting status are displayed Every time when the HSYNC signal is detected HSYNC display is highlighted for 100ms Main code Sub code Contents Remark Automatic adjustment window Manual adjustment window Sim53 8 SPF AUTO PRESS OK KEY EXEC 50 Sim53 8 SPF AUTO 50 START Key An optional value can be entered manually When OK or START key is pressed the entered value is saved in the EEPROM When...

Page 83: ...d the initial window as shown below is displayed When OK key or START key is pressed with the OC cover open the automatic adjustment is executed and the position which pixel from the CCD edge of the exposure correction sheet white Mylar in the SPF position is displayed After completion of adjustment the result is saved to the EEPROM When the result is in the range of 93 299 it is judged as a succe...

Page 84: ...n time setting in the key operator program When this setting is set to Enable 1 the key reception time is displayed in the key operator program allowing setting CA key Exit the simulation mode Interruption key Shifts to the sub code input window Default 1 Enable 11 Info lamp setting Used to set the Info lamp brightness PWM duty and the kind of flashing During this simulation Info lamp is lighted t...

Page 85: ...eed is at full speed When images are disturbed in printing through USB change the setting and try again CA key Exits from the simulation mode Interruption key Shifts to the sub code entry window Default 3 Normal2 Main code Sub code Contents Remark Sim67 50 USB SPEED 1 FULL SPEED 2 2 Display Setting 1 FAST 2 NORMAL 1 3 NORMAL 2 Default 4 SAFE 1 4 Slow Fast ...

Page 86: ...board communication trouble Time out 99 Panel language error Main code Sub code Details of trouble E1 00 Content IMC PWB communication trouble Detail An abnormality occurs in communication between the MCU PWB and the IMC PWB Cause IMC PWB MCU PWB harness abnormality MCU PWB connector disconnection IMC PWB ROM defect data abnormality Check and remedy Check connection of the connector and the harnes...

Page 87: ...CD unit Main code Sub code Details of trouble E7 11 Content Shading trouble White correction Detail The CCD white scan level is abnormal when the shading Cause Improper connection of the CCD unit flat cable Dirt on the mirror the lens and the reference white plate Copy lamp lighting abnormality CCD unit abnormality MCU PWB abnormality When occurred in the SPF scan position Improper installation of...

Page 88: ...munication trouble Framing Detail A framing error occurs in communication between the MCU and the FAX board Cause MCU PWB connector connection failure Garbled data Check and remedy Check connection of the FAX board Replace the FAX board Reset the machine Power OFF ON Main code Sub code Details of trouble F6 88 Content FAX board communication trouble Time out Detail FAX board communication error Ca...

Page 89: ...ror home position sensor Main code Sub code Details of trouble L3 00 Content Scanner return trouble Detail The scanner does not complete returning in the specified time The mirror is not in the home position when OC copying is started with the mirror standby in the home position Cause Mirror unit abnormality Scanner wire disconnection Origin detection sensor abnormality Mirror motor harness abnorm...

Page 90: ...Panel board communication trouble Protocol Detail An error occurs in communication between MCU Panel PWB Cause MCU PWB Panel PWB harness trouble Garbled data Check and remedy MCU PWB Panel PWB harness trouble Replace the panel or the MCU PWB Machine reset Power OFF ON 81 Content Panel board communication trouble Parity Detail A parity error occurs in communication between the MCU and the Panel PWB...

Page 91: ...al X X Side Mylar Optical section Lamp unit Reflector O O O O Mirror O O O O No 2 3 mirror unit Mirror O O O O Pulley X X X X CCD peripheral Lens O O O O Glass Table glass O O O O White Plate O O O O Other Drive wire X X X X Rail X X X X Document cover O O O O Document size sensor O O O O LSU Dust proof glass O O O O Paper feed section Multi paper feed section Take up roller manual SPF O O O O Pap...

Page 92: ...utside Toner Life 16K Remaining quantity check 1 a Press and hold the density adjustment LIGHT key for more than 5 sec and the machine will enter the user program mode b Press and hold the key for more than 5 sec and the remaining quantity will be displayed on the copy quantity display in one of the following levels Remaining quantity display levels 100 75 50 25 10 LO c Press the density adjustmen...

Page 93: ...he charger wire must be free from twist or bending Be sure to put the charger wire in the V groove C Duplex transport section No Item 1 High voltage section Duplex transport section 2 Optical section 3 Fusing section 4 Paper exit section 5 MCU 6 Optical frame unit 7 LSU 8 Tray paper feed section Paper transport section 9 Manual multi paper feed section 10 Power section 11 Developing section 12 Pro...

Page 94: ...put No 2 3 mirror unit to the positioning plate A Assembly Put the notched surface of wire holder 3 downward tighten temporarily and install Adjustment Main scanning direction distortion balance adjustment C Inverter PWB for copy lamp D Copy lamp No Content A Table glass B Copy lamp unit C Inverter PWB for copy lamp D Copy lamp E Lens unit F Wire G Document detection 1 2 1 3 4 3 A A 2 2 2 2 3 3 3 ...

Page 95: ...easure the magnification ratio 3 Change the installing position in the horizontal direction to adjust the magnification ratio When the copy image is longer than the original shift to the positive direction When the copy image is shorter than the original shift to the negative direction 1 scale of the scribed line corresponds to 0 34 of magnification ratio If this adjustment is not satisfactory mak...

Page 96: ...ce Check that the thermistor is in contact with the upper heat roller D Heater lamp Assembly Insert the spring A into the hole B in the fusing frame Assembly Put the paper guide earth spring A under the paper guide B before fusing No Contents A Fusing unit B Thermostat C Thermistor D Heater lamp E Upper heat roller F Separation pawl G Lower heat roller H Separation pawl I Cleaning pad 3 2 1 1 1 2 ...

Page 97: ...ide the rib C E Upper heat roller Disassembly There are three pawls on the fusing cover Remove the screws and slide the fusing cover to the right to remove The heater lamp is fixed on the fusing cover with a screw Slide the fusing cover to the front and remove the screw then remove the heater lamp F Separation pawl A B C 1 3 4 2 2 1 3 1 2 1 1 2 Grease JFE552 Floil GU2 2 2 3 3 1 ...

Page 98: ...pawl I Cleaning pad How to clean paper dust on the fuser cleaning felt Remove Fusing rear paper guide from Fusing unit during every periodic maintenance 50K and clean the collected paper dust using a ruler or other straight edge device Replace the cleaning felt at 150k or earlier if damaged 4 Paper exit section A Ozone filter 1 1 3 2 2 A 4 B C B C Grease JFE552 No Content A Ozone filter B Cooling ...

Page 99: ...AR M207 M165 M162 DISASSEMBLY AND ASSEMBLY 10 7 B Cooling fan C Paper exit unit Duplex model Simplex model 1 1 2 2 1 1 1 2 1 1 3 3 2 4 1 2 2 3 1 2 3 3 3 3 3 4 1 2 3 3 1 3 2 3 1 4 5 1 1 2 4 6 5 ...

Page 100: ... the spring pin faces in the longitudinal direction of the paper exit drive gear long hole B R Be sure to insert two ribs C into the groove D F Paper exit interface PWB when the job separator is installed G Paper exit sensor duplex sensor A Exit sensor B Duplex sensor 1 2 1 1 2 3 4 5 3 1 1 2 A B D C C 1 1 2 2 3 4 4 3 3 3 4 1 2 1 1 2 1 3 1 A B ...

Page 101: ... the optical unit in the sequence shown above 7 LSU A LSU unit Note Do not disassemble the LSU Note When replacing the LSU be careful not to touch the dust shield glass Adjustment Image lead edge position adjustment Image left edge position adjustment Paper off center adjustment Size of the screwdriver for removing the LSU No Content A MCU disassembly No Content A Optical frame unit 1 1 1 1 1 1 2 ...

Page 102: ...ly Move down the clutch pawl as shown below and avoid the clutch and install C Solenoid paper feed solenoid resist roller solenoid No Content A Middle frame unit B Drive unit C Solenoid paper feed solenoid resist roller solenoid D Resist roller clutch Resist roller E Paper feed clutch Paper feed roller Semi circular roller 1 1 2 2 2 1 1 1 1 2 Grease G 484 Molykote PG 75 1 2 2 3 ...

Page 103: ... Note Push the lever at the right edge of the multi frame cover to the right upper side and remove it Installation Be careful of the installing direction of the manual transport roller 6 1 2 3 3 3 4 1 2 No Content A Manual transport roller Manual paper feed roller B Manual multi paper feed C Manual feed solenoid D Manual transport clutch E Pressure plate unit F Manual paper feed clutch A A A 3 4 5...

Page 104: ...AR M207 M165 M162 DISASSEMBLY AND ASSEMBLY 10 12 B Manual multi paper feed C Manual feed solenoid D Manual transport clutch E Pressure plate unit 2 1 2 3 3 4 4 A A A 5 A 1 2 2 B 1 2 3 4 5 1 2 2 3 2 1 3 ...

Page 105: ... lever at the right edge of the multi frame cover to the right upper side and remove it 10 Power section A Power unit B Power fan 1 1 2 A A A 2 2 3 1 1 2 3 4 No Content A Power unit B Power fan C High voltage P W B D Power P W B E Power switch 1 1 1 2 1 1 3 2 2 2 2 2 2 2 2 2 2 2 2 2 3 2 1 1 ...

Page 106: ...0 14 C High voltage P W B D Power P W B E Power switch 11 Developing section A Developing box B Developing doctor Adjustment Developing doctor gap adjustment 1 2 1 1 1 2 2 3 2 2 1 1 1 2 No Contents A Developing box B Developing doctor C MG roller ...

Page 107: ...G roller main pole position adjustment Note Attach it to fit with the attachment reference when replacing the DV blade 12 Process section A Drum unit B Main charger unit C Cleaning blade 1 2 No Contents A Drum unit B Main charger unit C Cleaning blade 1 2 LO CK 2 1 1 2 1 1 1 ...

Page 108: ...r entry sensor Paper empty sensor D 2nd tray paper feed solenoid Transport solenoid E 2nd tray transport clutch F 2nd tray transport roller G 2nd tray paper feed clutch H 2nd tray paper feed roller I Main motor J I F P W B K Paper entry sensor L Paper empty sensor M Paper feed roller 1 1 2 3 3 5 5 5 5 5 6 1 1 1 2 1 1 2 2 2 2 3 4 4 4 4 4 4 5 6 7 9 8 8 8 1 1 2 2 2 1 1 3 ...

Page 109: ...per empty sensor D 2nd tray paper feed solenoid Transport solenoid E 2nd tray transport clutch F 2nd tray transport roller G 2nd tray paper feed clutch H 2nd tray paper feed roller 1 2 3 5 3 4 A B A 2nd tray paper entry sensor B Paper empty sensor 1 2 2 1 2 1 1 1 2 3 A B 3 A 1 2 1 2 ...

Page 110: ...F P W B K Paper entry sensor L Paper empty sensor M Paper feed roller When removing the paper feed roller operate the paper feed clutch with SIM 6 1 and keep the paper feed roller down as shown in the figure above for operation 1 2 1 2 3 1 2 3 2 2 2 1 2 3 1 1 2 3 1 2 ...

Page 111: ...5 1 0 1 5 2 0sec DISABLE AUTO KEY REPEAT OFF The auto repeat functions DISABLE PAPER SIZE SET OFF Paper size setting can be made ENERGY SAVE AUTO POWER SHUT OFF On Check box is checked AUTO POWER SHUT OFF TIMER 5 30 60 120 240min PREHEAT MODE 1 5 30 60 120 240min TONER SAVE MODE excluding U K NETWORK SETTING DHCP enable ON Automatic acquisition of IP address when the AR NB3 is installed IP address...

Page 112: ...B Installation procedure on Windows XP 1 Machine side Executable by performing the Service Simulation No 49 01 Flash Rom program writing mode A word Download mode appears on the operation panel to denote the download mode status 2 Connect the machine and the PC with a USB cable Be sure to connect the USB cable to the main unit side Connection to the optional dual function board cannot execute this...

Page 113: ...us 2 Connect the machine and the PC with a USB cable Be sure to connect the USB cable to the main unit side Connection to the optional dual function board cannot execute this function 3 Check that the new hardware search wizard is shown Press the Next button 4 Select Search for a suitable driver for my device and press the Next button 5 Select Specify a location and press the Next button 6 If the ...

Page 114: ...installation procedure of the joint maintenance program on Windows 2000 is completed with the above operation 3 Download procedure 1 Main body side Executable by performing the Service Simulation No 49 01 Flash Rom program writing mode A word Download mode appears on the operation panel to denote the download mode status 2 Connect the machine and the PC with a USB cable Be sure to connect the USB ...

Page 115: ...nload 8 PC side Specify the download file dwl 9 PC side When the DWL data file is specified the DWL data file is transferred from the PC to the machine Downloading is proceeded automatically 10 PC side When the message below is displayed download is completed Completion message Download is completed Do not turn the copier power off until Processing finished Turn off the power is displayed on the c...

Page 116: ...ading is not displayed on the operation panel of the machine turn OFF the power and press and hold the 4 key and the CA key and turn ON the power If then Download mode which means downloading is displayed on the operation panel LED of the machine perform downloading again If Download mode is still not displayed the MCU Panel IMC2 Fax must be replaced 4 Version confirming procedure 1 Machine side E...

Page 117: ...items to extend the sub tree items and select Confirm version 8 Check to confirm that the display below is indicated Version confirming is completed with the following procedures In version confirming means that connection is not made with the MCU PWB or that download is not performed The above figure shows the case where the FAX PWB is not installed When download is completed the version number i...

Page 118: ...ZE0 1 2 3 PMCLK 2078 74 Hz OPU_Reset LCD PWB TB62705CF 7seg LED LED 5V KEY MATRIX INFO LAMP UART MHPS SHIFTER Driver Sensor SFTHP VIDEO S H APCSTT SYNC SPMT0 1 2 3 RSPF Driver SPFCLH SPFGSOL SPFPSOL SPFRSOL Sensor Driver Selector L1 2 W0 1 2 3 SPFCOVER PAPER SPFOPEN SPFOUT SPFMOTOR PWM 12V 5V 3 3V FAN Measures against ozone 24V HC151 Image BUS PI Bus Image BUS PO Bus CLON DUPLEX Driver 2nd 3rd 4th...

Page 119: ...t 38 P64 IRQ0 In ASIC Interrupt 39 Vcc 3 3V Power 40 PE0 D0 In Out Data Bus 41 PE1 D1 In Out Data Bus 42 PE2 D2 In Out Data Bus 43 PE3 D3 In Out Data Bus 44 Vss GND Ground 45 PE4 D4 In Out Data Bus 46 PE5 D5 In Out Data Bus 47 PE6 D6 In Out Data Bus 48 PE7 D7 In Out Data Bus 49 PD0 D8 In Out Data Bus 50 PD1 D9 In Out Data Bus 51 PD2 D10 In Out Data Bus 52 PD3 D11 In Out Data Bus 53 Vss GND Ground ...

Page 120: ...127 PG1 CS3 Out ChipSelect for I O ASI 128 PG2 CS2 Out ChipSelect for ASIC No SIGNAL In Out DESCRIPTION 3 Image process ASIC HG73C141HFV a General The ASIC is composed of the three major blocks the image process section the print control section and the I F section Image process section With image data from the CCD PWB in the operation mode determined by the register setup shading AE process input...

Page 121: ...ore the lower the heat roller surface temperature is the higher the thermistor terminal voltage is and vise versa The thermistor terminal voltage is inputted to the CPU analog port The CPU controls ON OFF of the heater lamp by this input voltage level Reset_OUT ASIC Reset VCC3 VCC3 R18 11kF C23 0 1u C24 22000p R21 10kF IC4 1 2 3 M51957BFP NC 8 GND 4 VCC 7 NC 1 IN 2 NC 3 Cd 5 OUT 6 R19 10kJ CPU PF6...

Page 122: ... 6pin over the voltage at 5pin to drive the output THOPEN at 7pin to LOW This is passed to the CPU and the trouble code H2 is displayed 6 Driver circuit Solenoid a Outline Since the load signal from the CPU or the ASIC cannot drive the load directly it is passed through the driver IC to drive the load b Operation The driver circuit forms a Darlington circuit with transistors Therefore a large driv...

Page 123: ...excitement or 2 phase excitement Each motor switches the motor current value in each magnification ratio Mirror motor drive circuit 10 I F circuit a General The I F circuit is composed of the USB driver and the IEEE1284 driver and performs hard interface with the ASIC MCU PWB b USB circuit MM_PH_A OUT_A MM_AI0 MM_PH_B MM_BI0 MM_BI1 MM_AI1 OUT_A OUT_B MMref0 MMref1 MMref2 OUT_B 5V 24VM 5V PGND PGND...

Page 124: ... are outputted to the MCU PWB and to the ASIC which performs image process of the digital data c Lamp inverter PWB The transformer is controlled by the lamp control signal from the MCU PWB The transformer output controls lighting of the cool cathode ray tube B DC power circuit The DC power circuit directly rectifies the AC power and performs switching conversion with the DC DC converter circuit an...

Page 125: ...N9 CN4 CN403 9604S 22F x 2 WHITE CN5 C N12 CN30 CN36 CN17 CN21 CN32 CN2 CN3 B7B PH K S RED CN101 CN27 CN13 USB2 SHIFTER MOTOR SHIFTER HP SENSOR AUDITOR Option JOB SEPARATOR MOTOR Option COIN VENDER Option CN4 LCD BL PWB OPERETION PANEL CN37 PAPER OUT SENSOR DUP SENSOR Toner Sensor NET WORK BOX Option FFC DOCUMENT SENSOR AB or INCH DOCUMENT SENSOR AB or INCH AB ONLY INCH ONLY C N48 CN47 OC COVER SE...

Page 126: ...15 14 SHIFTER MOTOR GY PK 2 3 G ND SFTHP 1 5V BL SHIFTER HP SENSOR PW B SFTHP LEDVCC GND 1 2 3 1 2 3 4 5 SFTMA SFTM B SFTM A 24V 24V GY PK BL GND GY N C RD BK BK GY BL PK JOBS_ DLD VFMOUT PDPX VFM CNT SFTHP POUT 24V P GND SFTDB SFTDA 13 12 11 11 SFTDA 12 SFTDB 13 LFTDA INTERNAL COOLING FAN INTERNAL COOLING FAN SFTDA LFTDA SFTDB VFMCNT VFM OUT P GND 1 2 3 VFMCNT VFMOUT P GND 1 2 3 4 G ND 6 SFTM B 1...

Page 127: ...2 15 L1 5V SGND 16 ORIGNAL TRAY 1 2 3 1 2 3 4 5 N C B 24V1 6 1 2 A A B 3 24V1 7 PLUSE MOTOR 4 2 24V1 B 24V1 5 3 1 A A B 6 DSPF ONLY SPF GSOL 1 2 G SOL 24V1 SPF RSOL 1 2 24V1 SPFRSOL 1 2 10 12 24V1 R SOL L1 L2 25 26 6 18 16 7 5 20 17 21 23 9 10 24 11 3 14 12 4 2 19 15 22 13 1 24V P GND 24V S PFOUT SPFOPEN S PFCOVER PAPER D GND D GND P GND SPFPSOL SPFRSOL SPFMODB SPFMODA SEL IN3B SPFMODA SEL IN2B PD...

Page 128: ...17 18 3 3V POFF 5V 21 19 23 FW PR 24V 12 13 25 PSFMOUT D GND P FMCNT 26 1 P GND P GND 15 5VEN 9 8 6 D GND M C N C 4 5 3 T C BIAS GRIDL 10 11 14 P GND 3 3V D GND CN3 B26B P HDSS K S BR PL GY BR GY BL RD BL BR LB PK OR LB OR GY GY BR RD GY M C BAIS GRIDL P GND INT24 T C GY HAND PAPER PICK UP SOL BK HVU PWB P S PW B 1 3 CN101 B18B P HDSS B GY BL GY OR OR BL BR RD PL BR GY RD PK BR LB GY GY GY AC CODE...

Page 129: ...ND CN4 9604S 35F CN38 9615S 16A PP A PK CN4 9604S 35F CN28 B3P VH LF 2 1 14 16 OPUSTS OPUCMD D GND D GND 24V D GND 5VEN OPUCRDY OPUSRDY P ANEL_ RST 3 3V 5VEN D GND 3 3V 3 3V D GND MCU IF FFC SIDE COVER SWITCH HAENESS OPERATION PANEL HARNEES 28 27 26 25 24 23 22 21 20 19 18 17 SCAN2 SCAN1 SCAN2 SENSE0 SENSE1 SENSE2 SENSE3 GND SCAN6 SCAN5 SCAN4 SCAN3 16 15 14 13 12 11 10 9 8 7 6 5 LED2 LED1 LED3 LED...

Page 130: ...NI T 8 7 6 5 10 9 4 3 2 1 24V 11 12 13 CN36 B20B P HDSS K S 14 15 16 17 18 19 20 24V PSOL1 FSOL1 P GND P GND D GND D GND Y1 SELIN1C SELIN2C SELIN3C 5V 5V 24V 24V PSOL1 FSOL1 Y2 Y3 P GND P GND D GND D GND Y1 SELIN1C SELIN2C SELIN3C 5V 5V CNA B22B P HDSS K S PSOL2 PSOL3 FSOL2 FSOL3 8 7 6 5 10 9 4 3 2 1 11 12 13 14 15 16 17 18 19 20 21 22 N C N C JAPAN ONLY A 2 A 1 DH N DH L ELP 02V ELP 02V ELP 02V E...

Page 131: ...XCS1P FAXACK1P 3 4 5 6 7 8 9 10 11 12 13 14 15 16 PRLINE 5VEN GDATA4 FAXSTS GDATA7 FAXPAGE GDATA10 FAXCMD GND FAXDET 1 2 19 20 21 22 23 24 25 26 27 28 29 30 31 32 READY VCC3 GDATA11 GDATA15 GND FAXPRD VCC3 GND GND POFF GND GND 5V 17 18 35 36 37 38 39 40 41 42 43 44 45 46 47 48 GDATA5 GDATA6 H SYNC 24V GND GDATA3 GDATA8 GDATA1 GDATA9 GDATA12 33 34 GND 24V 49 50 GDATA2 GDATA0 3 4 5 6 7 8 9 10 11 12 ...

Page 132: ...tional one it is apt to keep the soldering iron in contact with the PWB for longer time This may cause land separation or may exceed the heat resistive temperature of components Use enough care to separate the soldering iron from the PWB when completion of soldering is confirmed Since lead free solder includes a greater quantity of tin the iron tip may corrode easily Turn ON OFF the soldering iron...

Page 133: ......

Page 134: ...nic mechanical photocopying recording or otherwise without prior written permission of the publisher Trademark acknowledgments Windows and Windows NT are trademarks of Microsoft Corporation in the U S A and other countries IBM and PC AT are trademarks of International Business Machines Corporation PCL is a trademark of Hewlett Packard Company Pentium is a registered trademark of Intel Corporation ...

Reviews: