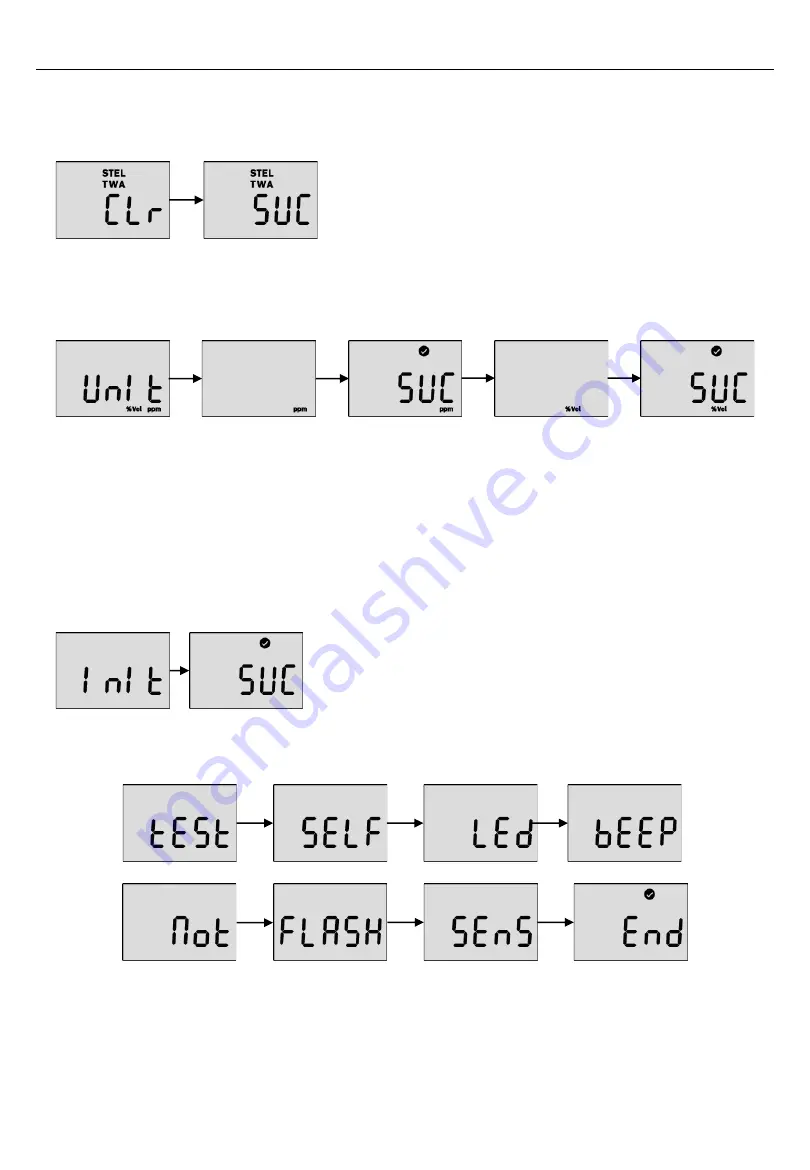
1. Press the pushbutton until Clr(STEL & TWA) is
displayed.
2. Press the power button to delete the TWA and STEL
value
3. After the successful activation, SUC with V mark is
displayed.
4.5. Adjust Unit
To change the unit(PPM or Vol) in the detector, follow below steps
1. Press the pushbutton until Unit is displayed and power button to enter the mode.
2. Press the pushbutton to select a unit (ppm or %vol) and power button to save it.
3. After the successful activation, SUC(V) mark is displayed. If it fails, FA(X) mark is
displayed.
4.7. Self Test
To perform the self diagnostic test, follow below steps.
1. Press the pushbutton until Test is displayed
2.
Press the power button for three seconds. In the “SELF” display, press the power
button for three seconds to activate the self test. While it’s activated, the detector will
test LED, beeping, vibration, flash memory, and sensor. After the successful test, V
mark is displayed. If the test fails, FA with X mark is displayed.
3. If the self test fails, the Error message appears.
4.4. Clear STEL and TWA
4. Setting Mode
To delete the measured STEL and TWA value in the detector, follow below steps
4.6. Factory Reset
1.
Press the pushbutton until “Initiate” is displayed.
2. Press the power button to apply it.
3. After the successful activation, SUC(V) mark is
displayed. If it fails, FA(X) mark is displayed.
To restore the factory setting, please follow below steps.
12


