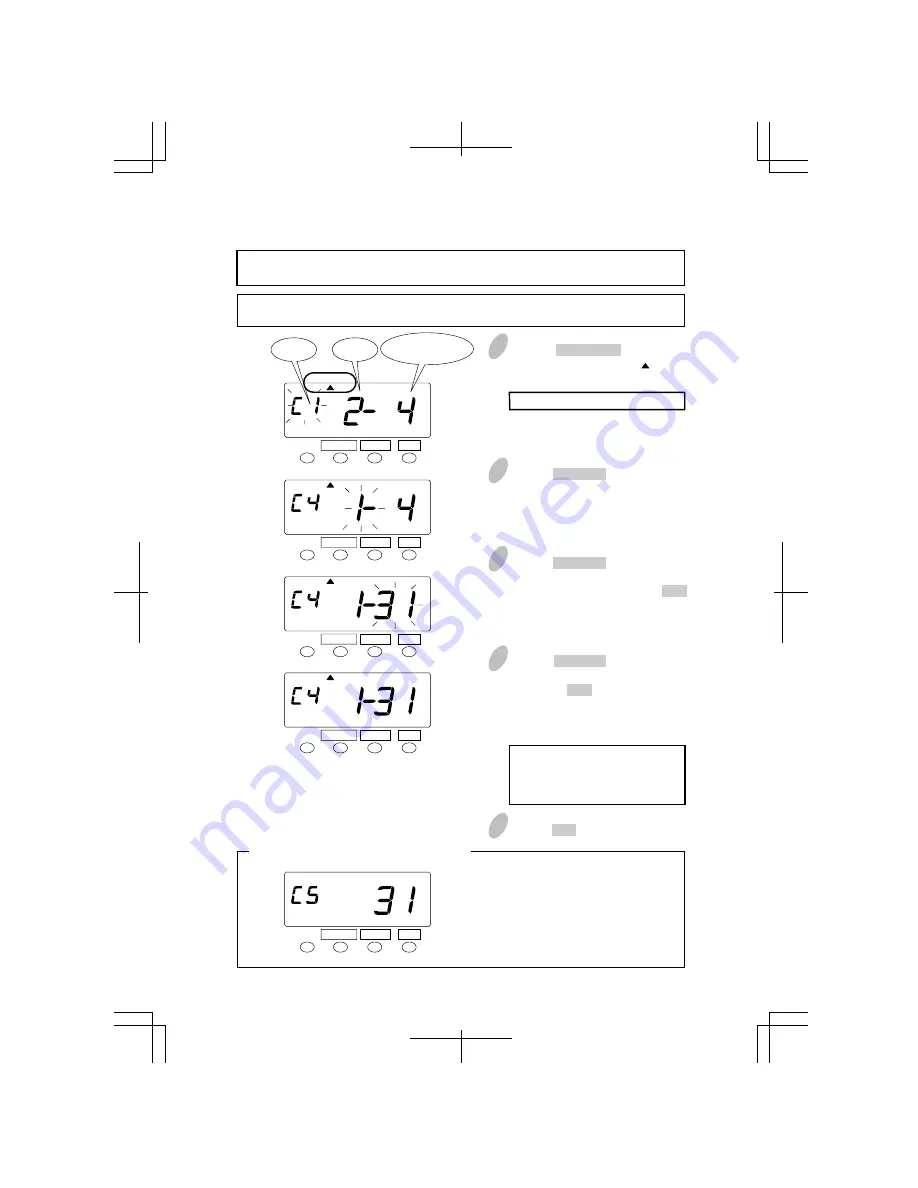
Setting the Card Type and the Pay Period
3
Push the CHANGE button to set the
middle number at "1" for "Monthly
Period" and then push the SET
button. At that moment, the flashing
changes to "Pay Period Ending
Date".
2
Push the CHANGE button to set the
left-side number at "C4" and then
push the SET button. At that
moment, the flashing changes to
"Pay Period".
4
Push the CHANGE button to set the
right-side number at "31" and then
push the SET button. At that
moment, the display will change
from flashing to steady and the
setting is now completed.
For setting the Pay Period Ending
Date/Day, see "How to set the
Pay Period Ending Date/Day" on
the next page.
Pay period is fixed when you select
"Card Type". After the Step 2, the
display will be as shown in the left
figure and the Step 3 is skipped.
You only have to do is set the pay
period sending date/day in the Step
4.
If error "E-49" appears when you try to change settings, then you must reset all cards
before proceeding. (See "All Cards Reset" on page 49.)
Example: Change "C1" with weekly period to "C4" with monthly period (pay period
ending date: 31).
1
Push the FUNCTION button for 3
seconds and position the " " under
the "CARD TYPE" mark.
The flashing number can be changed.
22
5
Push the SET button once again.
18
18
FUNCTION CHANGE
SET
Cord
Type
Pay
Period
FUNCTION CHANGE
SET
FUNCTION CHANGE
SET
FUNCTION CHANGE
SET
Pay Period
Ending Date/Day
When you select "C5", "C6", or "C7" ......
CARD TYPE
CARD TYPE
CARD TYPE
FUNCTION CHANGE
SET
CARD TYPE


