


35
Audio mode
Note
If you insert a number of different CDs and DVDs and receive the message
Drive error
every time, contact a qualified workshop.
Inserting and removing memory cards
Only supported audio files are displayed and played. Other files are ignor-
ed.
Navigation data stored on a memory card can only be read using the corre-
sponding navigation menu
⇒
page 62.
Inserting a memory card
If a memory card cannot be inserted, make sure it is positioned correctly
and is compatible with the unit.
●
Insert a compatible memory card with the cut-off corner first and facing
right (horizontal memory card slot) or upwards (vertical memory card slot)
until the card clicks into place in the unit.
●
Playback starts automatically if supported audio files are stored on the
memory card.
Removing a memory card
●
Press the inserted memory card. The memory card jumps to the eject po-
sition.
●
Remove the memory card.
Memory card cannot be read
If you insert a memory card containing data that cannot be read, the unit
will
not
change to memory card mode after loading. In the MEDIA main
menu, the
SD
function button in the top line of the screen remains disabled
and the function cannot be selected
⇒
Fig. 19
.
If the unit cannot read from the memory card at all, you are informed by a
pop-up window.
●
Press the
OK
function button and remove the memory card manually.
Note
No audio files can be copied onto the memory card in the unit.
Audio menu
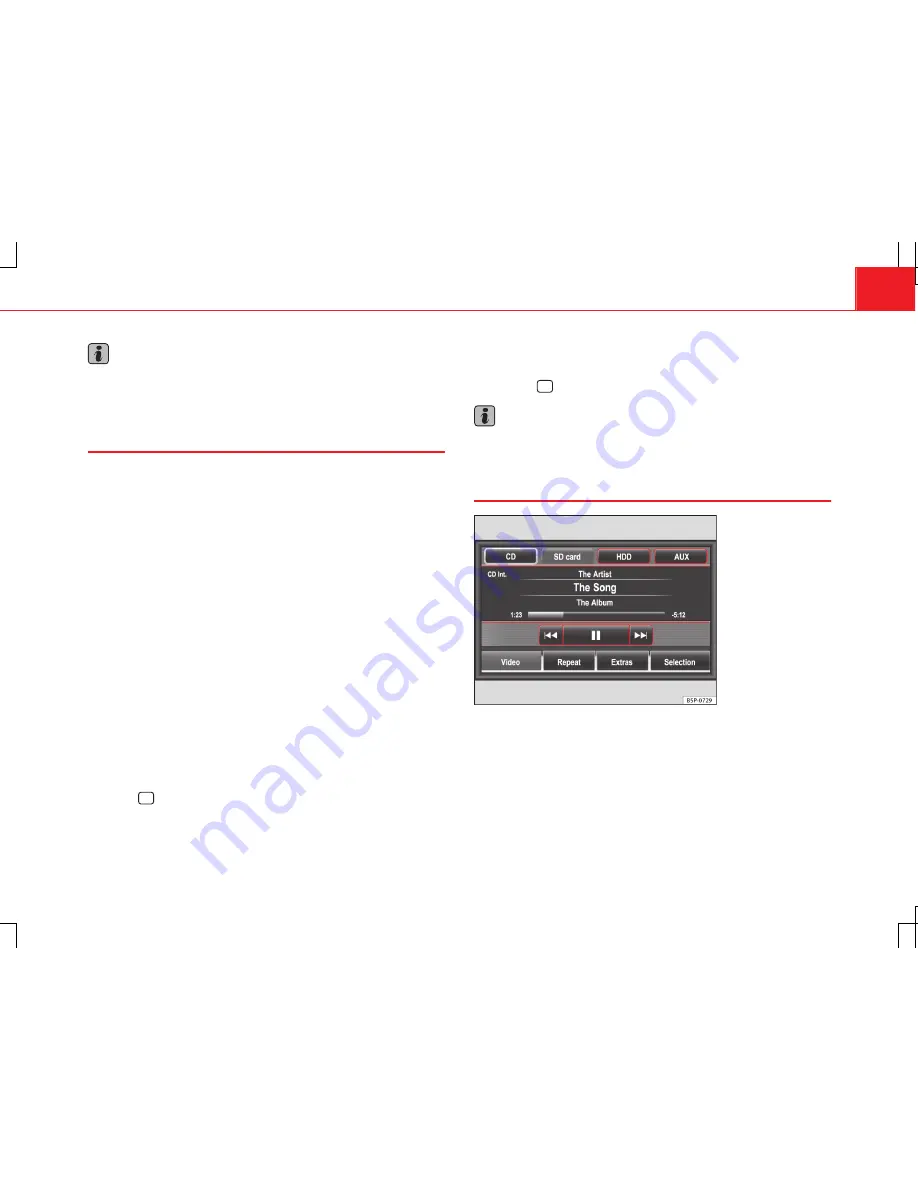
Fig. 21 MEDIA main
menu: audio menu
If an audio CD is inserted,
Track
and the track number corresponding to the
track order on the CD are displayed in the centre of the screen.
If the audio files contain additional track information (CD text, ID3 tag), the
track name
can be displayed in the centre with the
artist name
above and
the
album name
below it
⇒
Fig. 21
.
This displaying of track information can be deactivated in
Setup Media
⇒
page 123.


