ATLANTIC 3000
3000mm Diameter Ocean Buoy
Latest products and information available at
www.sealite.com
31
Electronic Equipment Installation
Lantern
Description
Qty
Navigation Lantern
1
M10 x 30mm Long S/S Cap Screw
4
Ø10 S/S Flat Washer
8
Ø10 S/S Spring Washer
4
M10 S/S Plain Nut
4
UV Stabilized Cable Tie
-
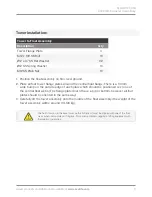
1. Install the navigation lantern using M8 socket head cap screws, flat and spring washers
and plain nuts.
2. Install any outstanding electronic equipment (eg. solar regulator, data logger, terminal
box) in the battery boxes and install associated wiring. Tie all cables in place using UV-
stabilized cable ties.
3. Install and secure batteries in place using supplied battery clamps.
4. Connect all negative (-) and positive (+) leads to the battery terminals. Cover the
terminals with a protective grease after connection and testing is finalised.
5. Test the lantern by covering it with a dark cloth or jacket and wait 1 minute for activation.
Refer to the lantern manual for information on setting flashing codes, intensity or other
variables and for troubleshooting.
Power & Signal, Optioned
Description
Qty
40W Solar Panels (pre-fitted)
2
Solar Regulator (pre-fitted)
1
Battery (size/quantity as optioned)
(1)
Summary of Contents for ATLANTIC-3000
Page 2: ...2 Version No Description Date Author Approved 1 0 Manual Launch October 2018 G Percy G Percy ...
Page 8: ...8 Technical Drawings ...
Page 14: ...14 Tower Assembly ...
Page 16: ...16 Tower Assembly Figure 4 Main Tower Assembly ...
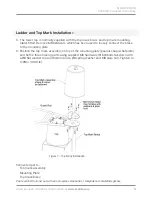
Page 20: ...20 Ladder and Top Mark Installation Figure 6 Ladder Installation ...
Page 32: ...32 Electronic Equipment Installation ...
Page 34: ...34 Notes ...

