30
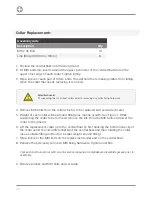
Collar Replacement:-
Assembly Aids
Description
Qty
M10 x 45 Bolt
16
Link (Ring ID 100mm x 10mm)
8
1. Position the central float on firm level ground.
2. Fit M10 bolts into inserts around the upper perimeter of the central float and on the
upper inner edge of each collar. Tighten lightly.
3. Slip a link over each pair of 10mm bolts. This will hold the remaining collars from falling
when the collar that needs replacing is removed.
Potential hazard.
Fit supporting links to all float collars prior to removing any collar fixing hardware.
4. Remove M16 bolts from the collar which is to be replaced and set aside (6 sets).
5. Weight of each collar will be around 60Kg plus marine growth. See Figure 1. While
supporting the collar to be removed remove the link from the M10 bolts and lower the
collar to the ground.
6. Lift the replacement collar up to the central float by first hooking the bottom inner lip of
the collar under the circumferential lip of the central float and then rotating the collar
(use a suitable lifting method for a collar weight around 60kg).
7. Slip a link over the M10 bolts on the replacement collar and on the central float.
8. Replace the previously removed M16 fixing hardware. Tighten until firm.
Coat each bolt tail and nut with an anti-seize compound or molybdenum disulphide grease prior to
assembly.
9. Remove all links and M10 bolts and set aside.
Summary of Contents for ATLANTIC-3000
Page 2: ...2 Version No Description Date Author Approved 1 0 Manual Launch October 2018 G Percy G Percy ...
Page 8: ...8 Technical Drawings ...
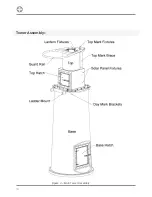
Page 14: ...14 Tower Assembly ...
Page 16: ...16 Tower Assembly Figure 4 Main Tower Assembly ...
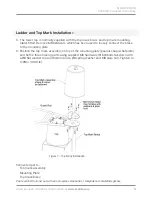
Page 20: ...20 Ladder and Top Mark Installation Figure 6 Ladder Installation ...
Page 32: ...32 Electronic Equipment Installation ...
Page 34: ...34 Notes ...

