background image

20

-  Fill the water pot (4) with water until it is 2/3 full. 
-  Place the juice container (3) onto the water pot (4). 
 -  Put the shorter end of the outflow angle (5) into the outlet nozzle of the juice container (3)  
  from the inside and turn the longer end so that it is at an angle to 
  the base. The outflow angle develops a suction 
  effect which allows the juice extractor to be emptied 
  to a large extent.
-  Pull the drain hose (6) onto the outlet nozzle on the juice container (3) from the outside. 
  The hose must sit securely on the nozzle. 
-  Now put the sealing plug (7) onto the end of the drain hose (6). 
-  Press the hose clamp (8) together at the sides and slide it onto the drain hose to approx.  
 

1 cm before the end of the hose (6). This makes the subsequent bottling of the juice easier. 

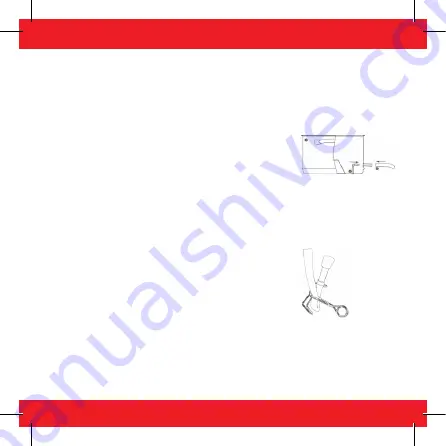
 -  To prevent juice from dripping out of the drain hose during 
  the extraction, you should clip the hose clamp (8) 
  to the pot handle of the juice container (3) or double 
  up the hose and press it together with the hose clamp (8) 
  (see diagram).
-  Place the fruit basket (2) onto the juice container (3) and put 
  the fruit that is to be extracted into the fruit basket (2) in layers 
  (if applicable with the sugar (the recommended amount 
  can be found in the following table or your recipe)).
-  Put on the glass lid (1) and heat everything at a high setting on a burner that is 
  appropriate for the diameter of the base (see Heat sources (types of stove)).
-  As soon as the water boils, reduce the heat supply. Ensure that the water boils evenly
  during the extraction of the juice and that there is always sufficient liquid in the 
  water pot (4).

Summary of Contents for GP 207

Page 1: ...Gebrauchs und Pflegehinweise Using and cleaning instructions GP 207 Multi Entsafter Loop Juice extractor Loop 03 2019 ...

Page 2: ... Sie deshalb diese Anleitung aufmerksam durch und bewahren Sie sie auf Pflegehinweise Vor dem ersten Gebrauch Bitte entfernen Sie alle vorhandenen Aufkleber und Etiketten Anschließend alle Bestandteile des Entsafters gründlich reinigen s Nach jedem Gebrauch Nach jedem Gebrauch Wichtig für einwandfreies Entsaften ist Sauberkeit Deshalb sollten Sie alle Bestandteile des Entsafters nach jedem Gebrauc...

Page 3: ...st bevor Sie mit der Reinigung beginnen 3 1 Glasdeckel 2 Fruchtkorb Dämpfeinsatz 3 Saftbehälter 4 Wassertopf 5 Ablaufwinkel 6 Ablaufschlauch 7 Verschlussstopfen 8 Schlauchklemme Gebrauchshinweise Um den Entsafter in Betrieb nehmen zu können setzen Sie die Bestandteile gemäß Zeichnung zusammen ...

Page 4: ...den Verschlussstopfen 7 auf das Ende des Ablaufschlauches 6 Drücken Sie die Schlauchklemme 8 seitlich zusammen und schieben Sie sie bis ca 1 cm vor Schlauchende auf den Ablaufschlauch 6 Dies vereinfacht das spätere Abfüllen des Saftes Um zu vermeiden dass während des Entsaftens Saft aus dem Ablaufschlauch tröpfelt sollten Sie die Schlauchklemme 8 am Topfgriff des Saftbehälters 3 einhängen oder den...

Page 5: ... und Daumen zusammendrücken bis der Saft über den Ablaufstutzen in den Schlauch gelangt Reicht dies nicht aus kippen Sie den Saftbehälter leicht an so dass der Ablaufstutzen am tiefsten liegt Vorsicht es besteht Verbrennungsgefahr durch heiße Teile und austretenden Wasserdampf Achtung Den Saft nicht mit dem Mund ansaugen Entsaften Sie nur reifes Obst Früchte gründlich waschen gut abtropfen lassen ...

Page 6: ...iemals vollständig verdampfen Bei Nichtbeachtung kann es sowohl zu Beschädigungen des Entsafters als auch zu Schäden an der Heizquelle kommen Mit oder ohne Zucker Möchten Sie den gewonnenen Saft zu Gelee verarbeiten können Sie den Zucker schichtweise über das im Fruchtkorb liegende Obst geben Oder auch den Gelierzucker direkt mit dem Saft unter Beachtung der Hinweise auf der Gelierzuckerverpackung...

Page 7: ...orgegebenen Mengen Fruchtart Zuckermenge Äpfel 0 bis 20 g Aprikosen 50 g Brombeeren 40 bis 50 g Erdbeeren 10 bis 40 g Heidelbeeren 80 g Himbeeren 50 g Johannisbeeren rot 80 bis 120 g Johannisbeeren schwarz 80 g bis 100 g Kirschen süß 70 g Kirschen sauer 80 g Kürbis 60 g Pfirsich 50 g Pflaumen 60 g Preiselbeeren 90 g Quitten 80 bis 100 g Rhabarber 100 bis 120 g Stachelbeeren 80 g Weintrauben 0 g ...

Page 8: ...ämpfer verwenden Hierfür setzen Sie den Frucht korb 2 direkt auf den Wassertopf 4 Oder aber Sie benutzen nur den Wassertopf 4 mit oder ohne Glasdeckel 1 für die tägliche Arbeit im Haushalt Darüber hinaus lässt sich der Fruchtkorb 2 wunderbar als Seiher einsetzen ...

Page 9: ...genden Angaben zur Positionierung auf Heizquellen Heizen Sie den Entsafter niemals leer oder auf höchster Leistungsstufe auf Beides kann zu irreparablen Defekten führen Brummgeräusche sind ein unvermeidbarer physikalischer Effekt und stel len keinen Defekt des Herdes oder des Entsafters dar Den Entsafter nicht über das Glaskeramik Kochfeld ziehen oder schie ben Salzkörner Staub und ähnliche Partik...

Page 10: ...em Rei niger für Glaskeramik entfernen Nach wiederholtem Einbrennen lässt dieser sich nicht mehr entfernen Gasherde Achten Sie bei der Verwendung des Entsafters auf einem Gasherd darauf dass die Flammen nicht über den Boden herausra gen Bei beschichteten Geschirren kann sonst die Versiegelung Schaden nehmen Platzieren Sie den Entsafters immer zentrisch damit ein sicherer Stand gewährleistet ist un...

Page 11: ... entstehen Beachten Sie dass Glasdeckel nur bis zu einer Temperatur von 180 C backofengeeignet sind Bei höheren Temperaturen besteht Berstgefahr Positionierung auf der Heizquelle Um die optimale Funktion des Entsafters zu gewährleisten sollte der Entsafterboden etwas größer als das Kochfeld sein oder dessen Durchmesser entsprechen Der ge eignete Herdplattendurchmesser ist auf dem Boden und oder de...

Page 12: ...brühungen Verbrennungen führen Wenn möglich die hinteren Herdplatten zum Kochen und Braten einsetzen Griffe bzw Stiele zur Seite oder nach hinten drehen Verwenden Sie Topfhandschuhe oder Topflappen um Verbrennungen zu vermeiden Stiel Seiten oder Deckelgriffe können heiß werden es droht Verbrennungsgefahr Nur geeignete Heizquellen benutzen Beim Betrieb auf Gas dürfen die Flammen nicht über den Bode...

Page 13: ...ittedieSchraubennichtzu fest anziehen oder überdrehen Ergänzendes Verfärbungen Blaue braune und bunt schillernde Verfärbungen nach dem Kochen im Inneren des Geschirrs lassen sich einfach mit Zitronensäure saft oder Essig entfernen Sie können eine Lösung im Verhältnis 5 1 Wasser zu Essig Zitrone herstellen und kochen diese im Geschirr kurz auf Oder Sie geben Essig Zitronensäure direkt auf ein weich...

Page 14: ...resstes Oliven oder Rapsöl eignen sich nicht zum Braten Diese Öle zersetzen sich bereits bei geringen Temperaturen und bilden braune Verharzungen so genannte Teerharze aus Kalk Kalkablagerungen sind durch matt weiße bis dunkelgraue Flecken im Geschirr zu erkennen Kalkablagerungen lassen sich einfach mit Zitronensäure saft oder Essig entfernen s Verfär bungen Angebranntes Angebranntes Gargut mit ei...

Page 15: ...punkten und blei benden Verfärbungen am Geschirrboden führen Lochfraß ist eine rein optische Veränderung und hat keinen Einfluss auf die Kocheigen schaften des Geschirrs Daher stellt Lochfraß keinen Reklamationsgrund dar Flug und Fremdrost Eisenpartikel sind überall in unserer Umwelt auch im Trinkwasser zu finden Haften die se auf der Geschirroberfläche können sie in Verbindung mit Feuchtigkeit Ro...

Page 16: ...n oder schreiben Sie uns einige Zeilen Im Falle von Beanstandungen Reklamationen fügen Sie bitte den Kaufbeleg bei nur so ermöglichen Sie uns eine Bearbeitung Ihres Anliegens Sie erreichen uns unter Josef Schulte Ufer KG Hauptstraße 56 59846 Sundern Germany Tel 49 0 29 33 98 10 Fax 49 0 29 33 71 50 info schulte ufer kg de www schulte ufer kg com Stand 03 2019 ...

Page 17: ...17 Using and cleaning instructions 03 2019 GP 207 Juice extractor Loop ...

Page 18: ...ions carefully and keep them safe Cleaning instructions Before the first use Please remove all the stickers and labels Then thoroughly clean all the components of the juice extractor see After every use After every use Cleanliness is important for a perfect extraction of juice Therefore you should always rinse all the components of the juice extractor thoroughly and dry them well after every use T...

Page 19: ...it basket steaming unit 3 juice container 4 water pot 5 outflow angle 6 drain hose 7 sealing plug 8 hose clamp Instructions for use To be able to use the juice extractor put the components together according to the drawing ...

Page 20: ...the end of the hose 6 This makes the subsequent bottling of the juice easier To prevent juice from dripping out of the drain hose during the extraction you should clip the hose clamp 8 to the pot handle of the juice container 3 or double up the hose and press it together with the hose clamp 8 see diagram Place the fruit basket 2 onto the juice container 3 and put the fruit that is to be extracted ...

Page 21: ... it for the extraction of the juice as follows Chop up apples pears and quinces without removing the core Chop rhubarbs into pieces as when preparing compote Do not hull strawberries blackcurrants redcurrants or gooseberries unless the residue is to be further processed Stone cherries plums mirabelle plums Score fruit with a hard skin e g grapes Pour the extracted juice directly into bottles or pu...

Page 22: ...ring it to the boil If you do not want to make jelly from the extracted juice you should add the sugar to the finished juice and heat it to 80 C Then pour it into pre heated bottles seal these well and store them in a cool dark place Recommended addition of sugar when extracting juice from fruit The stated quantities of sugar are approximate quantities and relate to 1 kilogram of fruit in each cas...

Page 23: ...ies sour 80 g Multi functional The juice extractor Ravenna can also be used as a steamer For this place the fruit basket 2 directly onto the water pot 4 Or just use the water pot 4 with or without the glass lid 1 for your daily household chores The fruit basket 2 is also wonderful for use as a colander Pumpkin 60 g Peach 50 g Plums 60 g Lingonberries 90 g Quinces 80 to 100 g Rhubarb 100 to 120 g G...

Page 24: ...f your stove and the following information relating to positioning on heat sources Never heat up the cookware when it is empty or at maximum power Both can lead to irreparable defects Humming noises are unavoidable physical effect and do not represent a defect in the stove or the cookware Do not pull or push the cookware over the glass ceramic hob Grains of salt dust and similar particles may scra...

Page 25: ...cles immediately with a cleaning agent for glass ceramic After it has been burn it repeat edly this can no longer be removed Gas stoves When using the cookware on gas stoves ensure that the flames do not go beyond the base of the cookware Otherwise the sealing may be damaged in the case of coated cookware Always place the cookware centrally so that a secure position is guaranteed and that it is no...

Page 26: ...re centrally on the burner When the cookware is used on an induction stove please always consult the operating instructions of the stove manufacture with regard to the correct positioning of the cookware If it is positioned incorrectly this could result in irreparable damages to the cookware for example the overheating of the side walls due to induction currents The sealing can be damaged if you p...

Page 27: ... If possible use the rear burners for cooking and frying Turn the handles to the side or to the back Use oven gloves or pot holders to avoid burns Shaft side and lid handles can become hot there is a risk of burning Only use appropriate heat sources When the juice extractor is used on gas the flames should not go beyond the base Always use the juice extractor for the intended purpose No changes ma...

Page 28: ...nformation Discolourations Blue brown and iridescent discolourations on the inside of the juice extractor after cooking can be easily removed with citric acid lemon juice or vinegar You can make a solution in a 5 1 ratio of water to vinegar lemon and boil this briefly in the juice extractor Or you can put a little vinegar citric acid directly onto a soft cloth and wipe out the juice extractor An o...

Page 29: ...ssed olive or rapeseed oil are not suitable for frying These oils break down under low temperatures and develop brown resin so called tar resin Limescale Limescale deposits can be identified by matt white to dark grey spots in the juice ex tractor Limescale deposits can easily be removed by citric acid lemon juice or vinegar see Discolourations Burnt food Boil burnt food briefly with a tablespoon ...

Page 30: ... the base of the juice extractor Pitting is a purely visual change and has no effect on the cooking properties of the juice extrac tor Therefore pitting is not grounds for a complaint Rust film and extraneous rust Particles of iron can be found everywhere in our environment including in the drinking water If they are sticking to the surface of the juice extractor they may combine with moisture to ...

Page 31: ...riticism Talk to us or write us a few lines In the event of complaints please enclose your receipt this will allow us to process your concern You can reach us at Josef Schulte Ufer KG Hauptstraße 56 59846 Sundern Germany Tel 49 0 29 33 98 10 Fax 49 0 29 33 71 50 info schulte ufer kg de www schulte ufer kg com Status 03 2019 ...

Page 32: ......

Reviews: