11. Maintenance / maintenance schedule
Reference Manual |Edition 4.0 (10-2013) |EcoCut 3300
71|108
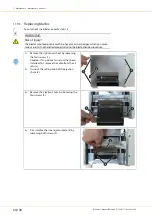
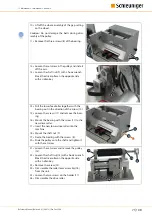
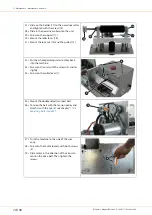
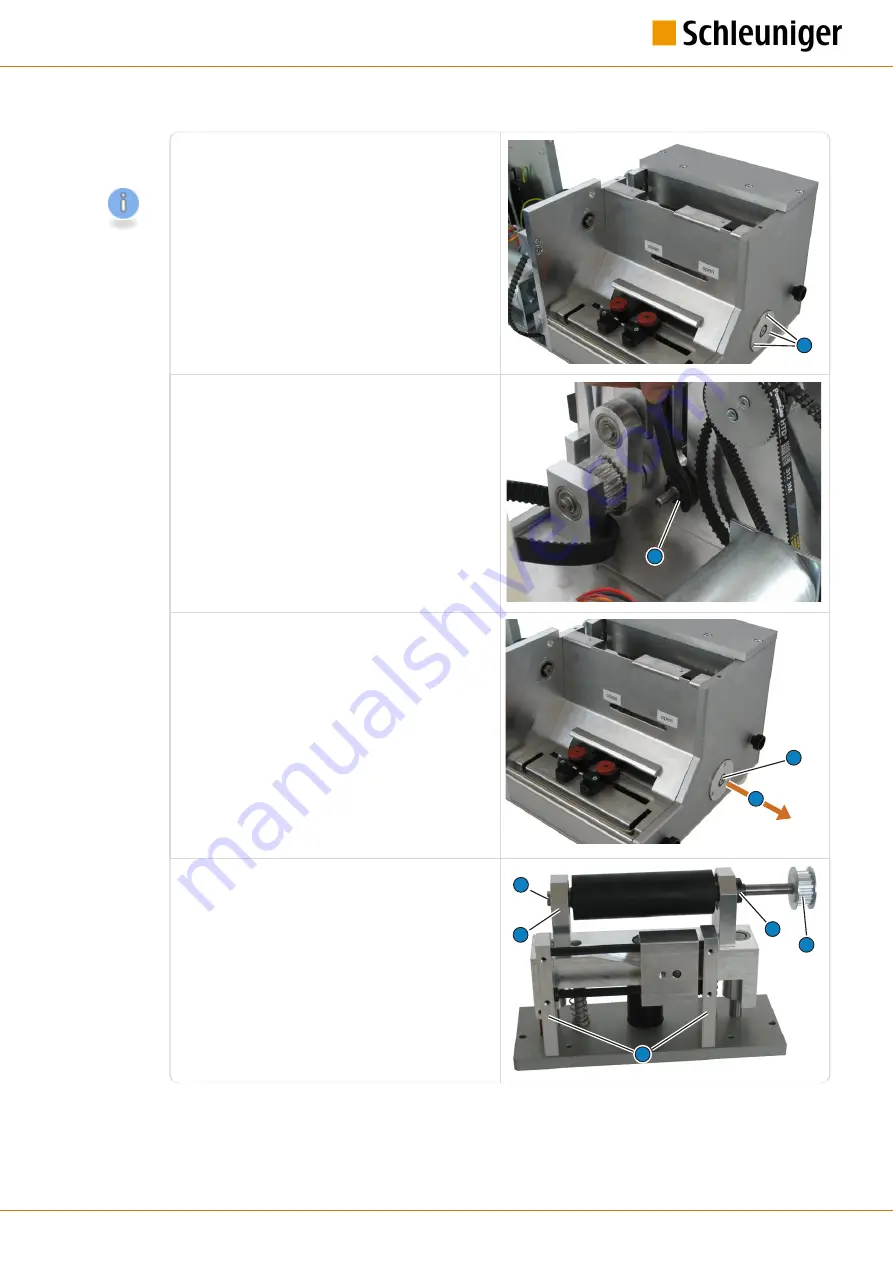
10» Lift off the whole assembly of the gap setting
on the wheel.
Caution:
Do not damage the belts during disas-
sembly of the pulley.
11» Remove the three screws (8) of the bearing.
8
12» Loosen the set screw in the pulley and slide it
off the axis.
13» Loosen the shaft nut (9) with a hook wrench.
Block the drive roller on the opposite side
with an allen key.
9
14» Pull the lower feed roller together with the
bearing out in the direction of the arrow (10).
15» Loosen the screws (11) and remove the bear-
ing.
16» Mount the bearing with the screw (11) to the
new drive roller.
17» Insert the new lower drive roller into the
machine.
18» Mount the shaft nut (9).
19» Fixate the bearing with the screws (8).
20» Slide the pulley onto the shaft and tighten it
with the set screw.
11
10
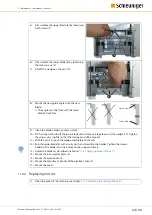
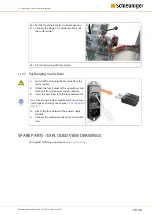
21» Loosen the set screw and remove the pulley
(13).
22» Loosen the shaft nut (14) with a hook wrench.
Block the drive roller on the opposite side
with an allen key.
23» Remove the screw (15).
24» Disassemble the roller lever assembly (16)
from the unit.
25» Loosen the two screws on the holder (17).
26» Disassemble the drive roller.
15
13
14
17
16
Summary of Contents for EcoCut 3300
Page 8: ...Table of contents 8 108 Reference Manual Edition 4 0 10 2013 EcoCut 3300...
Page 22: ...4 Product specifications 22 108 Reference Manual Edition 4 0 10 2013 EcoCut 3300...
Page 74: ...12 Spare parts exploded view drawings 74 108 Reference Manual Edition 4 0 10 2013 EcoCut 3300...
Page 76: ...13 Decommissioning disposal 76 108 Reference Manual Edition 4 0 10 2013 EcoCut 3300...
Page 102: ...14 Appendix 102 108 Reference Manual Edition 4 0 10 2013 EcoCut 3300...
Page 103: ...Personal notes Reference Manual Edition 4 0 10 2013 EcoCut 3300 103 108...
Page 104: ...Personal notes 104 108 Reference Manual Edition 4 0 10 2013 EcoCut 3300...
Page 107: ......
Page 108: ......

