80
MPS4232
Section 6: Maintenance
Formatting the Flash Disk
Should the flash disk of the MPS need to be reformatted, it
can be done fairly simply if the following procedure is care
-
fully followed. For most, but not all times that an MPS will
be reformatted, a serial connection needs to be available
to communicate with the unit. If you are able to currently
establish an Ethernet connection with the unit, reformat
-
ting may not the best option. However, if an Ethernet
connection cannot be established with the unit it is prob
-
ably the case that the MPS application file or memory
system has been corrupted and needs to be reformatted.
Note: This procedure will delete all files and settings in the
MPS. All setting will be returned to default. This procedure
will not remove the operating system.
The procedure for reformatting the MPS is as follows:
1. Power the MPS on.
If the IP address is known, you can attempt to
connect to the unit via an Ethernet connection.
If this is not successful, or if the IP address is not
known, you must connect using the serial port.
Details on connecting to the serial port can be
found in the “Serial Communications” section.
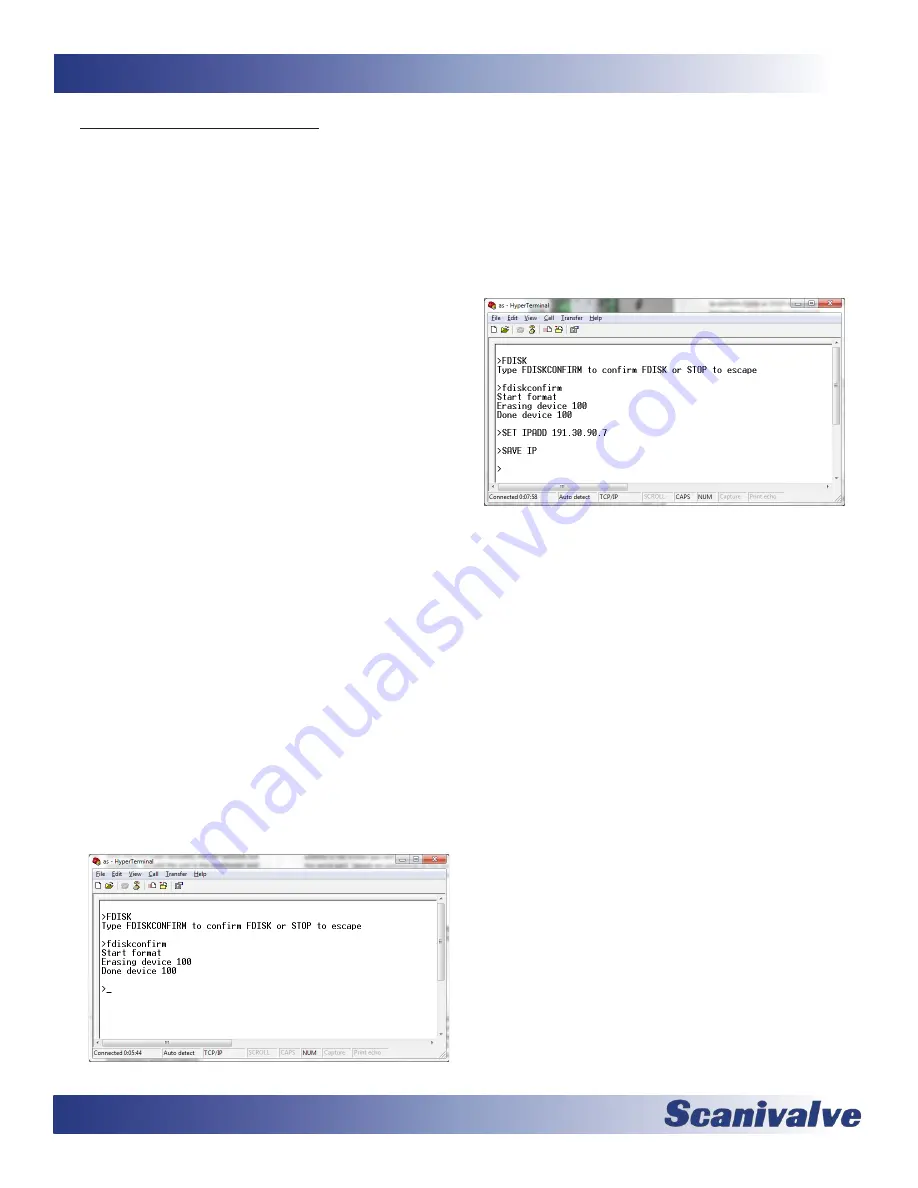
2. Once a connection is established, issue the
command:
The MPS will respond with “Type FDISKCONFIRM
to confirm FDISK or STOP to escape” Follow the
instructions and send the command:
FDISKCONFRM
<ENTER>
The MPS will respond indicating completion:
Start format
Erasing device 100
Done device 100
>
Figure 6-7: FDISK command
3. At this point the flash disk has been reformatted
and all contents have been deleted. All configura
-
tion settings, including the MPS’s IP address have
been deleted. The IP address must be configured by
issuing the command:
(where xxx.xxx.xxx.xxx is the desired IP address)
Followed by the commands:
SAVE IP
<ENTER>
Figure 6-8: Reset IP Address
4. Power cycle the MPS module or issue the
REBOOT
command.
5. After the MPS has cycled power and rebooted,
files can be reloaded to the MPS module using the
File Browser page on the Web Server. The most
important file to upload is the Calibration Coef
-
ficient Table. Follow the “Calibration Coefficient
Installation” procedure to restore Engineering Unit
scanning ability.
If any other files were archived, they can also be
uploaded to the module at this time. Otherwise,
all settings can be reset per the users configuration
and saved.
Summary of Contents for MPS4232
Page 1: ...MPS4232 Miniature Pressure Scanner Hardware and Software Manual Software Version 1 00...
Page 2: ......
Page 3: ......
Page 6: ...INTENTIONALLY LEFT BLANK...
Page 12: ...6 MPS4232 Section 1 Specifications INTENTIONALLY LEFT BLANK...
Page 15: ...9 MPS4232 Section 1 Introduction Section 1 Specifications MPS4232 INTENTIONALLY LEFT BLANK...
Page 18: ...12 MPS4232 Section 2 Introduction INTENTIONALLY LEFT BLANK...
Page 33: ...27 MPS4232 Section 4 Hardware INTENTIONALLY LEFT BLANK...
Page 37: ...31 MPS4232 Section 5 Software INTENTIONALLY LEFT BLANK...
Page 51: ...45 MPS4232 Section 5 Software...
Page 81: ...75 MPS4232 Section 6 Maintenance INTENTIONALLY LEFT BLANK...
Page 90: ...84 MPS4232 Appendix INTENTIONALLY LEFT BLANK...
Page 94: ...88 MPS4232 Appendix D Software Revision Log Version 1 00 Initial Release...


