中文
EN DE RU KO PT
JA
ES
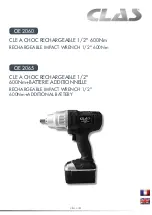
51075
10
7.
工作灯:
机器带有照明工作灯:当使用机器按下开关时,照明灯亮;松开,照明灯延迟
15
秒熄灭。
8.
电池电量显示:
按下机器开关,电量指示灯亮
5
秒,可按照下表判断电池包剩余电量。
LED
灯显示
剩余电量
0-25%
25-50%
50-75%
75-100%
9.
操作:
插入电池组时请务必使其完全锁紧到位,否则它可能会意外从工具中脱落从而造成自身或他人受伤。牢牢握住工具
并将套筒置于螺栓或螺母上方,开启机器并以适当的紧固时间开始紧固。
适当的紧固转矩可能会随着螺栓种类或尺寸、需紧固工件材料等的不同而不同。总体上,紧固时间越久紧固转矩越大。
注:
使工具平直对准螺栓或螺母。
紧固转矩过大可能损坏螺栓螺母或套筒,开始工作前,请务必进行试运转以确定适用于螺栓或螺母的适当紧固时间。
如果工具连续工作到电池组电量耗尽,则应暂停使用工具
15
分钟,再用已充电的电池组继续操作。
紧固转矩受下述多种因素影响。紧固后,请务必使用转矩扳手确认转矩:
1
)
当电池组电量将要完全耗尽时,电压将会下降紧固转矩也会减小。
2
)
套筒:
a
)使用尺寸不正确的套筒,将会造成紧固转矩减小。
b
)已经破损的套筒(六角端或矩形端磨损)会减小紧固转矩。
3
)
螺栓:
a
)即使转矩系数和螺栓等级相同,但因其直径不同所需紧固转矩也不同。
b
)即使螺栓的直径相同,但依其转矩系数等级及其长度不同,所需紧固转矩也不相同。
4
)
使用万向节或延伸杆会在某种程度上减少冲击套筒扳手的紧固力,可通过延长紧固时间进行弥补。
5
)
握持工具的方式或上螺栓部位的材料也会影响转矩。
6
)
低速操作本机也会减小紧固转矩。
问题解答:
1
)
为什么按压开关而机器却不运转?
在开关上部有一个转向拨杆,处在锁住的位置。将其拨向需要转动方向的位置,再按下按钮,机器就会开始转动。
Summary of Contents for 51075
Page 2: ......
Page 3: ...EN DE RU KO PT JA ES 51075 3 1 2 3 1 2 3 4 5 6 RCD RCD 1 2 3 4 5 6 7 1 2 3 4 5 6...
Page 5: ...EN DE RU KO PT JA ES 51075 5 1 2 3 4 Pb Hg Cd Cr PBB PBDE SJ T11363 2006 SJ T11363 2006 2...
Page 6: ...EN DE RU KO PT JA ES 51075 6 1 2 3 4 5 6 7 8 51075 4 0 2 4 0A 1 1 2 3 4 5 6 7 8...
Page 8: ...EN DE RU KO PT JA ES 51075 8 1 60 2 3 100 2 A A B C 2 D E 1...
Page 9: ...EN DE RU KO PT JA ES 51075 9 1 B 1 2 0 3 C 6 3 2 1 icon 4 D 2 5 D 2 6 E 1 O a 1 b c...
Page 10: ...EN DE RU KO PT JA ES 51075 10 7 15 8 5 LED 0 25 25 50 50 75 75 100 9 15 1 2 a b 3 a b 4 5 6 1...
Page 11: ...EN DE RU KO PT JA ES 51075 11 2 1 20 21 3 0 45...
Page 32: ...EN DE RU KO PT JA ES 51075 32 1 2 3 1 2 3 4 5 6 RCD RCD 1...
Page 33: ...EN DE RU KO PT JA ES 51075 33 2 3 4 5 6 7 1 2 3 4 5 6...
Page 34: ...EN DE RU KO PT JA ES 51075 34 7 1 2 3 4 1 1 2 3 4 5 6 1 2...
Page 36: ...EN DE RU KO PT JA ES 51075 36 Pb Hg Cd Cr VI PBB PBDE SJ T11363 2006 SJ T11363 2006 2...
Page 37: ...EN DE RU KO PT JA ES 51075 37 1 2 3 4 5 6 7 8 51075 4 0 2 4 0 1 1 2 3 4 5 6 7 8...
Page 39: ...EN DE RU KO PT JA ES 51075 39 1 60 2 3 100 A B 1 C 2 D E 2 1...
Page 40: ...EN DE RU KO PT JA ES 51075 40 2 A 1 1 2 0 3 6 3 3 2 1 icon 4 D 2 5 D 2 6 E...
Page 41: ...EN DE RU KO PT JA ES 51075 41 1 a 1 b c 7 15 8 5 LED 0 25 25 50 50 75 75 100 9 15...
Page 42: ...EN DE RU KO PT JA ES 51075 42 1 2 a b 3 a b 4 5 6 1 2 1 20 21 3 0 45...
Page 43: ...EN DE RU KO PT JA ES 51075 43...
Page 44: ...EN DE RU KO PT JA ES 51075 44 1 2 3 1 2 3 4 5 6 RCD RCD 1 2 3 4 5 6 7...
Page 45: ...EN DE RU KO PT JA ES 51075 45 1 2 3 4 a 5 6 7 1 2 3 3 4 5 OFF 1 1 2 3 4 5 6...
Page 47: ...EN DE RU KO PT JA ES 51075 47 pb Hg Cd 6 Cr PBB PBDE SJ T11363 2006 SJ T11363 2006 2...
Page 48: ...EN DE RU KO PT JA ES 51075 48 1 2 3 4 5 6 7 8 51075 4 0Ah 2 4 0A 1 1 2 3 4 5 6 7 8...
Page 50: ...EN DE RU KO PT JA ES 51075 50 1 60 2 3 100 2 A A B 1 C 2 D E 2 1...
Page 51: ...EN DE RU KO PT JA ES 51075 51 1 B 1 2 0 3 C 6 3 3 2 1 icon 4 D 9 2 5 D 2 6 E 1 a 1 b c...
Page 52: ...EN DE RU KO PT JA ES 51075 52 7 15 8 5 LED 0 25 25 50 50 75 75 100 9 15 9 1 2 a b 3 a b 4 5 6...
Page 53: ...EN DE RU KO PT JA ES 51075 53 1 2 1 20 21 3 0 45...
Page 64: ...EN DE RU KO PT JA ES 51075 64 1 2 3 1 2 3 4 5 6 RCD RCD 1 2 3 4 5...
Page 65: ...EN DE RU KO PT JA ES 51075 65 6 7 1 2 3 4 a 5 6 7 1 2 3 3 4 5 1 1 2...
Page 67: ...EN DE RU KO PT JA ES 51075 67 Pb Hg Cd Cr VI PBB PBDE SJ T11363 2006 1 SJ T11363 2006 2...
Page 68: ...EN DE RU KO PT JA ES 51075 68 1 2 3 4 5 6 7 8 51075 4 0Ah 2 4 0A 1 1 2 3 4 5 6 7 8...
Page 70: ...EN DE RU KO PT JA ES 51075 70 1 60 2 3 100 2 A A B 1 C 2 D E 2 1...
Page 71: ...EN DE RU KO PT JA ES 51075 71 1 B 1 2 0 3 C 6 3 3 2 1 icon 1 4 D 9 2 5 D 2 6 E 1 a 1 b c...
Page 72: ...EN DE RU KO PT JA ES 51075 72 7 15 8 5 LED 0 25 25 50 50 75 75 100 9 15 9 1 2 a b 3 a b 4 5 6...
Page 73: ...EN DE RU KO PT JA ES 51075 73 1 2 1 20 21 3 0 C 45 C...