44
Controlling the Projector
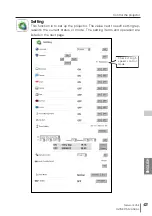
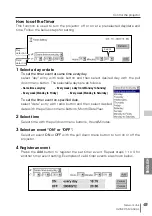
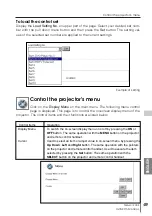
Setting items
Operation
Language
Select the language used in the on-screen menu of the projector. Select your
desired language with the pull down menu button, and then press the
Set
button.
Keystone
Correct the distortion of the projected image with the
Left
,
Right
,
Up
and
Down
buttons. To cancel the keystone correction, press the
OFF
button.
Blue back
When this setting is
ON
, the projector displays a blue image when no input
signal is selected.
Display
This setting is to select whether to display the on-screen display menu.
Logo
When this setting is
ON
, the projector displays a logo when starting up.
Ceiling
When this setting is
ON
, the picture is reversed top/bottom and left/right.
Rear
When this setting is
ON
the picture is reversed left/right.
No Show
When this setting is
ON
the picture on the screen is black out.
Freeze
When this setting is
ON
, the picture on the screen is frozen.
Power Management
When this setting is
ON
, the projector will automatically turn the lamp off if the
input signal is interrupted and no control button is pressed for 5 minutes and
30 seconds. Set
OFF
to disable this function.
On Start
When this setting is
ON
, the projector is automatically turned on just by con-
necting the AC power cord to a wall outlet.
Timer Setting
Turns the projector on or off at a preselected day/date and time. Please see
chapter [Timer Setting] on the next page for more information.
Remote Control
8 different remote control codes can be set. Must be set the same code num-
ber with the remote control when this code is changed.
Lamp Counter Reset
This is used to reset the lamp-use time. When replacing the lamp, reset the
lamp-use time by pressing the
Yes
button. Another popup window*
1
will
appear for confirmation and then press the
Yes
button to reset.
Lamp Mode*
This is used to switch the lamp mode. When
Eco
is selected, the projector
reduces the brightness and sets into the low power consumption mode.
* Some projectors may not have this menu.
P-TIMER
When
P-TIMER
button is pressed, the timer display "00:00" appears on the
screen and timer starts to count the time (00:00 ~ 59:59). To stop the time
counting, press
P-TIMER
button and press this button again to cancel the P-
TIMER function. The status is changed as
ON
->
STOP
->
OFF
when this but-
ton is pressed repeatedly.
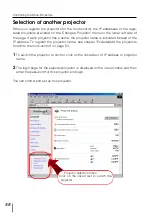
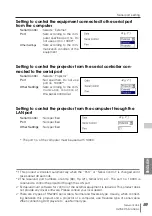
The setting items and their operations are listed below.
[Note]
*1 This popup window is realized by using the JavaScript function of web browser. If the prefer-
ence of the browser is set not to use the JavaScript, the lamp counter is reset immediately
without displaying the popup window for confirmation. To display the confirmation window,
please change your preference to use the JavaScript function.
There are various kind of ways to change this preference depending on the web browser's
version and application. Please refer to chapter “Appendix: Web browser setting/Active
Script (JavaScript enable)” on page 68.
Summary of Contents for PJ-NET ORGANIZER POA-PN10
Page 9: ...Installation 1 9 Network Unit OWNER S MANUAL ENGLISH ...
Page 25: ...Basic Setting and Operation 25 Network Unit OWNER S MANUAL ENGLISH 2 ...
Page 35: ...Controlling the Projector 35 Network Unit OWNER S MANUAL ENGLISH 3 ...
Page 50: ...50 Controlling the Projector ...
Page 51: ...Controlling the Multi Projectors 51 Network Unit OWNER S MANUAL ENGLISH 4 ...
Page 57: ...Use of Serial Port 57 Network Unit OWNER S MANUAL ENGLISH 5 ...
Page 80: ...80 Appendix ...
Page 81: ...Appendix B FAQ 81 Network Unit OWNER S MANUAL ENGLISH ...
Page 89: ...89 Network Unit OWNER S MANUAL Appendix ENGLISH ...
Page 90: ...Printed in Japan Part No 610 306 1474 1AA6P1P3990 IDLB SANYO Electric Co Ltd ...

