17
Network Unit
OWNER’S MANUAL
Network configuration
ENGLISH
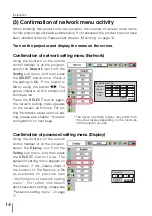
How to enter the numbers
To move the selection and change the values, Use the pointers
▲
/
▼
/
7
/
8
on the pro-
jector or on the remote control handset.
The
7
/
8
keys are used to move the selection item.
The
▲
/
▼
keys are used to change the number value.
3
Restart the Network Unit
Select the
SET
with the
7
/
8
keys and press the
SELECT
button again. The net-
work configuration display disappears and the Network Unit begins restarting*
1
. It
takes about 60 seconds. Do not disconnect the AC cord from the projector.
Completing of installation
Now the installation is completed. The IP address of this projector was set to
“192.168.1.201”. Next, please see chapter “Basic setting and operation” on page
25. It describes basic setup and operation of the projector.
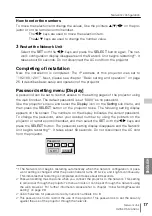
Password setting menu [Display]
A password can be set to restrict access to the setting pages of the projector using
the web browser. The default password is set “0000” as no password.
Use the projector’s menu and select the
Display
icon on the
Setting
sub menu, and
then press the
SELECT
button on the projector twice. The following setting display
appears on the screen. The numbers on the display indicates the current password.
To change the password, enter your desired number by using the pointers on the
projector or remote control handset, and then select the
SET
with the
7
/
8
keys and
press the
SELECT
button. The password setting display disappears and the Network
Unit begins restarting*
1
. It takes about 60 seconds. Do not disconnect the AC cord
from the projector.
Password
0 0 0 0
SET
CANCEL
*1 The Network Unit begins restarting automatically when the network configuration or pass-
word setting is changed. After the power indicator turns off twice, and it lights continuously.
This indicates that restarting is completed and it takes about 60 seconds.
✐
Password setting must be done when you connect the projector to the network. This setting
is carried out through the projector’s menu and also it can be set through the network using
the web browser. For further information please refer to chapter “Initial Setting/Password
setting” on page 29.
✐
Valid characters for password are only numeric numbers 0 to 9.
✐
This password is not to restrict the use of the projector. This password is to set the security
against the use of the projector through the network.
Summary of Contents for PJ-NET ORGANIZER POA-PN10
Page 9: ...Installation 1 9 Network Unit OWNER S MANUAL ENGLISH ...
Page 25: ...Basic Setting and Operation 25 Network Unit OWNER S MANUAL ENGLISH 2 ...
Page 35: ...Controlling the Projector 35 Network Unit OWNER S MANUAL ENGLISH 3 ...
Page 50: ...50 Controlling the Projector ...
Page 51: ...Controlling the Multi Projectors 51 Network Unit OWNER S MANUAL ENGLISH 4 ...
Page 57: ...Use of Serial Port 57 Network Unit OWNER S MANUAL ENGLISH 5 ...
Page 80: ...80 Appendix ...
Page 81: ...Appendix B FAQ 81 Network Unit OWNER S MANUAL ENGLISH ...
Page 89: ...89 Network Unit OWNER S MANUAL Appendix ENGLISH ...
Page 90: ...Printed in Japan Part No 610 306 1474 1AA6P1P3990 IDLB SANYO Electric Co Ltd ...


