


(26) 1200 PSI Hard Surface Extractor
1200 PSI Hard Surface Extractor (15)
5.0 Set-Up and Operation Continued
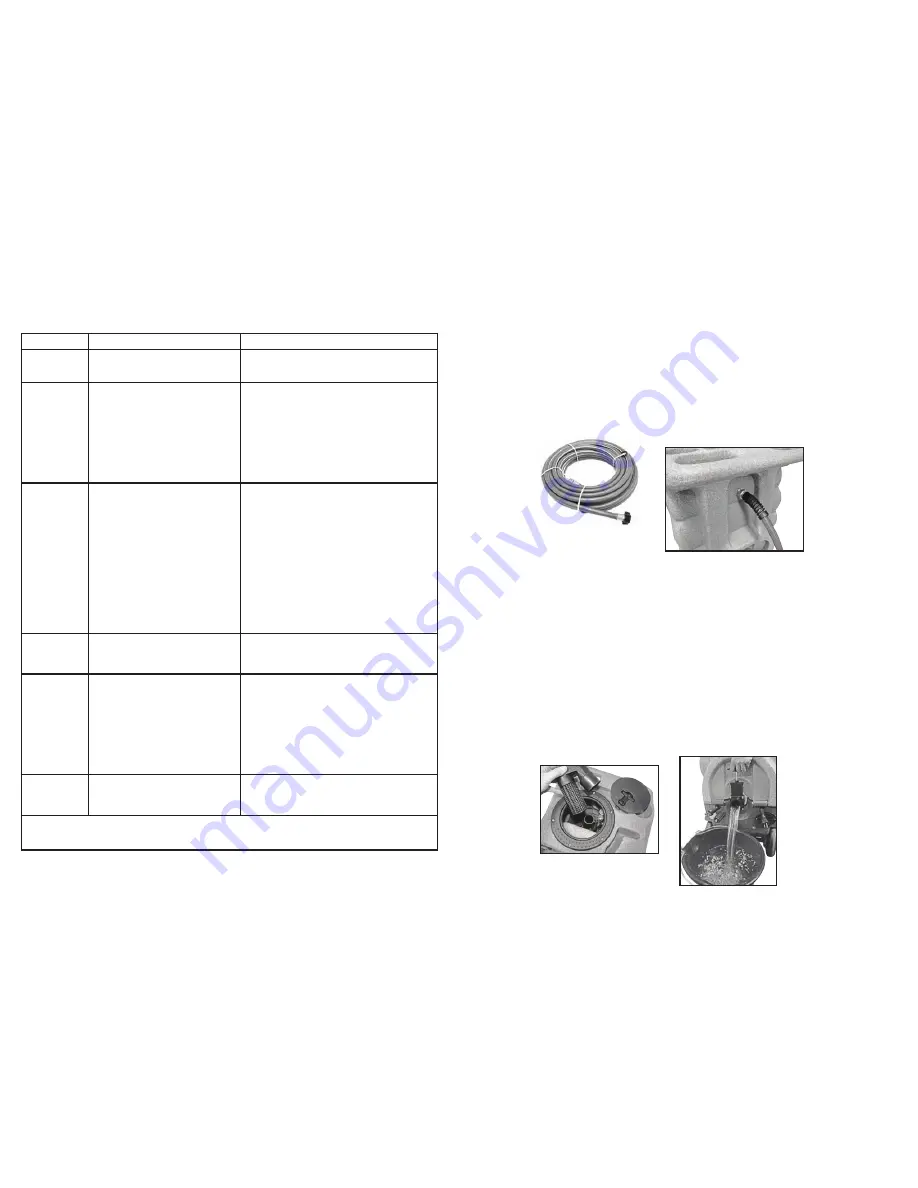
5.6 Connection of Auto-Dump Hose
The auto-dump hose is a 50-foot section of a 3/4” garden hose.
• Remove the cap from the auto-dump outlet fitting on the back of the machine.
• Connect the auto-dump hose to the outlet fitting.
• Place the other end of the hose in a commode or drain connected to a sanitary sewer
system.
• Secure the hose end to prevent movement during pumping.
Use defoamer to prevent foam build-up in the recovery tank during cleaning and to
keep foam/moisture from entering vacuums.
If not using the auto-dump feature, the auto-dump hose does not need to be connected.
When the recovery tank fills during cleaning, the float ball assembly in the vacuum inlet
filter will rise and will automatically shut-off the vacuum air flow to prevent the recovery
tank from overfilling and waste from getting into the vacuums. When this occurs:
• Immediately turn OFF the vacuum switches.
• Drain the recovery tank. Turn OFF the pump switch while draining the tank. Turn
pump switch back ON upon resumption of cleaning.
• Close the dump valve and turn the vacuum switches back ON when ready to resume
cleaning.
If the auto-dump or vacuum shut-off is not working properly, refer to the “Trouble
Shooting Guide” section or contact your distributor for advice or assistance.
50-Foot Auto-Dump Hose
Part No. 80-0112
Float Assembly
Part No. 80-0012
Drain Recovery Tank
8.0 Trouble Shooting Guide
Never operate the Hard Surface Extractor when the equipment is not performing as
expected or when any part is visibly damaged. When repair is needed, take the equipment
to an authorized service center.
Problem
Possible Cause
Remedy
Machine Not
Turning On –
No Power
1.
Building circuit breaker tripped
2.
Faulty power cord
3.
Faulty switches or internal wiring
1.
Reset breakers or move cords to other outlets
2.
Replace power cord
3.
Check wiring and test switches – repair as needed
Solution Pump not
Running
1.
Building circuit breaker tripped
2.
Pump circuit breaker tripped
3.
Faulty power cord
4.
Faulty switches or internal wiring
5.
Pump motor breaker tripped
6.
Pump motor faulty
7.
Pump seized – trips breaker
1.
Reset breakers or move cords to other outlets
2.
Reset breaker – check available circuit power and
pump
3.
Replace cord
4.
Check wiring and test switches – repair as needed
5.
Push in reset button on pump motor and/or external
breaker
6.
Replace pump motor
7.
Repair or replace pump head and bearing – check
motor and/or replace complete pump and motor
assembly
Low Solution
Pressure and/or
Pulsation
1.
Jets too large for pressure desired
2.
Jets worn allowing too much flow
3.
Solution inlet filter plugged
4.
Hose from solution tank restricted
5.
Pump intake hose or fittings leaking
6.
Pressure regulator sticking
7.
Pressure regulator faulty
8.
Filter screen or jets plugged on tool
9.
Solution tank empty
10.
Pump not primed
11.
Pump faulty
12.
Pressure gauge faulty
13.
Tool valve faulty
14.
Quick disconnects or hoses restricted
1.
Check jet size and flow rates – use smaller jets or
lower pressure
2.
Replace jets
3.
Clean or replace filter
4.
Repair or replace hose
5.
Repair or replace hose – tighten clamps or replace
fittings
6.
Lube o-rings on regulator shaft
7.
Repair or replace pressure regulators
8.
Clean out filter or jets
9.
Add water to tank – check and repair auto fill as-
sembly
10.
Perform pump priming procedure
11.
Repair or replace pump
12.
Replace gauge
13.
Repair or replace valve
14.
Clean out or replace quick disconnects and/or hoses
Can’t Connect
Solution Hose to
Machine
1.
Pressure in lines
2.
Quick disconnects faulty
3.
Wrong style/size quick disconnects
1.
Replace pressure
2.
Replace quick disconnects
3.
Replace quick disconnects to match connects on
machine
Auto-Dump Pump-
Out not Working
1.
Building circuit breaker tripped
2.
Faulty power cord
3.
Faulty switches or internal wiring
4.
Auto-dump pump-out pump faulty
5.
Auto-dump pump-out pump clogged
6.
Outlet check valve stuck
7.
Discharge hose restricted
8.
Float switch stuck
9.
Float switch faulty
1.
Reset breakers or move cords to other outlets
2.
Replace cord
3.
Check wiring and test switches – repair as needed
4.
Replace auto-dump pump-out pump
5.
clean auto-dump pump-out – keep recovery tank
clean – use hydro-filter
6.
Clean or replace check valve
7.
Un-kink, clean-out or replace hose
8.
CLean switch – make sure float slides up and down
easily
9.
Replace float switch
Vacuum Motor not
Running
1.
Building circuit breaker tripped
2.
Faulty power cord
3.
Faulty switches or internal wiring
4.
Vacuum motor faulty
1.
Reset breakers or move cords to other outlets
2.
Replace cord
3.
Check wiring and test switches – repair as needed
4.
Replace vacuum motor
To reduce the risk of fire, electrical shock or injury, repairs to wiring should only be performed by experienced service technicians. If
you are not experienced in checking electrical wiring, contact your nearest authorized service center to perform tests and repairs to
wiring and switches.
https://harrissupplyind.com - To Order Parts Call 608-268-8080


