Modo Photo (Foto) :
Ajuste de las opciones de captura
Ajuste de nitidez
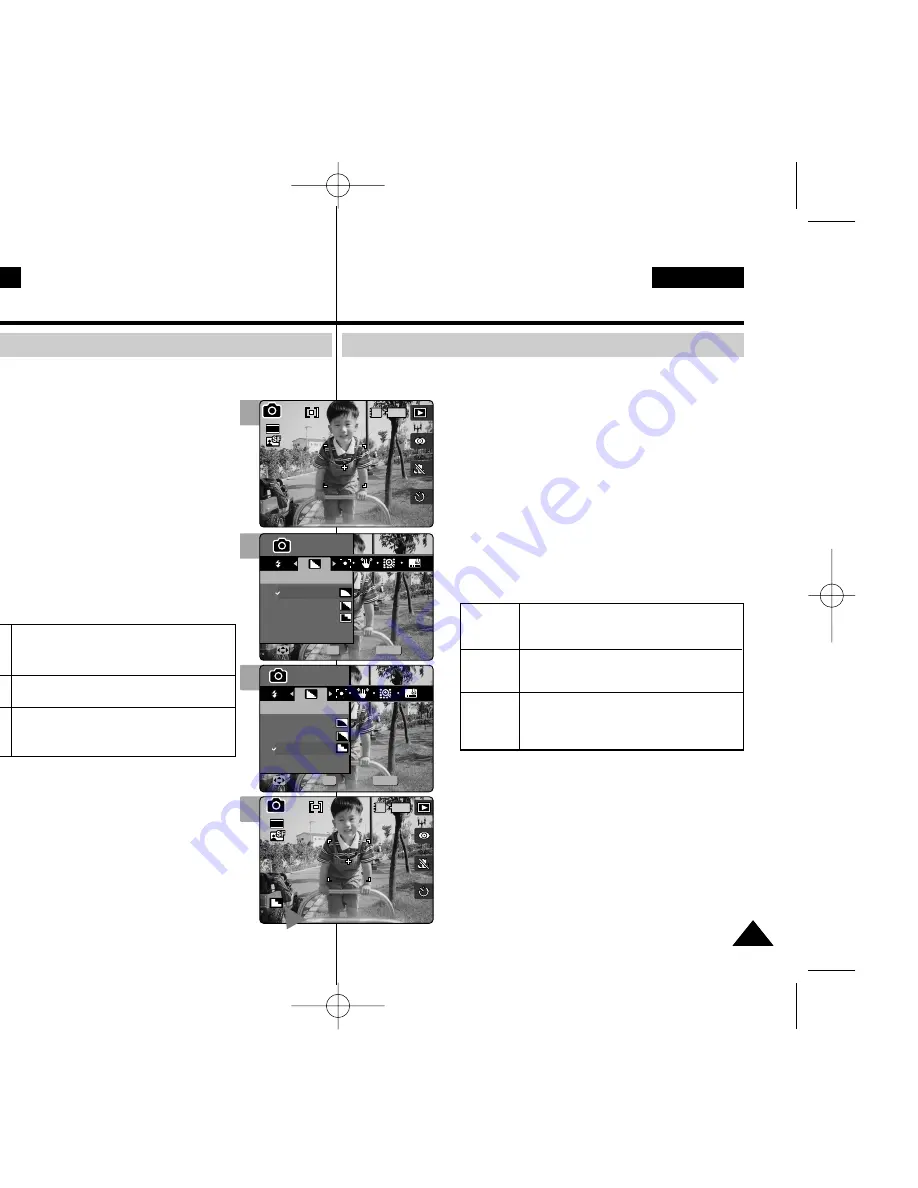
Puede ajustar la nitidez de la imagen que va a capturar. Fije la nitidez
de la imagen antes de tomarla.
1.Gire el Dial de modo a
Photo (Foto)
.
2.Pulse el botón [POWER] (ENC.
) para encender
la Miniket Photo.
3.Pulse el botón [MENU].
◆
Aparece la pantalla del menú.
4.Mueva el joystick a la izquierda / derecha
hasta seleccionar <Sharpness> (Nitidez).
5.Seleccione la opción moviendo el joystick
hacia arriba / abajo y pulse el botón (OK) del
joystick.
6.Pulse el botón [MENU] para salir del menú.
◆
Aparece en pantalla un icono que indica la
nitidez seleccionada.
◆
No aparecerá ningún icono cuando se defina
en <Normal>.
[ Nota ]
✤
Mientras aparece el menú en pantalla, si se pulsa
el botón [Record / Stop] (Grabar / Detener) se
saldrá del menú.
73
73
ENGLISH
ESPAÑOL
Los bordes de la imagen aparecen
suavemente y puede seleccionarla cuando
quiera editarla en el PC.
Los bordes de la imagen aparecen algo
marcados y puede seleccionarla cuando
quiera imprimir.
Al marcar y resaltar los bordes de la
imagen es posible que se produzcan
algunas alteraciones aunque se vea
claramente.
<Soft>
(Suave)
<Normal>
<Sharp>
(Fino)
Photo Mode :
Setting the Capturing Options
Setting the Sharpness
You can set the sharpness of the image to be captured. Set the image
sharpness before taking a picture.
1.Turn the Mode Dial to
Photo
mode.
2.Press the [POWER] button to turn on the Miniket
Photo.
3.Press the [MENU] button.
◆
Menu screen appears.
4.Move the joystick left / right to select
<Sharpness>.
5.Select an option by moving the joystick up / down,
and then press the joystick (OK).
6.Press the [MENU] button to exit the menu.
◆
An icon indicating the selected sharpness
appears on the screen.
◆
No icon will be displayed when it is set to
<Normal>.
[ Note ]
✤
While the menu screen is displayed, pressing the
[Record / Stop] button will exit the menu.
The image’s edges display softly and you
can select this when you want to edit it on
the computer.
The image’s edges display sharply, and
you can select this when you want to print.
As the image’s edges are sharpened and
emphasised, some noise might occur
although it is seen clearly.
<Soft>
<Normal>
<Sharp>
4
5
6
MENU
Photo
Photo
Sharpness
Sharpness
Soft
Normal
Sharp
Move
Move
Select
Select
Exit
Exit
OK
Photo
Sharpness
Move
Select
Exit
23
23
Photo
Sharpness
Move
Select
Exit
MENU
Photo
Photo
Sharpness
Sharpness
Soft
Normal
Sharp
Move
Move
Select
Select
Exit
Exit
OK
23
23
2592
Photo
Sharpness
Move
Select
Exit
Photo
Sharpness
Move
Select
Exit
IN
23
23
23
3
IN
2592
Photo
Sharpness
Move
Select
Exit
Photo
Sharpness
Move
Select
Exit
23
23
23
00934M VP-MS10 UK+ESP~089 11/21/05 10:18 AM Page 73


