4
Move
OK
Select
MENU
Exit
Camera Mode
►Disc Manager
Disc Finalize
Disc Unfinalize
Disc Format
Disc Info
5
Move
OK
Select
MENU
Exit
Video Mode
VR Mode
Camera Mode
►Disc Manager
Disc Finalize
Disc Unfinalize
Disc Format
Disc Info
-RW
VR
Disc format? (Video)
All files will be deleted!
Yes
No
SP
STBY
Cannot edit in camcorder.
6
00:00:00
30 min
ENGLISH
78
DVD Camcorder: Disc Manager
Formatting a Disc (Disc Format)
DVD-RW/+RW
This function works only in
Camera
Mode
.
page 26
You can format a recorded disc to be used again.
By formatting, all existing data will be deleted.
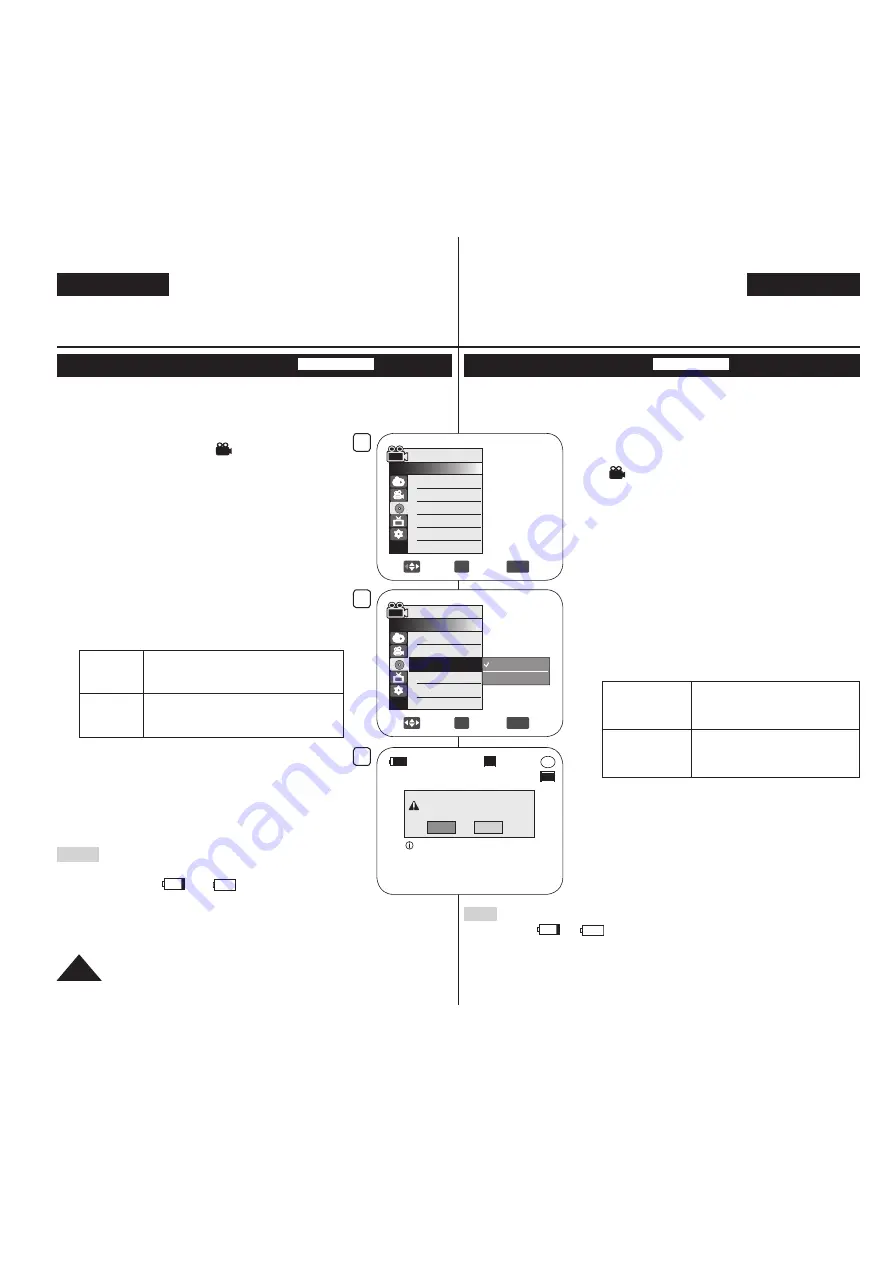
1. Set the
[Mode]
switch to
[DISC]
.
2. Set the
[Power]
switch to
[
(Camera)]
.
3. Press the
[MENU]
button.
The menu list will appear.
4. Move the
[Joystick]
up or down to select
<Disc
Manager>
, then press the
[Joystick(OK)]
.
5. Move the
[Joystick]
up or down to select
<Disc
Format>
, then press the
[Joystick(OK)]
.
6. Move the
[Joystick]
up or down to select
<Video Mode>
or
<VR Mode>
, then press the
[Joystick(OK)]
. (DVD-RW only) Set the mode
depending on the application.
If you insert DVD-RW disc, the
<Disc format?
(Video
or
VR) All files will be deleted!>
message will appear.
Video
(Video Mode)
If the disc has been finalised, it enables
the disc to be played back on other DVD
Players/Recorders.
VR
(VR Mode)
You can edit the disc on a DVD Camcorder,
but playback is only possible on DVD
Recorder that supports VR mode.
Refer to page 12 for Finalised disc compatibility.
If you insert DVD+RW disc
<Disc format? All
files will be deleted!>
message will appear.
7. Move the
[Joystick]
left or right to select
<Yes>
,
then press the
[Joystick(OK)]
.
When formatting is complete, the
<Complete!>
message will appear.
Notes
The Finalise/Format functions are not available
at battery level
and
.
Formatting will delete all the recorded contents on
disc. Be careful not to delete data by mistake.
Do not turn the power off in the middle of the formatting. The data recorded
in disc may be damaged.
中 文
DVD摄像机:光盘管理器
格式化光盘(光盘格式化)
DVD-RW/+RW
此功能只适用于
摄像模式
。
26页
您可以格式化已录制光盘以便再次使用。通过格式化,所有现有的数据将会
被删除。
1. 设置模式
[Mode]
选择光盘
[DISC]
。
2. 设置电源
[Power]
键,选择摄录模式
[
(Camera)]
。
3. 按菜单
[MENU]
键。
菜单清单将会显示。
4. 上下移动摇杆
[Joystick]
选择
<Disc Manager>
(光盘管理器)
,然后按
[Joystick(OK)]
。
5. 上下移动摇杆
[Joystick]
选择
<Disc Format>
(光盘格式化)
,然后按
[Joystick(OK)]
。
6. 向上或向下移动
[Joystick]
选择
<Video Mode>
(Video 模式)
或
<VR Mode> (VR 模式)
,然后按下
[Joystick(OK)]
。(仅限于DVD-RW)根据应用设置模式。
若您插入DVD-RW光盘,
<Disc format? (Video
or VR) All files will be deleted!> (光盘格
式化?(Video
或
VR)所有文件将被删除!)
信息将
会显示。
Video
(Video 模式)
若光盘已经终结,它将可以使光
盘能够在其他DVD播放机/刻录器
上播放。
VR
(VR 模式)
您可以在DVD摄录机上编辑光盘,
但是只有在支持VR 模式的DVD录像
机上才有可能播放该光盘。
有关已终结光盘的兼容性信息,请参阅第12页。
若您插入DVD+RW光盘,
<Disc format? All
files will be deleted!> (光盘格式化?所有
文件将被删除!)
信息将会显示。
7. 左右移动摇杆
[Joystick]
选择
<Yes> (是)
,然后按
摇杆
[Joystick(OK)]
。
当格式化完成,
<Complete!> (完成!)
字样将显示。
注意
电量处于
或
时不可使用格式化/终结功能。
格式化将删除光盘上所有录制的内容,小心不要误删数据。
请勿在格式化的过程中关闭电源。这可能会损坏光盘录制的数据。
All manuals and user guides at all-guides.com


