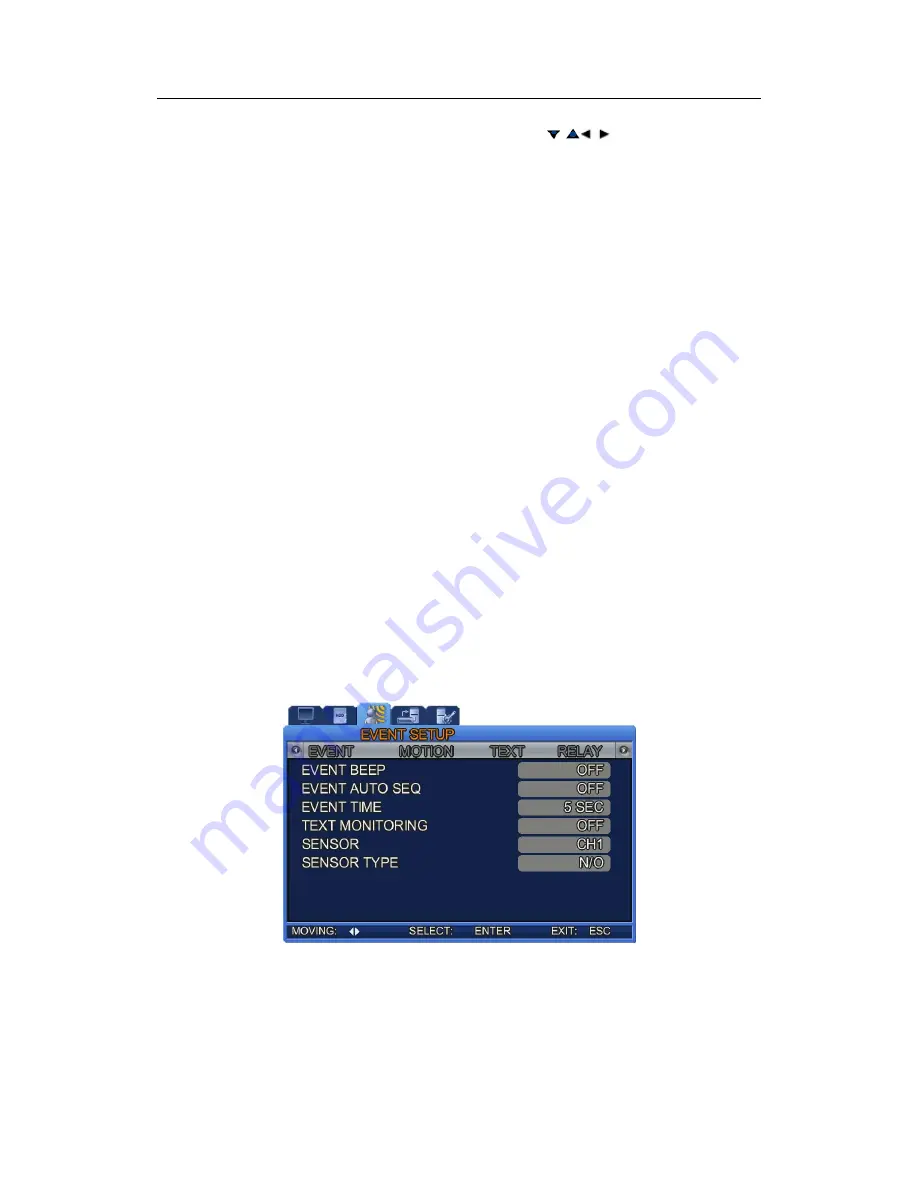
7.2. Event Setup
Scheduled
Recording
can
be
set
up
to
24
hours
per
day.
Using
the
buttons,
move
to
an
hour
block,
and
then
press
ENT
to
select
a
recording
mode.
S : Sensor Recording
‐ : Recording Disabled
i g
C : Continuous (Normal) Record n
n Recording
M : Motion Detectio
T : Text Recording
Image
Quality:
Select
High,
Standard,
or
Low
to
adjust
the
image
quality.
Recording
Frames:
Select
the
number
of
images
(frames)
that
can
be
recorded
per
second.
At
the
704x480
size,
a
maximum
of
30
images
can
be
selected,
and
a
maximum
of
120
images
at
the
352x240
size.
Pre
‐
Event
Recording:
Select
to
start
recording
prior
to
an
event.
Selecting
[Yes]
commands
the
DVR
to
start
recording
3
seconds
prior
to
an
event,
and
[No]
disables
this
option.
Post
‐
Event
Recording
Duration:
Select
a
recording
duration
after
an
event;
from
1
to
20
seconds.
Audio:
Select
"Yes"
or
"No"
to
record
audio.
7.2.
Event
Setup
Set
the
event
menus
of
a
DVR
such
as
Motion
Detection,
Sensor,
and
Alarm.
Press
the
MENU
button,
and
then
select
a
tab
using
the
left
and
right
buttons.
The
sub
menus
appear
as
shown
in
the
picture
below.
Press
the
ENTER
button,
and
select
a
sub
menu
using
the
left
and
right
buttons.
Press
ENTER
again,
and
then
change
the
settings
of
the
menu
by
pressing
the
left
and
right
buttons.
7.2.1.
Event
Setup
①
EVENT
BEEP:
Select
ON
or
OFF
to
play
a
beep
when
an
event
occurs.
②
EVENT
AUTO
SEQ:
Select
ON
or
OFF
to
display
event
screens
in
full
screen
mode.
45
Summary of Contents for SVR-470
Page 1: ......
Page 29: ......
Page 68: ...11 4 Search Mode Select an hour to play a saved video 67 ...
Page 71: ......
Page 83: ...Appendix H Product Schematics Appendix H Product Schematics 82 ...


