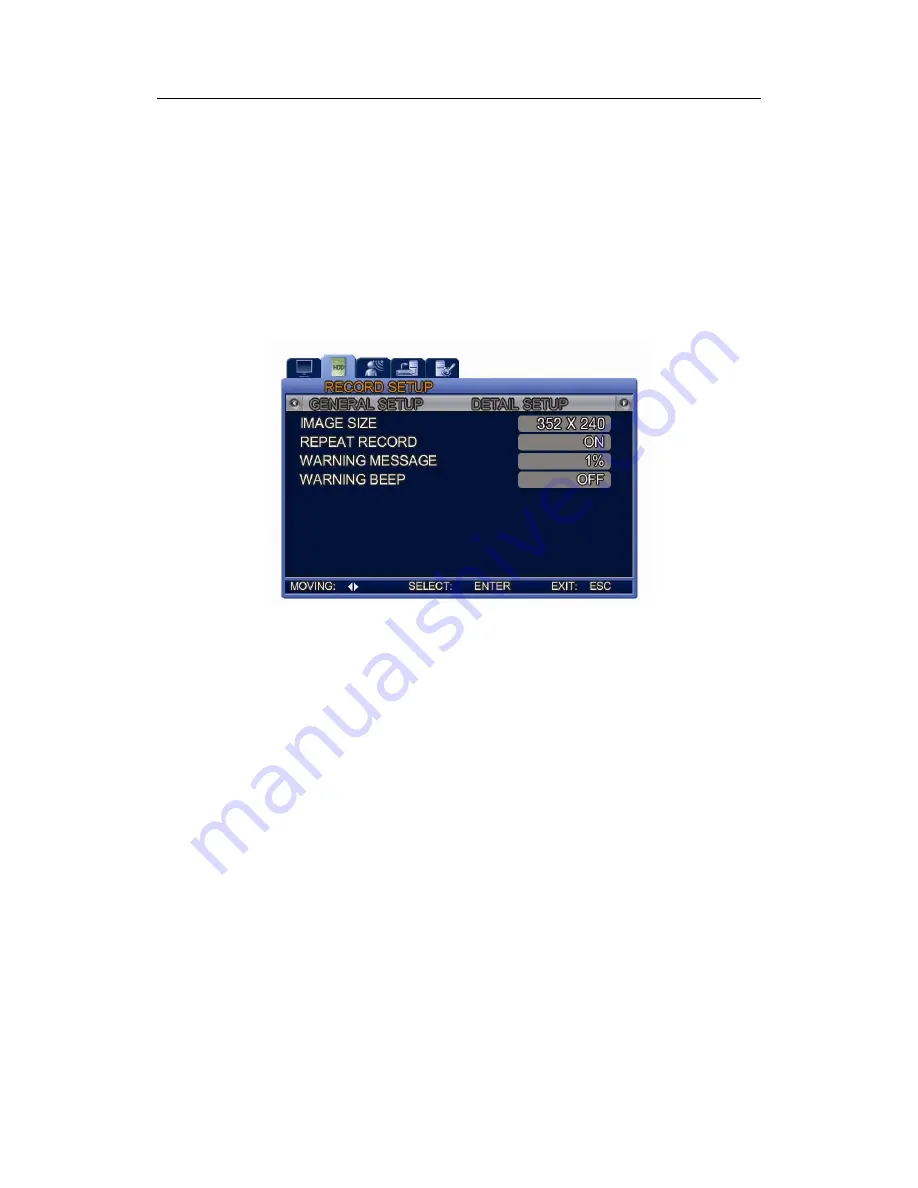
7.1. Record Setup
Chapter
7.
Recording
&
Event
Setup
7.1.
Record
Setup
Press
the
MENU
button,
and
then
select
a
tab
using
the
left
and
right
buttons.
The
Record
sub
menus
appear
as
shown
in
the
picture
below.
Press
the
ENTER
button,
and
select
a
sub
menu
using
the
left
and
right
buttons.
Press
ENTER
again,
and
then
change
the
settings
of
the
menu
by
pressing
the
left
and
right
buttons.
7.1.1.
General
Setup
①
IMAGE
SIZE:
Select
a
video
size.
The
SVR
‐
470
supports
two
resolutions:
352x240
and
704x480.
②
Selecting
the
largest
size
(704x480)
improves
the
recorded
image
quality,
but
increases
the
file
size
and
decreases
the
frame
rate.
The
monitoring
screen
can
be
recorded
to
the
HDD.
The
recordable
capacity
varies
depending
on
the
size
of
the
HDDs.
③
REPEAT
RECORD:
Select
to
repeat
the
recording
operation.
‐
[ON]:
The
unit
keeps
repeating
the
recording
operation.
If
there
is
not
enough
space
in
the
HDD,
it
overwrites
the
oldest
data
with
new
recording
data.
‐
[OFF]:
If
there
is
no
longer
enough
space
in
the
HDD,
and
then
aborts
the
operation.
④
WARNING
MESSAGE:
Select
a
minimum
%
of
free
space
left
in
the
HDD
to
display
an
alert
message.
Available
ranges
are
from
1
to
20%,
with
5
to
10%
being
generally
recommended.
⑤
WARNING
BEEP:
Select
ON
or
OFF
to
play
an
alert
buzzer
when
the
free
space
in
the
HDD
reaches
the
previously
defined
%.
43
Summary of Contents for SVR-470
Page 1: ......
Page 29: ......
Page 68: ...11 4 Search Mode Select an hour to play a saved video 67 ...
Page 71: ......
Page 83: ...Appendix H Product Schematics Appendix H Product Schematics 82 ...


