Operations & Installation
2-6
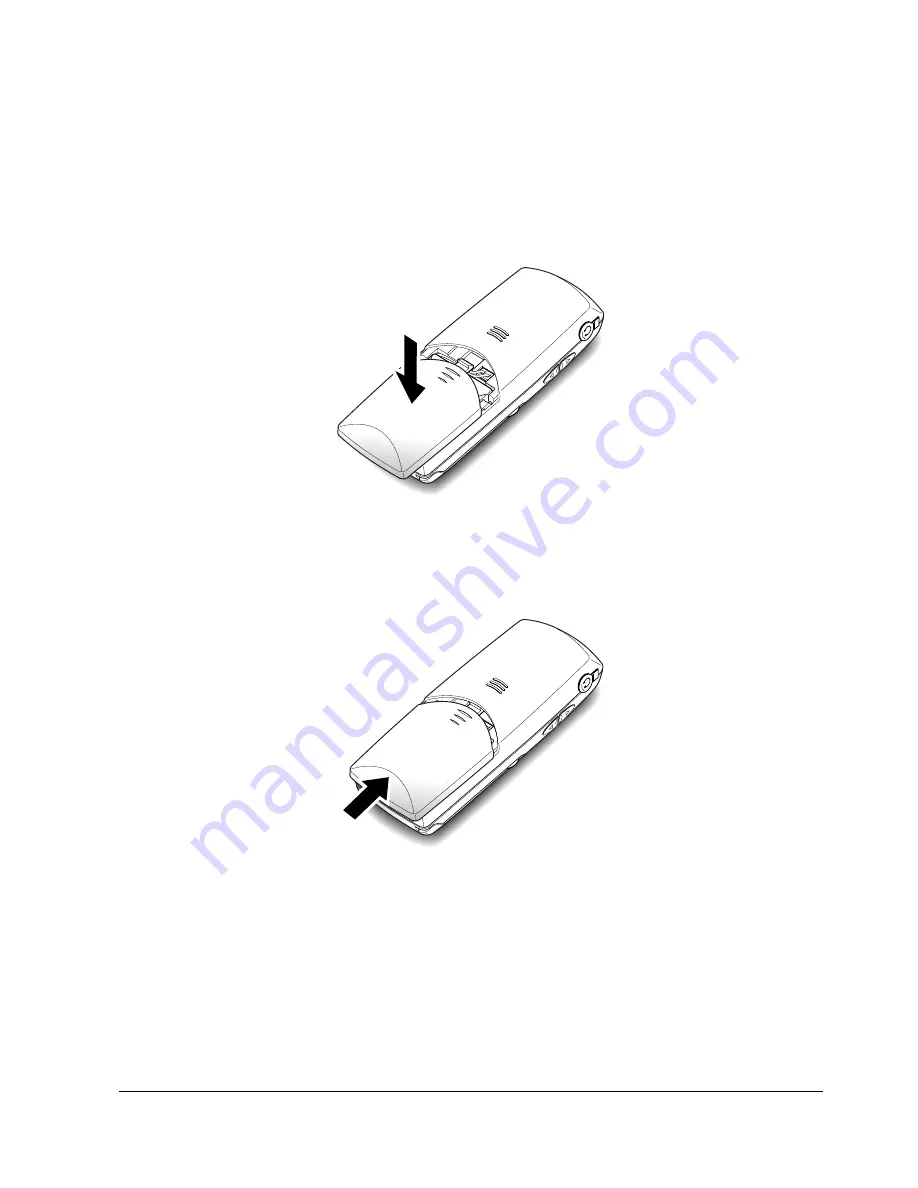
3. Replace the battery cover. Make sure that the cover is properly aligned.
4. Slide the cover up until it snaps shut.
Notes:
¥ The battery needs to be replaced if it does not recover its full storage capacity after recharging.
¥ When replacing battery, only use SAMSUNG-approved battery. For details, see ÔSpecificationsÕ on page 65 or
ask your nearest service center.
Summary of Contents for SP-R6100
Page 3: ......
Page 52: ...Exploded View Parts List 3 6 3 6 SP R6100 CHARGER Exploded View 6 8 7 1 2 3 4 5 9 ...
Page 54: ...Exploded View Parts List 3 8 SP R6100 PACKING Exploded View 3 8 3 7 4 1 5 8 2 6 9 ...
Page 67: ...6 1 6 PCB Diagrams 6 1 SP R6100 Base PCB I ...
Page 68: ...PCD Diagrams ...
Page 69: ...6 2 SP R6100 Base PCB II 6 2 ...
Page 70: ...PCD Diagrams ...
Page 71: ...6 3 SP R6100 Handy PCB I 6 3 ...
Page 72: ...PCD Diagrams ...
Page 73: ...6 4 SP R6100 Handy PCB II 6 4 ...
Page 74: ...PCD Diagrams ...
Page 75: ...6 5 SP R6100 Key PCB I PCD Diagrams 6 5 ...
Page 76: ...6 6 SP R6100 Key PCB II PCB Diagrams 6 6 ...
Page 77: ...6 7 SP R6100 Charger PCB I 6 7 PCD Diagrams ...
Page 78: ...6 8 SP R6100 Charger PCB II PCB Diagrams 6 8 ...
Page 79: ...Schematic Diagrams 7 1 7 Schematic Diagrams 7 1 SP R6100 Hand LOGIC ...
Page 81: ...Schematic Diagrams 7 3 7 3 SP R6100 BASE LOGIC ...
Page 82: ...Schematic Diagrams 7 4 7 4 SP R6100 Base CLIP ...
Page 84: ...Schematic Diagrams 7 6 HAND KEY 7 6 ...


