background image


Chapter 4. Menu 


4.1. Setup 


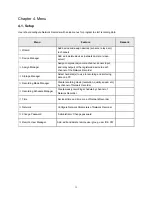
User should configure Network Recorder with setup menus for program to start recording data.   


Menu 

Feature 

Remark 

Add device and assign devices (sensors, relays, etc) 

to channels 


 Wizard 

Add, edit, delete devices (network camera / video 

server) 


 Device Manager 

Assign components (camera channel, sensor input, 

and relay output) of the registered device to each 

channel of the Network Recorder 


 Assign Manager


Select hard disk(s) to use in recording and archiving 

data on a PC 

 Storage Manager 


Create recording mode (resolution, quality, speed, etc) 

by channel of Network Recorder 


 Recording Mode Manager 

Create weekly recording schedule by channel of 

Network Recorder 

 Recording Schedule Manager 


Time 

Set local time and time zone of Network Recorder 


Network Configure 

Network 

Parameters of Network Recorder 


Change Password 

‘Administrator’ Change password 


Remote User Manager 

Add, edit and delete remote user group, user ID & PW 


 14

Summary of Contents for SNR-16A

Page 1: ......

Page 2: ...osts With experience a world of convenience connected anytime anywhere Preface The user who installs and operates the product should be aware of this manual and other manuals referred to by this manual before installation and operation for proper use This manual and the software and hardware explained here are protected by copyright law Therefore the copy reprint and translation to other languages...

Page 3: ...1 Setup 14 4 1 1 Wizard 15 4 1 2 Device Manager 17 4 1 3 Assign Manager 23 4 1 4 Storage Manager 26 4 1 5 Recording Mode Manager 30 4 1 6 Recording Schedule Manager 33 4 1 7 Time 34 4 1 8 Network 35 4 1 9 Change Password 35 4 1 10 Remote Users Manager 36 Chapter 5 Client Software 37 5 1 Registering Network Recorder to Network Manager 37 5 2 Monitoring Live Video 38 5 2 1 Play Video From All Channe...

Page 4: ...m manages remote users and local users independently Administrator can also assign different rights to users The program does not limit the number the registered users The program supports scheduling of recorded data with different parameters by days and hours of the week Administrator can create normal and alarm recording mode with different rates resolutions and recording qualities Administrator...

Page 5: ...Video Memory 256MB or higher Display Resolution 1024x768 or higher 16Bit or higher Display Color HDD Storage Space 200GB or higher Operating System Windows Server 2003 Standard Edition SP2 Windows XP Professional SP2 Others DirectX 9 0 or greater Microsoft NET Framework 2 0 Microsoft SQL Server 2005 Network Recorder 32 Recommended Intel Core 2 Duo E6750 2 66GHz or higher CPU Main Memory 2GB or hig...

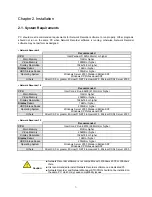
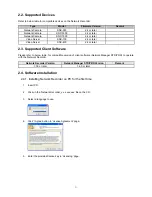
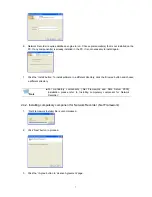
Page 6: ...nt Software Please refer to below table for compatible version of client software Network Manager STD PRO to operate with the Network Recorder Network Recorder Version Network Manager STD PRO Version Remark 1 0 0 or later 1 4 0 or later 2 4 Software Installation 2 4 1 Installing Network Recorder on PC for the first time 1 Insert CD 2 Click on the Network Recorder_v x x xxx exe file on the CD 3 Sel...

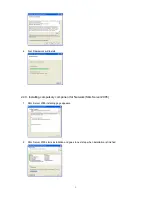
Page 7: ...are in a different directory click the Browse button and choose a different directory For mandatory components Net Framework and SQL Server 2005 installation please refer to Installing compulsory component for Network Recorder Note 2 4 2 Installing compulsory component for Network Recorder Net Framework 1 Net Framework installer file is uncompressed 2 Click Next button to proceed 3 Click the I Agr...

Page 8: ...rk will install 2 4 3 Installing compulsory component for Network SQL Server 2005 1 SQL Server 2005 installing page appears 2 SQL Server 2005 starts installation and goes to next step when installation is finished 8 ...

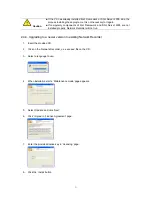
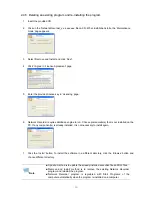
Page 9: ...rly Network Recorder will not run Caution 2 4 4 Upgrading to a newer version to existing Network Recorder 1 Insert the provided CD 2 Click on the Network Recorder_v x x xxx exe file on the CD 3 Select a language to use 4 When installation starts Maintenance mode page appears 5 Select Update and click Next 6 Click I Agree in License Agreement page 7 Enter the provided license key in Licensing page ...

Page 10: ...o run Choose prerequisite s that is not installed on the PC If any component s is already installed it is not necessary to install again 7 Click the Install button To install the software in a different directory click the Browse button and choose different directory Update method is to update the already installed execution file and DLL files Remove and Install method is to remove the existing Ne...

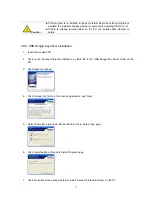
Page 11: ...B Dongle Key driver installation 1 Insert the provided CD 2 Click on the Sentinel Protection Installer x x x EXE file in the USB Dongle Key Driver folder on the CD 3 Click Next to continue 4 Click I Accept the Terms in the License Agreement and Next 5 Select Complete option and Next buttons in turn in Setup Type page 6 Click Install button in Ready to Install Program page 7 Click No button when as...

Page 12: ...sh button when installation is completed Once the Network Recorder is installed plug the provided USB dongle key to PC before running software Without USB dongle key Network Recorder program does not run Caution 12 ...

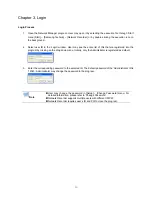
Page 13: ...ed into the program by clicking on the drop down menu Initially only the Administrator is registered as default 3 Enter the corresponding password to the selected ID The default password of the Administrator ID is 12345 Administrator may change the password in the program User may change the password in Setup Change Password menu For detailed information please refer to Change Password Note Networ...

Page 14: ...to each channel of the Network Recorder Assign Manager Select hard disk s to use in recording and archiving data on a PC Storage Manager Create recording mode resolution quality speed etc by channel of Network Recorder Recording Mode Manager Create weekly recording schedule by channel of Network Recorder Recording Schedule Manager Time Set local time and time zone of Network Recorder Network Confi...

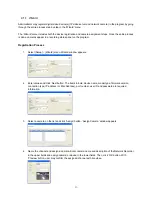
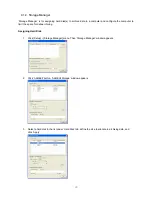
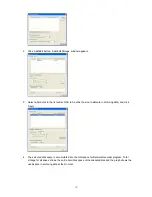
Page 15: ...t Setup Wizard menu Wizard window appears 2 Enter values and click Next button The items in bold device name model type firmware version connection type IP address or Mac Address port number user ID and password are required information 3 Select a camera on the list and click Assign button Assign Camera window appears 4 Name the channel and assign a camera Enter camera name and description of the ...

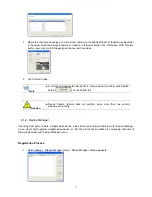
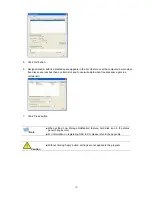
Page 16: ...ps up and displays network video devices network camera and video server that are detected on the LAN 4 Select device and click Add button In the Device Wizard window the selected device s network information is entered automatically 5 Enter the device name user ID and PW Then click Next button 6 Select a camera on the list and click Assigning button Assigning Camera window appears 16 ...

Page 17: ... Device Search window click Search button on the bottom left Note Device Search feature does not perform when more than two search windows are running Caution 4 1 2 Device Manager User may add edit or delete a digital video device video server and network camera with Device Manager menu User should register a digital video device so that the device can be utilized in composing channels of Network ...

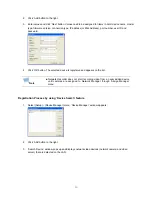
Page 18: ...is registered and appears on the list Network Recorder does not start recording video from a newly added device until cameras are assigned to Network Manager through Assign Manager menu Note Registration Process by using Device Search feature 1 Select Setup Device Manager menu Device Manager window appears 2 Click Add button to the right 3 Search Device window pops up and displays network video de...

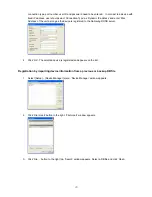
Page 19: ...ed device is registered and appears on the list To refresh and update the device list in Device Search window click Search button on the bottom left Note Registration process with a device with dynamic IP address 1 Select Setup Device Manager menu Device Manager window appears 2 Click Add button to the right 3 Enter values and click Next The items in bold device name model type firmware version 19...

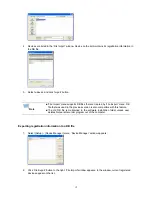
Page 20: ...device is registered to the Samsung DDNS server 4 Click OK The selected device is registered and appears on the list Registration by importing device information from a previous or backup DB file 1 Select Setup Device Manager menu Device Manager window appears 2 Click File Import button to the right File Import window appears 3 Click File button to the right top Search window appears Select a DB f...

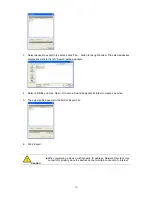
Page 21: ...was used in the previous version is also compatible with this feature Note The old DB file is maintained in the software installation folder unless user deletes Network Recorder program out of the computer Exporting registration information to a DB file 1 Select Setup Device Manager menu Device Manager window appears 2 Click File Export button to the right File Import window appears In the window ...

Page 22: ...window appears 4 Select a DB file and click Open Or name a file and designate its folder to create a new file 5 The selected file appears in the field of Export File 6 Click Export When registering a device with dynamic IP address Network Recorder may not perform properly since the devices cannot maintain connection to Internet Caution 22 ...

Page 23: ...it is necessary to assign sensor inputs and relay outputs to Network Recorder in addition to camera assignment Otherwise sensor inputs or relay outputs cannot be used in Network Recorder Assign Camera 1 Select Setup Assign Manager menu Assign Manager window appears 2 Select Camera tab Cameras are listed in the selected window For sensor or relay assignment corresponding tab shall be selected 3 Sel...

Page 24: ...s 2 Select Camera tab Cameras are listed in the selected window For sensor or relay assignment corresponding tab should be selected 3 Select a camera in the list and click Unassign 4 In the confirmation window click OK button 5 Click Close button in the Assign Manager window Changing assigned camera name 1 Select Setup Assign Manager menu Assign Manager window appears 24 ...

Page 25: ...l and click Edit Name button 4 Change name and click Ok button User may assign or un assign sensors and relays in the same method as assigning cameras Note The assigned components appear on the list in the main window when Assign Manager is closed 25 ...

Page 26: ...he computer to limit the space for data archiving Assigning Hard Disk 1 Click Setup Storage Manager menu Then Storage Manager window appears 2 Click Add Edit button Add Edit Storage window appears 3 Select a hard disk in the list under Hard Disk tab define the size to allocate in archiving data and click Apply 26 ...

Page 27: ...th and 4 processes with other disk s in the computer to allocate more space for Network Recorder 6 Click OK button 7 Assigned disk s with its allocated space appears in the list User may set the computer to warn when free disk space gets lower to a certain limit and to overwrite data when free disk space gets to a certain limit 8 Click Close button Assigning NAS Network Attached Storage 1 Select S...

Page 28: ...efine the size to allocate in archiving data and click Apply 4 The selected disk space is accumulated into the total space for Network Recorder program Total storage for all drives shows the entire hard disk space of the allocated disk and the graph shows the used space in archiving data at the moment 28 ...

Page 29: ...certain limit and to overwrite data when free disk space gets to a certain limit 7 Clink Close button When setting Low Storage Notification feature hard disk icon in the status panel changes color Note For information on registering NAS to PC please refer to the appendix Without clicking Apply button settings are not applied to the program Caution 29 ...

Page 30: ...ng User may edit the existing mode or create new mode s in this menu Creating a Normal Recording Mode 1 Click Setup Storage Manager menu Then Recording Mode Manager window appears 2 Select a camera for which a new mode is to be added 3 Click Add button Recording mode is created differently for each channel 4 In Add Recording Mode window name the mode select the color to display check on Normal Rec...

Page 31: ...larm Recording Mode 1 Click Setup Storage Manager menu Then Recording Mode Manager window appears 2 Select a camera for which a new mode is to be added and 3 Click Add button Recording mode is created differently for each channel 31 ...

Page 32: ... and post alarm durations Event types of motion detection video loss sensor input and relay output 5 Click OK button I Frmae mode is 1 2 images per second only as transmitted from a device User may combine Normal Recording and Alarm Recording in a mode by making settings for both recording modes Note Network Recorder may not meet the recording parameters due to network conditions or computer perfo...

Page 33: ...ce check mark in Active recording schedule and mode menu to the top 4 Select desired day and hour in the weekly schedule time grids by drag and drop with a mouse Then recording mode selection window pops up 5 Select mode in the list and click OK button Complete the entire week by repeating steps 2 4 6 Click Close button Once the recording schedule is configured Network Recorder starts recording da...

Page 34: ...Windows Setting Date Time 1 Select Setup Time menu Time window appears 2 Select Time tab and set date time 3 Click OK button Setting Time Zone 1 Select Time Zone tab in Time window 2 Set a time zone 3 Click OK button When changing time to a PC through Adjust Date Time menu in Windows the changed PC time is reflected to Network Recorder automatically Caution 34 ...

Page 35: ...utomatically by the program It uses the same IP address of a PC where Network Recorder program runs Remote user should register Network Recorder Server to Network Manager Client with this IP address Note Network Recorder uses two ports Control Port and Player Port When registering Network Recorder Server to Network Manager Client user should enter Control Port as port number 4 1 9 Change Password ...

Page 36: ... Remote User Manager menu Remote User Manager window appears 2 Click Add button to the right Enter values for items in bold to the left 3 Click OK button The user ID appears on the list By choosing check mark to Allow IP Address menu and entering IP address user can access Network Recorder only from the designated IP address Note Network Recorder is to access from a remote site local user ID canno...

Page 37: ... For information on Site Manager menu please refer to Network Manager STD PRO manual Registering Network Recorder 1 Select Setup Device Manager menu Device Manager window appears 2 Click Add button 3 Enter values and click Ok Items in bold must have values For model selection choose Network Recorder 9 16 32 Network Recorder uses 6500 as default port and admin 12345 as default ID PW 4 Click OK butt...

Page 38: ...rs that match with the number of channels of Network Recorder Note 5 2 2 Play Video By Connecting Each Channel At A Time User may play video from a channel of the Network Recorder 1 Locate a desired channel of Network Recorder icon on the site tree 2 Click icon or name of channel on the site tree Once selected Network Manager displays green light in front of the channel icon and connects Network R...

Page 39: ...up from Network Recorder to PC over the network and converts the backup video file to AVI format For detailed information on Player software please refer to Network Manager STD PRO manual Playing Recorded Video 1 Select Tools Player menu or click Player icon in the tool bar Player software appears 2 Define search parameters in the menus to the left DVR Date Time 3 Click play button then recorded v...

Page 40: ...camera 1 Select a camera on the list 2 Click Instant Player icon then Instant Player window pops up and plays the latest recorded video On a PC with Windows 2003 OS Direct X hardware acceleration should be set as Maximum to execute Instant Viewer or Instant Player Caution 6 2 Checking Recording Status Network Recorder displays recording status User may check the recorded data status by selecting d...

Page 41: ...ording video resolution Quality Recording video quality Frame Rate Recording video frame rate Pre Post Pre and Post alarm recording duration Storage Archiving hard drive User may restart recording by selecting Recording Restart on the pop up menu User may right click mouse after placing mouse point on a channel of Fail for recording status Fail can be caused by disconnection between Network and vi...

Page 42: ...Recorder program Total hard disk space and free space 42 ...

Page 43: ...con Status Remark Network Recorder has started running but it has not started recording Network Recorder is recording data Network Recorder stops recording by user Network Recorder fails to record data from a certain channel s or from all the channels 6 3 2 Menu Menu Feature Remark Configuration Open Open Network Recorder Recording Pause Stop recording Recording Start Start recording Restart Socke...

Page 44: ...d an IP address on the same network 192 168 168 xxx but not 192 168 168 168 that is already taken by ReadyNAS After assigning an IP to PC open IE Browser and enter Note https 192 168 168 168 admin 2 Execute RAIDar program by clicking RAIDar icon on the background RAIDar program detects ReadyNAS system when it is booted and connected to network properly 3 Select the device and click Browse to acces...

Page 45: ...not have existing DHCP service the ReadyNAS device will assure that you will get an IP address Note For more detailed information please refer to the manual on the provided CD from Netgear Co Adding a Network Drive to a PC 1 Click Map Network Drive from My Computer menu 2 Click Browser button Then it shows the entire network drives on the LAN Select an certain drive and click OK button 3 Click Fin...

Page 46: ...e Start icon 4 The Iomega NAS Discovery software will list all discovered Iomega NAS servers NOTE See Troubleshooting if Iomega NAS Discovery does not find your Iomega NAS NOTE By default the Iomega NAS is set to obtain its IP address from a DHCP Dynamic Host Configuration Protocol server Click on the IOMEGANAS xxxxx name and then the Manage button If your network has a DHCP server running the Iom...

Page 47: ...and click the APPLY button For more detailed information please refer to the manual on the provided CD from Iomega Co Note Adding a network drive to PC 1 Select a network drive in the Iomega NAS Discovery list and click Map Drive button on the top 2 Name the drive in Map Network Drive window 3 Click Finish button Once added as a network drive PC can access the drive and write data on it over the n...

Page 48: ... Recording HDD Disk Space Channel 100GB 200GB 250GB 9 60 Hour 120 Hour 150 Hour 16 34 Hour 68 Hour 85 Hour 32 17 Hour 37 Hour 42 Hour Based on CIF Quality High Frame Rate 15 maximum 1 64MB HDD consumption per second Network Bandwidth Based on CIF Quality High Frame Rate 15 Normal Recording Network Bandwidth Mbps Channel Recording Only 1 User Connect 5 User Connect 9 4 8 24 16 7 14 42 32 14 21 56 B...

Page 49: ...ata overwrite FIFO Support Storage space assigning by each disk Support Storage Warning against lower disk space Support External storage NAS Support Camera 9 16 32 Sensor 9 16 32 Component Relay 9 16 32 User configurable recording mode number Support Unlimited Continuous recording Support Schedule recording Support Day Hour Event MD Sensor Video Loss recording Support Record Combination Continuou...

Page 50: ... Support Instant Viewer Instant Play Recorded video Support Instant Player Recording status Support Recording schedule parameter information Support Status Information Storage status Support Windows based software Support Network Manager STD PRO Login protection ID PW Support Client S W Maximum concurrent user based on playback 5 Recording Live display Search Playback Support Multiplex 50 ...

Page 51: ...51 ...
Reviews: