


ENGLISH
103
103
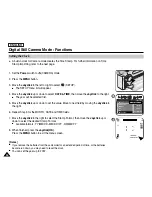
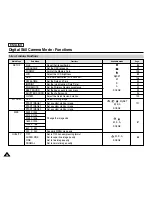
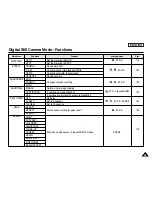
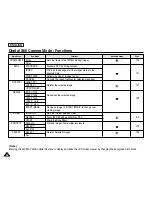
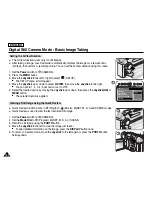
Delayed Recording – Self Timer
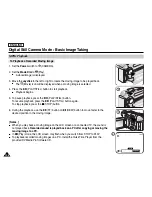
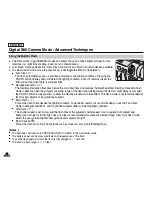
Digital Still Camera Mode : Basic Image Taking
✤
Self Timer function works in
(Program),
(Movie), M, S, A and SCENE modes.
✤
Using the remote control, delaying the shutter release (in order to take self-photography and
various other camera uses) is available.
1. Set the
Power
switch to
(CAMERA).
2. Set the
Mode Dial
to
(Program),
(Movie), M, S, A or SCENE.
3. Press the
MENU
button.
4. Move the
Joystick
to the left or right to select
(SELF TIMER).
■
The available options are listed.
OFF - 2s SELF - 10s SELF
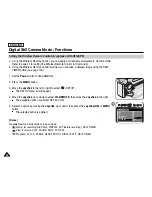
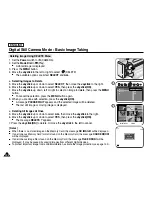
5. Select an option by moving the
Joystick
up or down, then press the
Joystick(OK)
or
MENU
button.
■
The icon of the selected mode will be displayed and automatically exits from the menu
screen.
■
You can also set the Self Timer by pressing the
SELF TIMER
button on the Remote
Control until the desired option is displayed.
-
: Delays the shutter release by 2 seconds.
-
: Delays the shutter release by 10 seconds.
6. Frame your subject.
7. Press the
PHOTO
button on the Remote Control or on the Camcorder to start the timer.
For moving images, press the
Start/Stop
button on the Remote Control or on the
Camcorder.
■
A beep sound will be played and after the time indicated, recording starts.
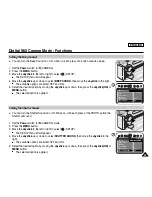
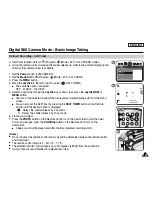
[ Notes ]
■
Do not obstruct the remote control sensor by putting obstacles between the remote control
and Camcorder.
■
The remote control range is 4 ~ 5m (13 ~ 17 ft).
■
The effective remote control angle is up to 30 degrees left/right from the center line.
■
Using a tripod is recommended for delayed recording.
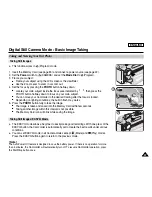
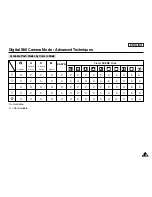
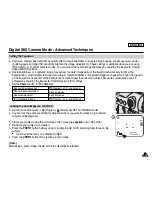
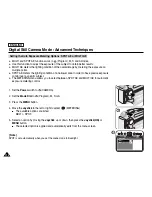
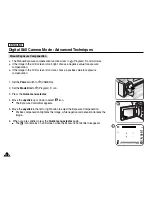
SELF TIMER
OFF
2s SELF
10s SELF
NOR
2592
2
08:27 PM
2005.01.01
7
4
5
5 7
Summary of Contents for SCD6550 - DuoCam MiniDV Camcorder
Page 159: ...ENGLISH 155 155 Memo ...